
Choose the Right Repair for the Defect—Not Just the Most Popular Filler
Rigid filler cannot follow changing board dimensions, so it may crack, crumble, detach or be pushed above the floor surface.
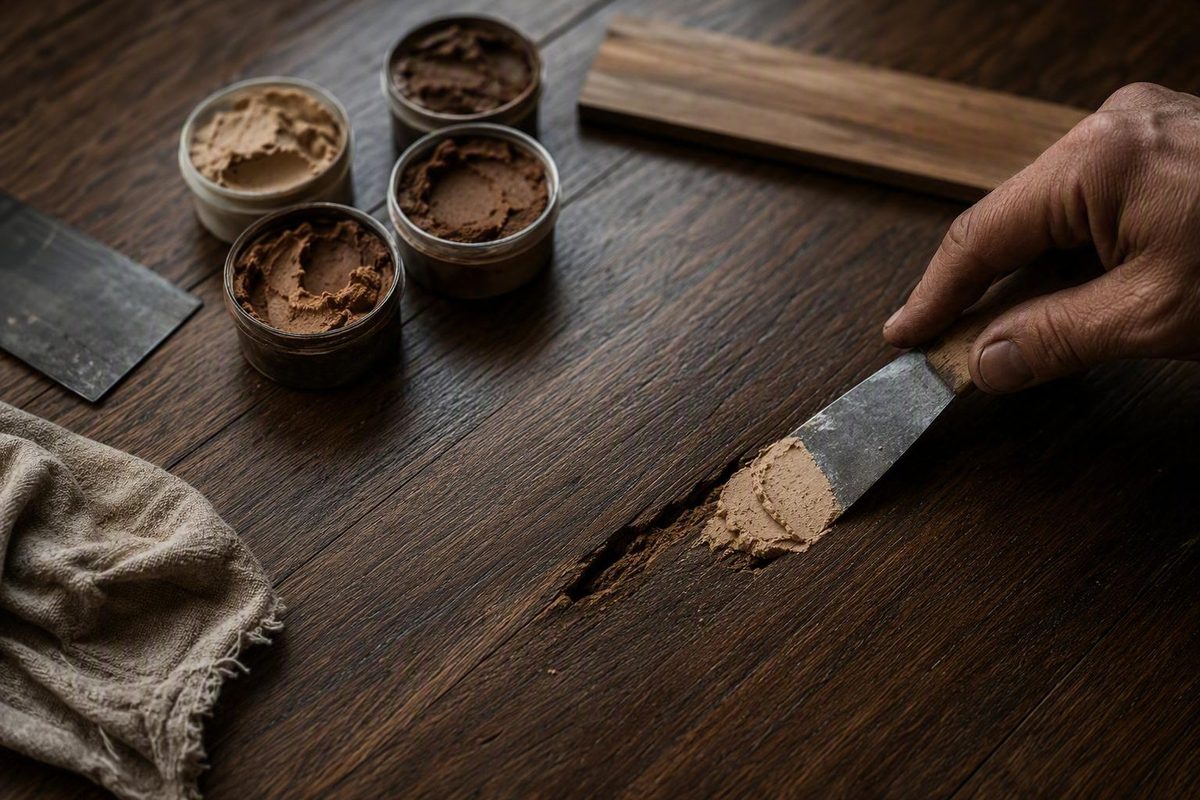
Choose the right repair for the defect—not just the most popular filler.
The quick answer: choose by repair condition
There is no independently proven best wood filler for hardwood floors in every situation. The appropriate choice depends on what is damaged, whether the wood moves, whether the floor is finished, whether sanding is planned, and whether the repair material is compatible with the intended stain and topcoat.
Use this matrix as a starting point:
| Floor condition or defect | Category to consider | Why |
|---|---|---|
| Small nail hole, chip, or shallow void in bare wood | Hard, sandable filler | It can cure and be sanded flush before staining and finishing |
| Stable floor being fully sanded | Compatible spot filler or, in suitable cases, trowelable filler | Excess material can be removed during refinishing |
| Tiny defect in an already-finished floor | Precolored, non-hardening putty | It avoids sanding through the surrounding finish |
| Gap that opens and closes seasonally | Usually no rigid filler | Movement can crack, crumble, detach, or eject hard material |
| Persistent wide gap that remains open in humid weather | Fitted wood or possibly cork, after diagnosis | A solid or compressible repair may suit the gap better than conventional filler |
| Round pipe, screw, or knot hole | Face-grain wood plug | Real wood supplies visible grain and a more wood-like surface |
| Deep gouge or missing section | Dutchman patch, fitted wood, or board replacement | A large mass of grainless filler is likely to remain conspicuous |
| Loose, rotten, water-damaged, or badly deformed board | Diagnose the cause, then repair or replace the board | Cosmetic filler cannot stabilize damaged flooring or a moving substrate |
For a small, stable defect in bare hardwood, shortlist a hardening filler that can be sanded and used with the complete stain-and-finish system. For a tiny nail hole in a floor whose finish will remain intact, consider color-matched, non-hardening putty instead.
Do not force rigid filler into a seasonal joint. Hardwood boards can expand and contract as indoor conditions change, while cured filler remains comparatively rigid. Pete’s Hardwood Floors consequently limits conventional filler to small holes and chips and recommends real-wood repairs for larger holes and gouges; it also warns that seasonal movement can break filler out of board gaps. See Pete’s practical guidance on filler limitations and moving gaps.
The named products later in this guide are examples recommended by retailers, contractors, manufacturers, or trade-oriented publishers. They are not winners established through standardized independent testing for humidity cycling, adhesion, stain response, wear, or foot traffic.
Diagnose the defect before buying filler
First determine whether wood is actually missing. A light scratch confined to the clear finish is not automatically a filler job. If the mark has not removed wood, the appropriate response may be cleaning, finish touch-up, or a broader coating repair rather than packing material over the surface.
Classify the defect before shopping:
- Nail hole: A small, localized opening that may accept filler or putty, depending on the floor’s surface condition.
- Chip or shallow void: Missing wood near a board edge or within its face; potentially suitable for hard filler if it is small and stable.
- Crack within one board: Suitability depends on whether the crack remains stationary and whether the board is sound.
- Gap between boards: Requires a movement and moisture assessment before any repair material is selected.
- Deep gouge: May contain too much missing wood for a convincing filler repair.
- Round hole: Often better suited to a face-grain plug.
- Missing section: Generally calls for fitted wood, a Dutchman patch, or board replacement.
- Surface scratch: May involve only the finish and therefore require no filler.
Next, identify the surface condition. Is the wood bare? Is the floor entering a complete sanding and refinishing sequence? Or is it already finished, with no plan to disturb the surrounding coating? Hard filler normally requires sanding. Precolored putty is designed around the opposite constraint: preserving an existing finish.
Movement is the decisive issue for board-to-board gaps. Cured conventional filler remains hard, but boards can change dimension as humidity changes. If a joint is filled while the floor is dry and then closes as the boards regain moisture, the expanding wood may push the repair upward. When the joint opens again, the material may crack or separate from the board edges.
If practical, observe a questionable gap during both dry and humid conditions. Photograph it from the same angle, include a ruler or feeler gauge, and note whether it closes, narrows, or remains unchanged. Wagner Meters advises determining whether gaps are seasonal and assessing moisture conditions before filling; its guide also warns that material inserted while flooring is dry may be pushed upward when the wood expands. Review its seasonal-gap and moisture guidance.
Do not rely on one universal width cutoff. Size matters, but so do depth, missing grain, edge condition, traffic, board stability, and seasonal movement. A narrow moving joint can be a worse candidate for rigid filler than a somewhat larger but stable chip.
Treat boards that move underfoot, soft or rotten wood, water damage, widespread cupping or crowning, broad deformation, and suspected subfloor movement as reasons for further assessment—not as cosmetic filler projects. The available flooring guidance identifies these conditions as situations in which filler cannot correct the underlying problem.
Hard filler, putty, flexible filler, and wood-flour cement compared
Product names are inconsistent. A material sold as “putty” may cure hard, while another similarly named product remains pliable. Compare materials by behavior: Does the product harden? Can it be sanded? Can it accept stain? Is it intended to tolerate movement? Is it meant for bare or finished wood?
| Material | Ideal use | Hardness or flexibility | Sandable? | Stainable? | Color-matching method | Finish considerations | Possible failure modes |
|---|---|---|---|---|---|---|---|
| Hardening filler | Small, stable defects in bare wood | Hard and generally rigid | Usually | Formulation-dependent | Premixed wood tone, permitted tint, or subsequent stain | Must work with the selected stain, sealer, and topcoat | Shrinkage, cracking in moving defects, poor stain match |
| Non-hardening putty | Tiny holes and cosmetic defects in finished flooring | Soft or pliable | Generally no | Generally no | Choose a close finished color before application | Intended to avoid sanding the surrounding finish | Displacement and recurring touch-up |
| Trowelable filler | Broad filling on a suitably stable floor being sanded | Hard and rigid | Yes | Product-dependent | Premixed color or subsequent stain | Must fit the complete refinishing workflow | Crumbling in moving joints or broad color mismatch |
| Thick wood patch | Larger but stable localized voids | Hard, with more body than trowel filler | Usually | Product-dependent | Premixed or otherwise colored as permitted | Test the complete coating system | Shrinkage, cracking, or an obvious grainless patch |
| Flexible or elastomeric product | Selected joints with limited movement | Pliable to rubber-like | Product-dependent | Often no | Choose a close premixed color | Coating and appearance compatibility require testing | Separation, visible color mismatch, uncertain long-term performance |
| Wood-flour cement | Spot or trowel filling during refinishing | Usually hard after curing | Yes | System-dependent | Mix with suitable fine sanding dust | Intended for sanding and refinishing | Binder-related color shift, uneven stain response, cracking in moving gaps |
| Two-part filler | Stable repairs needing a very hard cured mass | Very hard and dense | Usually | Often poor or unavailable | Color before curing or use an opaque treatment | Better where natural stain absorption is not essential | Conspicuous color block or cracking at moving edges |
Hardening filler is generally used on bare wood. It dries firm enough to sand flush, but “stainable” does not mean it will absorb stain exactly like the adjacent hardwood.
Non-hardening putty is a precolored touch-up material for minor defects in finished wood. It is normally not intended to be sanded or stained, so the purchased color must already be close. Because it remains pliable, it may be displaced in frequently walked-on areas. The practical distinction between hard filler and soft putty is summarized in Family Handyman’s comparison of the two material categories.
Trowelable filler describes an application method as much as a material. Filler is spread across a sanded floor to enter voids, allowed to harden, and then sanded away from the board faces. This can make sense on a suitably stable floor receiving a complete refinish. It is not a universal treatment for old flooring with independently moving boards.
Thicker patch products are promoted for larger stable voids. Additional body may make them easier to build than thin trowel filler, but it does not create natural grain. The larger the patch, the more likely it is to look like a uniform island among varied boards.
Flexible or elastomeric products are promoted for limited movement. Tradeoffs may include non-stainability, slower curing, difficult sanding, and dependence on accurate initial color selection. Flexibility alone does not establish permanence, especially if moisture conditions or board movement remain uncontrolled.
Wood-flour cement is combined with fine sanding dust, often from the floor being repaired. That can bring the starting color closer to the surrounding wood, but dust is only one part of the cured repair. Binder color, density, stain, topcoat, and natural board variation can still produce a visible difference.
Two-part fillers can cure very hard, but their dense surfaces are generally poor candidates where natural-looking stain absorption is essential.
Named options worth comparing—by use case
The following products recur in commercial or trade recommendations. The supplied evidence does not include current manufacturer technical sheets for every product, so treat these as shortlist candidates rather than verified specifications. Before purchase, obtain the current label, application instructions, technical data sheet, and safety data sheet from the manufacturer.
For small, stable repairs in bare wood
TimberMate is repeatedly recommended as a water-based, hardening option for nail holes, chips, and other stable defects on floors that can be sanded. Pete’s Hardwood Floors reports that it can be reconstituted with water and tinted, while commercial sources also make favorable claims about shrinkage and finish acceptance. Those claims reflect seller or contractor experience, not standardized independent floor testing.
TimberMate therefore belongs on a shortlist only when its current manufacturer instructions confirm that it suits the repair depth, wood species, stain, sealer, and topcoat. It should not be treated as the automatic answer to every floor defect.
For stable floors receiving broad filling during sanding
DuraSeal Trowelable Wood Filler is recommended by Ground Floor Supply for large-area application on stable floors being sanded. The retailer describes it as hard-drying, sandable, and compatible with stain and finish. This proposed use excludes active seasonal joints and floors with independently moving boards.
For larger but stable localized voids
DuraSeal Wood Patch and Goodfilla Wood & Grain Filler are retailer-recommended thicker options. Ground Floor Supply positions DuraSeal Wood Patch as having more body than trowel filler and describes Goodfilla as a dense, hard-drying material. The same retailer separates these stable-void products from flexible systems intended for limited movement. See Ground Floor Supply’s product-by-condition guide.
Neither product can reproduce the grain of a missing section. If the repair would occupy a prominent area—or if the defect moves—fitted wood may give a more convincing result.
For refinishing with floor-derived sanding dust
Bona Mix and Fill and a wood-flour cement referred to as Glitza or Glitsa in the supplied trade sources appear in refinishing recommendations. These systems are associated with fine sanding dust or floor-specific blending before sanding and finishing.
The inconsistent Glitza/Glitsa spelling has not been resolved by current first-party documentation in the available evidence. Confirm the exact product identity, official spelling, availability, and current instructions before buying or specifying it.
A floor-dust mixture can improve the starting color relationship, but it does not guarantee an invisible repair. The binder, cured density, stain, topcoat, and board-to-board variation still influence the result.
For limited movement
Berger-Seidle Pafuki with Pak Stop is recommended by Ground Floor Supply as a flexible system. The retailer says Pafuki mixed with water cures hard, while combining it with Pak Stop creates a more flexible, rubber-like mass. The same source reports that the flexible system is non-stainable, slower-curing, and more difficult to sand than conventional filler.
These are retailer claims rather than independently verified comparative results. This system should not be treated as permission to fill every seasonal gap. Determine why the joint moves, then confirm that the current manufacturer instructions cover the joint dimensions, substrate, flooring construction, and intended coating system.
For localized work on a finished floor
Berger-Seidle Flex Fill Color is promoted by Ground Floor Supply as a precolored, flexible option for localized work where sanding is not planned. The retailer describes it as non-stainable, which makes the initial color choice important. The supplied evidence does not establish its long-term durability under traffic or repeated seasonal cycling.
DuraSeal Wood Putty is promoted by the same retailer as a non-hardening option for tiny nail holes and minor imperfections. That makes it unsuitable for sanding but potentially useful where disturbing the surrounding finish would create a larger problem.
Before buying any named option, verify:
- Intended substrates and finished-versus-unfinished use
- Permitted repair width and depth
- Whether multiple layers are allowed
- Surface-preparation requirements
- Drying or curing conditions
- Sanding requirements
- Stain, sealer, and topcoat compatibility
- Cleanup, ventilation, protective equipment, and disposal instructions
- Current formulation and availability
No numeric ranking is defensible because the cited recommendations do not provide standardized comparisons for humidity cycling, adhesion, stain response, wear, or floor traffic.
Finished floors need a different repair strategy
Hard filler normally belongs on bare wood or within a refinishing sequence. It must cure and then be sanded level. On an already-finished floor, sanding a small patch can cut through the surrounding coating and turn a tiny defect into a larger refinishing problem.
For a tiny nail hole or minor cosmetic defect, consider a precolored, non-hardening putty. Pressing in a close color may be less disruptive than using hard filler, but putty generally cannot be sanded or stained afterward. Select the color before application and remove excess without abrading the adjacent finish.
Soft putty is not maintenance-free. Periodic renewal may be necessary.
A precolored flexible product is another limited possibility where the existing finish must remain. It may tolerate more movement than rigid filler, but many such materials cannot be stained. The available sources do not establish that every flexible spot repair will survive long-term traffic and seasonal cycling.
Test any finished-floor repair in an inconspicuous location, especially on prefinished flooring whose factory coating is unknown. After the repair has cured as directed, check for:
- Edge staining
- Loss of sheen
- Poor adhesion
- Smearing
- Surface softening
- Color shift
- A visible difference in texture or reflectivity
Set realistic expectations. Even a sound localized repair can differ from the surrounding floor in color, sheen, surface texture, grain, light reflection, and aging behavior. The available evidence does not establish that every finished-floor defect can be blended invisibly without refinishing a larger area or an entire board.
When filler is the wrong repair
Rigid filler is a poor permanent solution for a joint that opens and closes with seasonal humidity. It cannot reliably follow the dimensional change of the surrounding boards, so it may crack, crumble, detach, or be pushed above the floor surface.
Flexible filler may accommodate limited movement, but it should not be presented as a permanent cure for active moisture conditions, loose flooring, or excessive board movement. It is a repair material, not a substitute for diagnosis.
For round pipe holes, old screw holes, missing knots, and similar voids, consider a face-grain plug. Its visible grain can be aligned with the board, creating a more wood-like repair than a broad filler mass or an end-grain dowel slice. The plug can then be trimmed, sanded, and finished as the repair system permits.
For a deep gouge or missing section, a Dutchman patch replaces the absent material with fitted wood. If damage is extensive or the board is loose, split, rotten, or badly deformed, replacement may be more appropriate.
For a persistent wide gap that remains open during humid conditions, fitted wood may be an option. Pete’s Hardwood Floors also suggests cork for suitable year-round gaps because it is compressible. Construction, edge geometry, finish sequence, and actual movement determine whether either approach is appropriate. Sandover Floors likewise separates plugs, Dutchman repairs, cork, and board replacement from ordinary filler because they address different defects. See Sandover Floors’ overview of filler limits and solid-wood alternatives.
Rope, compressible strips, cork, and fitted wood are alternatives—not varieties of conventional wood filler—and should not be folded into a filler ranking. Avoid universal instructions about foam backer rod: the available retailer guidance conflicts over its use in tongue-and-groove flooring, so the floor construction and the selected repair system’s current instructions must govern.
Seek qualified assessment when boards move underfoot or the floor shows soft or rotten wood, water damage, widespread cupping or crowning, broad deformation, or suspected subfloor movement. Filling the visible symptom may conceal the area temporarily without correcting the cause.
Color, stain, and finish compatibility determine whether the repair blends
Do not select filler solely from the floor’s named species. An oak floor, for example, can contain pale and dark areas, mineral streaks, and boards that have aged differently. Match the exact zone surrounding the defect.
A premixed species color may resemble new wood but not an older floor.
Filler has no continuous wood grain. That limitation becomes more obvious as the repair grows. Color can reduce contrast, but it cannot reproduce pores, rays, growth rings, or figure. This is why a wooden plug or patch may look more convincing than a large filler mass.
“Stainable” means only that a product is intended to receive an approved stain. It does not guarantee that the repair will absorb the same amount or develop the same color as adjacent hardwood. Dense two-part materials may need to be colored before application or used where an opaque treatment is acceptable. Non-stainable flexible products require a close initial color because stain cannot correct the match later.
Be cautious with homemade glue-and-sawdust filler. A commercial wood-flour system is formulated for this role, although it still requires testing.
Use this test-patch protocol:
- Obtain representative scrap from the floor or choose a concealed area.
- Prepare it exactly as the visible repair will be prepared.
- Apply the same material at the intended depth.
- Let it cure fully rather than judging its wet color.
- Sand it using the planned repair or refinishing process.
- Apply the exact stain, sealer, and topcoat.
- Allow the complete system to dry or cure as directed.
- Inspect it in daylight and under the room’s evening lighting.
- View it from standing height and from the main approach to the room.
- Check color, sheen, texture, adhesion, and edge visibility.
Compatibility must be assessed across the entire system. A filler may look acceptable when dry but become too light, dark, or opaque after staining. Testing the filler, stain, sealer, and finish together is more reliable than judging a wet sample or package color.
How to apply filler—and avoid the common failure modes
Begin with the selected product’s current instructions. Permitted substrates, maximum depth, mixing, drying, sanding, finish compatibility, cleanup, and safety requirements vary. The following process applies only to a small, stable defect that the chosen material is designed to fill.
- Confirm that filler is appropriate. Rule out a finish-only scratch, seasonally moving gap, loose board, moisture damage, and substantial missing wood.
- Plan the complete finish system. Know which stain, sealer, and topcoat will follow before choosing the filler.
- Prepare bare wood where required. In a refinishing repair, remove the existing coating to the extent directed by the selected product and finish system. Do not spread hard filler over an incompatible coating.
- Clean the void. Remove failed filler, loose fibers, dirt, wax, and debris. Vacuum thoroughly without rounding over sound edges.
- Mix or condition the material as directed. Do not add water, solvent, tint, or sanding dust unless the instructions expressly permit it.
- Apply a controlled amount. Press material into the defect while avoiding unnecessary smearing into surrounding grain.
- Layer deeper repairs only when permitted. Allow each layer to dry fully as directed before adding another.
- Wait for complete drying or curing. Do not rely on one universal clock.
- Sand flush using the specified sequence. Abrasive choice depends on the filler and the broader refinishing process.
- Apply stain and finish only after a successful test. Keep traffic off the area until the entire repair and coating system has cured as directed.
Published estimates vary substantially. Durham’s manufacturer-authored comparison says some fillers dry in approximately 30 minutes to several hours, depending on formulation and thickness. See the stated drying range and its qualifications. Wagner Meters reports that one interviewed refinisher prefers overnight drying or at least six hours, including between layers when possible; that is experience-based guidance rather than a universal product specification. Follow the current instructions for the exact material in use.
Before sanding, check that the material is dry throughout rather than merely firm on top. Filler that clumps or gums up abrasive paper may not be ready.
Troubleshooting common failures
- The filler shrank below the surface: The application may have been too deep, too wet, or insufficiently cured. Check whether the manufacturer permits another layer.
- The repair cracked: The defect may be moving, the application may be too thick, or the material may be too rigid for the location.
- The filler crumbled: Investigate seasonal movement, contamination, weak edges, poor preparation, or an unsuitable material.
- The repair was pushed out: A joint may have been filled while the boards were dry and then closed as moisture increased.
- The filler stains too light or dark: It is absorbing stain differently from the surrounding wood. Return to the test-patch process rather than adding stain blindly.
- The patch lacks convincing grain: The repair may be too large for filler; consider a plug, Dutchman patch, or fitted wood.
- Soft putty keeps disappearing: Traffic or cleaning may be displacing it. A different repair strategy may be necessary.
- The finish peels, beads, or remains soft: Stop recoating and investigate contamination, incomplete cure, or incompatibility.
Can wood filler permanently repair gaps between hardwood floorboards?
Usually not when the gap opens and closes seasonally. Rigid filler cannot reliably follow board movement, so it may crack, crumble, detach, or be pushed upward. Observe the joint through dry and humid periods before selecting a repair.
A small, genuinely stable joint on a floor being refinished may be eligible for a product specifically approved for that use. A persistent wide gap may instead need fitted wood, cork, or another construction-specific repair. No filler should be expected to correct loose boards or an underlying moisture problem.
Should I use wood filler or wood putty on a finished hardwood floor?
For a tiny nail hole or minor cosmetic defect where the finish will remain intact, precolored non-hardening putty is often the more practical category. It avoids the sanding normally required by hard filler.
Putty generally cannot be sanded or stained, so choose its color in advance. It may also be displaced in a high-traffic location. If substantial wood is missing—or if a hard, level surface is essential—the repair may require localized finish removal, a solid-wood patch, or refinishing beyond the immediate defect.
Is TimberMate the best wood filler for hardwood floors?
Not universally. TimberMate is frequently recommended as a water-based, hardening filler for stable repairs in bare wood and refinishing work. Commercial sources describe it as tintable and reconstitutable with water, but the available evidence does not include standardized independent comparisons proving that it outperforms every alternative.
It belongs on a shortlist when the defect is small and stable, sanding is possible, and current manufacturer instructions confirm compatibility with the intended stain and topcoat. It is not the right category for a seasonal gap, loose board, large gouge, or finished-floor touch-up that cannot be sanded.
How long should hardwood-floor filler dry before sanding or finishing?
There is no universal waiting period. Published guidance ranges from about 30 minutes to several hours for some formulations and application depths, while one flooring professional interviewed by Wagner Meters advises at least six hours or overnight in the conditions discussed. Wagner Meters explains the variables and the longer experience-based recommendation.
Follow the current instructions for the exact product and account for depth, formulation, temperature, humidity, and airflow. If the filler clumps on the abrasive or deforms under pressure, allow more time. Apply stain or topcoat only after the repair is fully dry or cured and a test patch has confirmed compatibility.
When is a wood plug, patch, or replacement board better than filler?
Choose a face-grain plug for a round hole when aligning real grain will produce a more natural-looking repair. Consider a Dutchman patch or fitted wood for a deep gouge or localized missing section. Replace the board when damage is extensive, the board is split or loose, or too much sound wood would need to be disguised with a grainless filler mass.
Board replacement or qualified assessment is also preferable when the area is rotten, water-damaged, broadly cupped or crowned, unstable, or affected by subfloor movement. Filler can camouflage a suitable void; it cannot restore compromised flooring or correct the condition that damaged it.
The best repair is the one matched to the floor’s actual condition. Use hard filler narrowly for small, stable defects that can be sanded. Use precolored putty selectively for minor finished-floor touch-ups. Avoid forcing conventional filler into moving joints or large areas of missing wood. When flooring is loose, wet, deformed, rotten, or substantially absent, repair the wood or the underlying problem instead of trying to conceal it.