
How to Refresh a Worn Wood Floor Without Choosing the Wrong Treatment
Deep scratches, dents, dark stains, pet damage, grey timber, bare patches and failed coatings are beyond dependable cosmetic buffing.
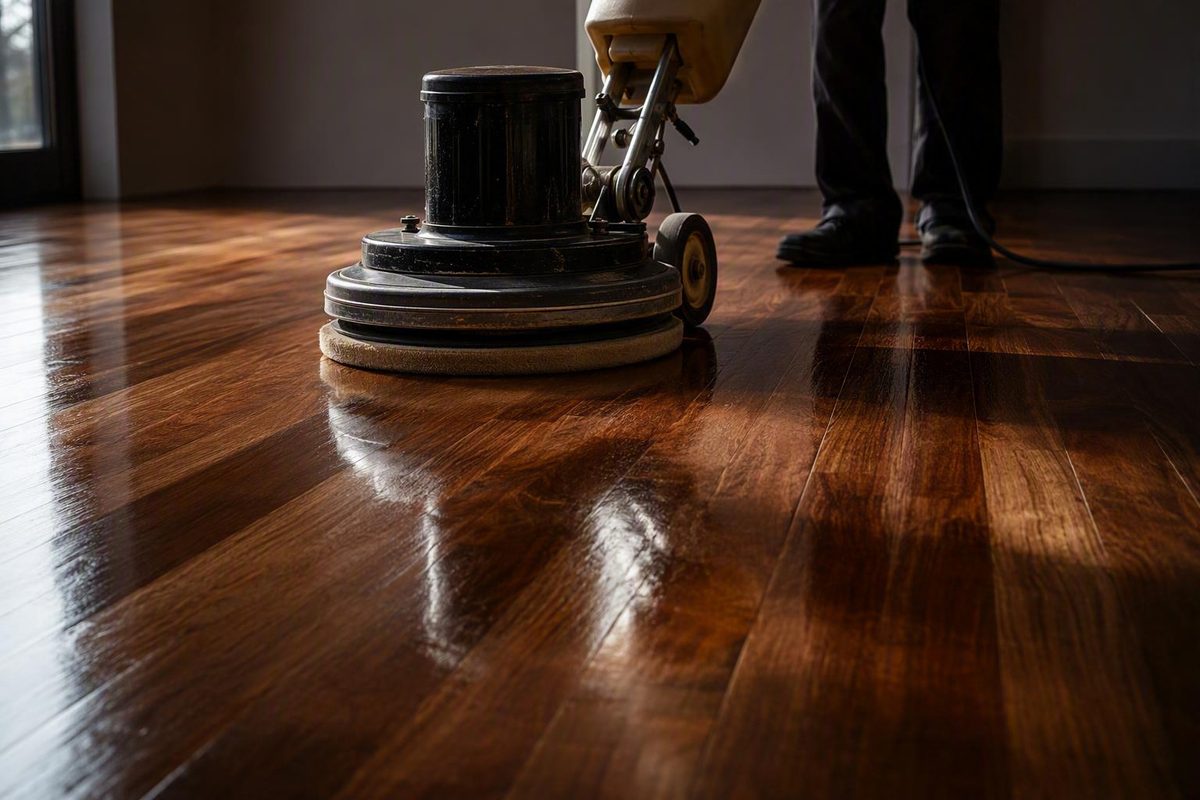
Buffing timber floors can describe several very different jobs. One may spread liquid polish, another may work wax to a sheen, and a third may deliberately abrade an old coating so that a new topcoat can bond. Choosing the wrong treatment can leave a floor cloudy, scratched, contaminated or unable to accept a future coating.
The safe starting point is diagnosis, not a machine. Determine whether the problem is dirt, loss of sheen, shallow finish damage, coating failure or damage extending into the timber. Then establish the finish type and whether the floor is solid or engineered before selecting a cleaner, polish, pad, abrasive or coating.
Editorial approach: This informational guide distinguishes general floor-care principles from product-specific instructions. The directions for the actual floor finish, maintenance product, coating and machine should take precedence where they are more specific.
First, clarify what “buffing” means
Terminology check
Process commonly called “buffing” What it actually does Is it abrasive? Does it add a new protective coating? Buffing dried wax Works an existing or newly applied compatible wax layer to the sheen specified by its manufacturer Usually not in the same sense as screening Buffing itself does not add wax; the separate wax-application step adds or renews it Applying liquid polish Spreads a cosmetic maintenance product over an intact finish Generally no Not usually equivalent to recoating Screening the finish Creates controlled fine abrasion in an existing coating Yes No—not unless followed by a coating Buff-and-recoat or screen-and-recoat Prepares an intact coating, removes dust and applies a compatible new topcoat Usually, although some systems permit another approved preparation method Yes Full sanding and refinishing Removes the old finish, may remove some timber, and prepares the exposed surface for stain and finish Yes, substantially Yes
Wax buffing works a compatible wax layer rather than cutting through a modern coating. Applying the wax is what adds material; buffing develops the sheen after the wax reaches the stage specified by its manufacturer.
Liquid polishing is different. It is generally a non-abrasive appearance treatment intended to improve sheen and make fine surface marks less conspicuous. It should not automatically be treated as preparation for a new coating.
Screening is controlled abrasion of the existing finish. Its purpose is to leave a uniformly prepared surface to which a compatible new coating can adhere mechanically. A screen-and-recoat therefore includes more than running a buffer over the room: it involves inspection, cleaning, approved preparation, edge work, dust removal and application of a new topcoat. A flooring contractor’s guide to abrading and recoating an existing finish describes “screen-and-recoat” and “buff-and-coat” as names for this broader process.
Full sanding is a different level of intervention. It removes the existing finish rather than merely keying its surface and may expose or remove some timber. The floor can then be repaired as appropriate, stained if a colour change is wanted, and protected with a new finishing system.
The distinction matters when obtaining quotations. Never assume that “buffing” includes a recoat—or that “polishing” means abrasion. Ask the contractor to state:
- What cleaning and contamination assessment are included?
- Will the existing finish be abraded?
- What machine and preparation method will be used?
- Will edges and corners receive corresponding preparation?
- Is wax, polish or a new coating being applied?
- How will compatibility and adhesion be assessed?
- What drying, access and curing restrictions apply?
A precise scope prevents an appearance-only polish from being mistaken for a new wear coat, or an abrasive recoat from being mistaken for gentle polishing.
Decide what the floor actually needs
Start with what you can see and feel. The key question is whether the defect is confined to dirt or the upper surface of a bonded finish, or whether it reaches through the coating into the timber.
| What you see | Likely level of damage | Treatment worth investigating | Reason to stop or escalate |
|---|---|---|---|
| Ordinary dirt, footprints or traffic film | Surface contamination | Finish-compatible cleaning | Stop if cleaning creates haze, stickiness or colour transfer |
| Mild haze after cleaning | Residue, moisture or product buildup may be involved | Identify the residue and clean appropriately | Do not cover unexplained haze with more polish |
| Uniform dullness on a smooth, intact floor | Loss of sheen or light wear in the coating | Compatible polish or possible screen-and-recoat | Stop if bare timber or weak coating appears |
| Light scuffs or superficial scratches | Upper-finish damage | Cleaning, compatible polishing or recoat assessment | Stop if scratches penetrate the coating |
| Isolated deep scratch or gouge | Finish and possibly timber damage | Local repair or refinishing assessment | Buffing will not rebuild missing wood |
| Grey, pale or visibly bare timber | Finish worn through | Repair or full refinishing assessment | Screening may enlarge the exposed area |
| Widespread worn traffic lanes | Thin or failed wear layer | Refinishing assessment | A cosmetic polish cannot replace a missing coating |
| Dark stains or major discolouration | Possible timber staining, moisture or other subsurface damage | Investigate the cause; assess repair or refinishing | Do not assume sanding alone will solve recurring moisture |
| Peeling or flaking coating | Adhesion or coating failure | Identify the failure before removal or recoating | A new coat over weak material may also fail |
| Cupping, swollen seams or significant water damage | Possible moisture imbalance or intrusion | Moisture investigation and professional assessment | Cosmetic treatment may conceal symptoms without correcting the cause |
| Sound floor but unwanted timber colour | Existing system may be intact | Full sanding and a new stain-and-finish system may be considered | Buffing can change sheen, not the underlying timber colour |
Cleaning should come before abrasion when the problem could simply be dirt or traffic film. A floor can look tired because residue scatters light unevenly. Abrading that residue into the finish—or sealing it beneath a new topcoat—can turn a cleaning problem into a coating problem.
Uniform dullness, light scuffs and fine scratches are the strongest candidates for a restrained treatment, provided the finish remains intact and bonded. Buffing may make a shallow scratch less visible by evening the sheen around it, but that does not mean the scratch has been removed. Damage beneath the coating remains beneath the coating.
Deep scratches, dents, dark stains, pet damage, grey timber, bare patches and failed coatings sit outside the dependable reach of cosmetic buffing. A floor-condition guide to buffing and sanding similarly limits buffing to light surface wear rather than deep damage.
Several household observations can provide clues, but none is conclusive:
- A scratch that catches a fingernail may be deeper than one that cannot be felt.
- Colour or residue transferred to a cloth may suggest buildup or a particular finish family.
- Water that beads or darkens an area may provide information about local protection.
- A sticky or gummy response in a hidden area may indicate a reactive finish or residue.
These observations do not reliably identify every coating, reveal the remaining thickness of an engineered wear layer or guarantee that a new finish will adhere across the room. Use them to decide what to investigate, not as permission to proceed blindly.
Identify the finish and floor construction before selecting products
A surface coating forms a film over the timber. Polyurethane is a familiar example, although its chemistry, age and application history can vary. Penetrating oils enter the wood to a greater degree, while hardwax-oil systems combine oil and wax components and have their own maintenance procedures. Traditional wax and factory-applied finishes add further variables.
These systems do not share one universal polishing or recoating method.
| Finish family | Main uncertainty to resolve | Safe next step |
|---|---|---|
| Polyurethane or another film-forming coating | Exact coating, age, adhesion, prior cleaners and contamination | Consult the coating or flooring manufacturer’s approved cleaning and recoat procedure |
| Traditional wax | Whether the floor is genuinely wax-finished and whether another coating lies underneath | Use only a compatible wax-care system; obtain advice before changing to a film-forming coating |
| Penetrating oil | Oil type, maintenance history and compatibility with any rejuvenating product | Follow the original oil-system maintenance process |
| Hardwax oil | Brand or system, spot-repair method and required preparation | Use the system-specific rejuvenation or recoating procedure |
| Factory-applied finish | Manufacturer, finish technology and permitted field maintenance | Check the flooring manufacturer’s care and recoat instructions |
| Unknown or mixed finish | Whether different rooms or repairs contain incompatible products | Pause and seek product or professional identification |
| Engineered timber | Wear-layer thickness, previous sanding and finish construction | Confirm manufacturer limits before abrasion; avoid aggressive work while uncertain |
Paste wax may suit some unvarnished or previously waxed hardwood, but it should not be applied indiscriminately. In particular, wax can be unsuitable over urethane and products marketed as no-wax finishes. ServiceMaster’s finish-specific waxing guidance warns against applying wax over a urethane-finished floor. Wax may also complicate a later attempt to apply polyurethane or another film-forming coating.
Hardwax-oil flooring is not simply a polyurethane floor with a different sheen. Its repair, cleaning and recoating procedures depend on the particular system. Using a generic acrylic polish or treating it automatically as a conventional screen-and-recoat can create an appearance or compatibility problem.
Before relying on a household test, look for stronger evidence:
- Installation records or purchase invoices.
- Product labels and leftover coating containers.
- The flooring manufacturer and product line.
- Care instructions supplied at installation.
- Information from the previous installer, owner or maintenance provider.
- Records of waxes, oil soaps, polishes and restoration products previously used.
Engineered timber deserves particular caution. Some engineered boards can be cleaned, polished or recoated successfully because those treatments act mainly on the finish. Abrasive work is constrained by the thickness and condition of the timber wear layer, however, and previous sanding may have reduced it. A thin or uncertain wear layer makes aggressive abrasion or sanding risky.
Adopt a firm stop-work rule. Do not proceed with machine abrasion or a new coating when the finish is unknown, different coatings appear to be mixed, the floor is peeling, engineered construction is uncertain, or an inconspicuous test becomes sticky, discoloured, cloudy or weak. Uncertainty is itself a condition to resolve.
Prepare the room and eliminate contamination
Preparation is not merely housekeeping. Grit can scratch the floor beneath a rotating pad, while invisible contamination can prevent a recoat from bonding.
Use this pre-job checklist:
- Remove furniture, rugs, movable thresholds and other obstructions.
- Plan a clear exit route so the final section does not trap you.
- Inspect for loose boards, movement and protruding fasteners.
- Address unstable boards and fasteners before machine work.
- Protect adjoining flooring, walls, vents and fixed surfaces as appropriate.
- Confirm adequate lighting, ventilation and power arrangements.
- Gather the approved cleaner, applicator, pads and coating before starting.
- Read the floor, product and machine instructions in full.
Sweep thoroughly, then vacuum with a soft-brush floor attachment. Pay attention to board gaps, thresholds, edges and areas beneath removed furniture. A hard particle dragged beneath a pad can create a circular or sweeping scratch.
Clean with a product approved for the existing finish. Use a damp rather than wet method unless the floor manufacturer expressly directs otherwise. Excess water can enter seams and contribute to swelling or warping, while harsh or abrasive cleaners can damage a protective finish, as outlined in these hardwood-cleaning precautions. Allow the floor and its seams to dry completely before applying polish, beginning abrasion or opening a coating container.
A floor that looks clean is not necessarily ready for polyurethane or another topcoat. Wax, oil, accumulated polish and cleaner residue may survive routine cleaning. If trapped beneath a coating, contamination may contribute to cloudiness, uneven texture, incomplete curing, peeling or flaking.
Distinguish two tasks:
- Ordinary cleaning removes loose dirt, normal spills and finish-compatible grime.
- Contamination remediation identifies and removes substances that conflict with the proposed coating system.
The second task may require a manufacturer-approved process and should not be improvised from a generic cleaning recipe. Do not introduce unapproved solvents or stronger abrasives merely because ordinary cleaning did not solve the problem.
Test the proposed cleaner, applicator or pad and appearance product in an inconspicuous but representative area. Let the test complete all relevant drying stages, then inspect it in natural and artificial light. For a recoat, follow the coating manufacturer’s prescribed adhesion test and preparation procedure.
A small household test can reveal a bad reaction. It cannot conclusively identify the finish or guarantee whole-floor adhesion where contamination varies between rooms or repaired areas. If previous product use is unknown, different sections behave differently, or the coating manufacturer’s preparation requirements cannot be met, use a flooring professional rather than treating a clean-looking surface as proof of compatibility.
Workflow A: polish or buff wax without screening the finish
This workflow is for a bonded, intact floor that needs modest cosmetic improvement—not a new protective topcoat and not repair of damage in the timber.
1. Confirm the product belongs on the floor
Verify the finish family and check both the flooring and maintenance-product instructions.
2. Clear, vacuum, clean and dry
Remove furniture and rugs, eliminate all grit, use the approved cleaner and let the floor dry fully. If the dullness disappears during proper cleaning, stop there. A floor does not need polish merely because polishing was originally planned.
3. Make an appearance test
Apply the proposed product in a hidden but representative area. Inspect for darkening, excessive gloss, streaking, milkiness, tackiness and edge lines. Let the product reach the manufacturer’s specified inspection stage before deciding whether the resulting sheen is acceptable.
4. Apply compatible liquid polish sparingly and evenly
Work in sections small enough to control the application and preserve an exit route. If the selected product requires maintaining a wet edge, follow its directions for doing so. Spread a thin, even layer with the grain, using light pressure rather than scrubbing the product aggressively into the finish.
Bona’s directions for its own polish call for a clean, dry floor, small working sections and gentle spreading with the grain. These are manufacturer-specific polishing directions, not universal quantities, applicator requirements or access times for other products.
Avoid repeatedly passing over material that has begun to set. Excess manipulation may create lap marks or uneven sheen. Use only the applicator and amount specified for the chosen product.
5. Treat confirmed wax finishes according to the wax system
Apply compatible wax lightly and evenly, at the amount and stage directed by its manufacturer. Buff only when that product says it is ready.
Corners, edges and areas around fixed features may require compatible hand tools. Blend these areas carefully into the machine-worked field rather than forcing a large buffer against skirting boards or into confined spaces.
6. Respect product-specific access instructions
Coverage, applicator type, drying, rebuffing, reapplication and access restrictions differ among products. Distinguish a surface that looks dry from one ready for normal traffic, rugs, furniture or pets.
Adding another coat is not a universal cure for haze or poor sheen. If the first application looks cloudy, streaked or tacky, stop and identify the cause. More product may magnify buildup rather than correct it.
Most importantly, this cosmetic workflow is not a substitute for abrasive preparation. If a new coating requires mechanical adhesion, spreading polish or buffing wax does not provide the required surface.
Workflow B: screen and recoat an intact finish
A suitable candidate has an existing coating that remains bonded and intact but has become dull or lightly worn. There should be no widespread bare timber, extensive peeling, deep damage or unresolved contamination.
The general sequence is:
- Inspect and identify. Confirm the finish, floor construction, damage level and intended coating.
- Test compatibility and adhesion. Follow the proposed coating manufacturer’s procedure.
- Clean and rinse if required. Remove soil and approved cleaning residues without flooding the floor.
- Dry fully. Include joints and edges, not just the visible surface.
- Abrade uniformly. Use the least aggressive effective screen or pad approved for the floor and coating system.
- Complete edge and detail preparation. Match the field preparation without cutting into the timber.
- Remove all dust. Vacuum methodically and use any final dust-removal method approved by the coating manufacturer.
- Apply the compatible coating. Follow its requirements for applicator, film thickness, ventilation, coats and access.
Screening creates fine, controlled abrasion in the old finish so the new coating can grip mechanically. It is not intended to cut into the timber. If preparation exposes wood, the floor has moved outside the planned screen-and-recoat workflow.
Select the least aggressive abrasive that reliably meets the approved preparation specification. A pad that is too mild may fail to create an adequate key; one that is too aggressive may produce visible scratches, cut through thin areas or damage an engineered surface. There is no universal pad colour or abrasive grade because machine design, finish chemistry and manufacturer requirements differ.
Dust removal after screening is essential. Residual abrasive dust, hair or fibres can become trapped in the wet coating and create roughness or visible imperfections. The Home Depot’s broader hardwood refinishing sequence likewise places thorough sweeping and vacuuming before stain or finish because remaining debris affects the surface.
A compatible topcoat can rebuild the wear layer, refresh the appearance or change the sheen level. It cannot remove dents, dark stains, pet damage or defects beneath the old finish. Those imperfections may remain visible, and a fresh uniform sheen may make some of them easier to notice.
Stop and reassess if:
- Abrasion exposes pale, grey or bare timber.
- The test area softens, wrinkles, discolours or peels.
- Wax, oil, polish or cleaner residue remains.
- The existing or proposed coating cannot be identified.
- The old coating is delaminating.
- Different areas respond differently to preparation.
- The engineered wear layer is uncertain.
Do not improvise a universal number of coats, overlap percentage or cure time. These variables belong to the specific approved coating system.
Control the buffer safely and avoid machine damage
Rotary and orbital machines behave differently. Commercial machine guidance describes rotary buffers as efficient in open areas but generally more demanding to control, while orbital machines are often presented as more forgiving in small rooms or for less-experienced operators. Neither design is automatically safe or suitable for every user.
Before entering the visible centre of the room, read the machine manual and learn the controls, cable arrangement and emergency shut-off procedure. With the correct pad fitted, test how the machine starts, stops and changes direction in an inconspicuous area. If it repeatedly pulls away from you or cannot be held under calm control, stop rather than learning on the finished field.
Operating fundamentals include:
- Hold the machine with both hands where its design requires.
- Stand in a balanced position with non-slip footwear.
- Let the machine and approved pad perform the work rather than adding excessive downward pressure.
- Move in smooth, controlled passes.
- Keep the machine moving while the pad is rotating.
- Maintain a consistent pace rather than dwelling on visible marks.
- Inspect the prepared surface frequently under good light.
Keeping the machine moving, avoiding unnecessary pressure and using controlled passes reduces the risk of swirl marks, uneven sheen and burn-like patches; these operating and safety principles are also set out in this buffer-operation guide. The machine manual remains the controlling source for the particular model.
A stationary machine, unsuitable pad, clogged abrasive or uneven movement can damage the finish. Trying to erase a persistent scratch by dwelling over it is especially risky: if the damage lies below the coating, extra passes may cut through sound finish without removing the defect.
Manage the cable as deliberately as the machine. Inspect the machine and cord before use, use the electrical connection required by the manufacturer, and keep the cord behind the working path so it cannot pass beneath the pad. Never leave a running machine unattended.
Inspect the pad throughout the job. Replace it if it tears, becomes clogged, loads unevenly or becomes saturated in a way prohibited by the pad, polish or machine instructions. A contaminated pad can redistribute grit or old product across a clean section.
Treat edges, corners, stairs and confined spaces separately. Use manufacturer-approved hand or detail methods rather than tilting or forcing a large machine into an area it was not designed to reach. Detail work should create preparation compatible with the main field without gouging edges or damaging skirting boards.
Match personal protective equipment and environmental controls to the actual process and the instructions for the machine and products involved. Depending on the work, those instructions may require eye protection, suitable respiratory protection, hearing protection, gloves, non-slip footwear, ventilation or dust control. General buffing guidance also calls for protective equipment and ventilation where dust or finishing products create exposure concerns; see this floor-buffing safety overview.
Do not guess which respirator, filter, glove or ventilation arrangement is suitable. Check the coating label, safety data sheet and machine instructions. If old paint, unknown fillers or unidentified coatings may be disturbed, pause and obtain appropriate testing or professional advice rather than treating the work as routine clear-finish buffing.
Know when sanding or professional assessment is the better choice
Polishing, screening and full sanding differ in purpose, material removal and risk.
| Treatment | Material removed | Suitable condition | Achievable result | Disruption and operator risk |
|---|---|---|---|---|
| Cleaning or polishing | Little or none of the existing coating | Intact finish with dirt, mild haze or dullness | Cleaner appearance and refreshed sheen | Lowest material removal, but compatibility and streaking still matter |
| Screen and recoat | Fine abrasion of the existing coating | Bonded finish with light wear and no widespread bare timber | New compatible wear coat and refreshed or altered sheen | More preparation, dust and coating risk; adhesion is critical |
| Full sanding and refinishing | Existing finish and potentially some timber | Failed finish, severe wear, deeper defects or desired colour change | Exposed timber prepared for repair, stain and a new finish system | Most invasive; higher dust, machine-control and material-removal risk |
Full sanding removes the existing finishing system and prepares exposed timber for stain and a new protective coating. Buffing primarily works on what is already there. HGTV’s comparison of buffing and sanding describes sanding as a progressive abrasive process that removes finish and stain before the floor is refinished.
Indicators that sanding, repair or another professional response deserves assessment include:
- Deep scratches and gouges.
- Exposed, pale or grey timber.
- Failed, peeling or flaking coatings.
- Severe wear or broad worn-through traffic lanes.
- Substantial staining or discolouration.
- Rough or uneven surfaces.
- A desired change to the timber colour.
- Repairs that cannot be blended within the existing finish.
Sanding is not automatically the whole solution. Dark stains, cupping, swollen joints and recurring coating failure can indicate moisture intrusion or another environmental problem. Investigate and correct the source before applying a cosmetic treatment or new coating. Some boards may need repair or replacement rather than increasingly aggressive sanding.
Professional assessment is especially sensible when:
- The coating is unknown or appears mixed.
- Wax or oil contamination is suspected before a polyurethane recoat.
- A test area fails, remains tacky or peels.
- Edge damage is extensive.
- The floor has widespread bare wood.
- An engineered floor’s wear layer is unknown.
- Moisture damage or cupping is present.
- Unknown old coatings, fillers or painted surfaces may be disturbed.
The DIY decision should not be based solely on room size. Consider your ability to control the machine, certainty about the finish, access to the correct equipment, ventilation, dust management, awkward edges, room layout and the consequences of correcting a failed coating. Buffing is generally less invasive and often less disruptive than full sanding, but a failed recoat can still require extensive removal.
Ask a prospective contractor:
- What does “buffing” include in this quotation?
- How was the existing finish identified?
- How will wax, oil, polish and cleaner contamination be assessed?
- What adhesion test will be used?
- Which visible scratches, stains or worn areas will remain?
- Will the floor be polished, mechanically screened or prepared another way?
- Which coating system will be applied, and why is it compatible?
- How will edges and corners be handled?
- What access restrictions apply to people, pets, furniture and rugs?
- What happens if the test area fails?
Clear answers matter more than a vague promise to “bring back the shine.”
Troubleshoot the result, respect curing stages, and protect the floor
When a result looks wrong, stop adding material until the cause is understood. The possibilities below are not a definitive diagnosis; they are reasons to check the relevant product instructions or obtain a coating-failure assessment.
| Symptom | Possibilities supported by the process | Cautious response |
|---|---|---|
| Cloudiness or milkiness | Moisture, residue, contamination, incompatible product or application error | Stop adding product; consult the product manufacturer before cleaning or recoating |
| Swirl marks | Grit beneath the pad, unsuitable or loaded pad, stationary machine use or uneven movement | Stop blind repeat passes and determine whether the marks are in maintenance product, coating or timber |
| Burn-like patches | Machine dwelling in one place, excessive pressure or concentrated abrasion | Stop machine work and assess whether the finish has been cut through |
| Uneven sheen | Uneven application, residue, missed areas or inconsistent preparation | Wait until the manufacturer’s inspection stage before deciding on correction |
| Visible dust or hair | Incomplete dust removal or airborne debris during application | Do not pick at a soft coating; follow the coating manufacturer’s correction procedure |
| Peeling or flaking | Contamination, incompatible coatings or a weak underlying finish | Restrict traffic and obtain a coating-failure assessment before applying anything else |
| Tackiness or slow curing | Excess product, contamination, incompatibility or site conditions outside the product requirements | Adjust only the conditions permitted by the instructions and contact the manufacturer |
| Scratches remain | Damage extends beneath the treated layer, or buffing only changed the surrounding sheen | Assess local repair or refinishing instead of increasing machine aggression |
Persistent deep scratches or visible bare timber do not show that the floor needs more passes with the same buffer. They show that the selected process cannot reach the damage safely. Continuing may remove sound finish around the defect and make the repair larger.
Do not confuse these milestones:
- Working time: the period in which a product can be spread or adjusted.
- Dry-to-touch time: when the surface no longer feels wet.
- Light-foot-traffic time: when limited access may be allowed.
- Furniture-return time: when concentrated loads may be restored.
- Rug-return time: when covering the floor will not interfere with curing.
- Full cure: when the coating has reached the performance stage specified by its manufacturer.
These times vary by product and may also be affected by film thickness, temperature, airflow and humidity. Follow the technical directions for the exact polish or coating rather than a generic timetable. A manufacturer may distinguish limited sock traffic from the later return of furniture, rugs and pets, but those instructions apply only to that manufacturer’s specified system.
Once the floor is ready for normal use:
- Remove grit regularly by sweeping or soft-brush vacuuming.
- Use only finish-compatible cleaners.
- Minimise water and clean spills promptly.
- Fit clean felt pads beneath furniture legs.
- Lift furniture rather than dragging it.
- Place suitable entrance mats where grit enters.
- Check chair pads and furniture protectors for trapped debris.
- Avoid harsh cleaners, steel wool, abrasive brushes and unspecified scrubbing pads.
- Do not apply polish or wax merely because the floor has reached an arbitrary age.
Maintenance should respond to the floor’s condition and finishing system. Excessive product use can create buildup just as neglect can allow the wear layer to become thin.
Will buffing remove scratches from a timber floor?
It depends on what “buffing” means and how deep the scratch is. Cleaning or non-abrasive polishing may make fine scratches less noticeable by evening the surrounding sheen. Screening may abrade minor imperfections within an intact coating before a recoat.
Neither approach reliably removes a scratch that penetrates the finish, exposes timber or includes a dent or gouge. If the mark remains visible after cautious treatment, do not dwell over it with the machine. Assess local repair, board repair or full refinishing instead.
Can a polyurethane-finished floor be buffed and recoated?
Potentially, yes. A bonded polyurethane finish with light wear and no widespread bare timber may be a candidate for cleaning, approved abrasion and a compatible recoat.
Suitability depends on the precise coating, its adhesion, prior maintenance products and contamination. Wax, oils and polish residue can prevent a new polyurethane layer from bonding. Follow the proposed coating manufacturer’s preparation and adhesion-testing procedure; obtain professional assessment if the product history is unknown.
Can engineered timber flooring be buffed safely?
Some engineered timber can be cleaned, polished or recoated because these treatments work mainly on the finish. That does not mean every engineered floor can be screened or sanded.
The safe limit depends on the factory finish, board construction, remaining timber wear layer and previous refinishing. Confirm the manufacturer’s instructions and stop if abrasion exposes timber or the wear-layer thickness is uncertain. Aggressive sanding without that information risks cutting through the usable surface.
How often should timber floors be polished or buffed?
There is no universal interval. Liquid-polish schedules are product-specific, while screening and recoating should respond to coating wear, contamination and adhesion—not a calendar alone.
Monitor traffic lanes, entrances, kitchens and areas around frequently moved chairs. Investigate when the floor becomes uniformly dull or lightly worn but before the finish wears through. Do not add wax or polish repeatedly if the floor has buildup, haze or unexplained tackiness.
How long must a buffed and recoated floor remain free of foot traffic, rugs, pets, and furniture?
Use the instructions for the exact polish or coating. Light-foot-traffic time, furniture return, rug return and full cure are separate milestones, and each can change with product chemistry, coat thickness and site conditions.
Do not infer that a dry-looking surface can accept furniture or rugs. Concentrated loads, pet claws and floor coverings may affect a coating that is still curing. Keep the area restricted until every relevant manufacturer-specified milestone has been reached.
The final decision sequence is simple: define what “buffing” is intended to mean; check whether the damage is confined to an intact finish; establish the finish and floor construction; investigate incompatible residue; and test the proposed system. Proceed with compatible polishing or screening and recoating only when those conditions are satisfied. Choose repair, moisture investigation, full refinishing or professional assessment when timber is exposed, coatings are failing, damage is deep or the floor remains uncertain.