
Choose a Floor Color by Testing the Wood, Not Trusting the Swatch
Compare light, medium, dark, gray, and natural options by undertone, upkeep, and room light, then test finalists on the actual sanded floor.
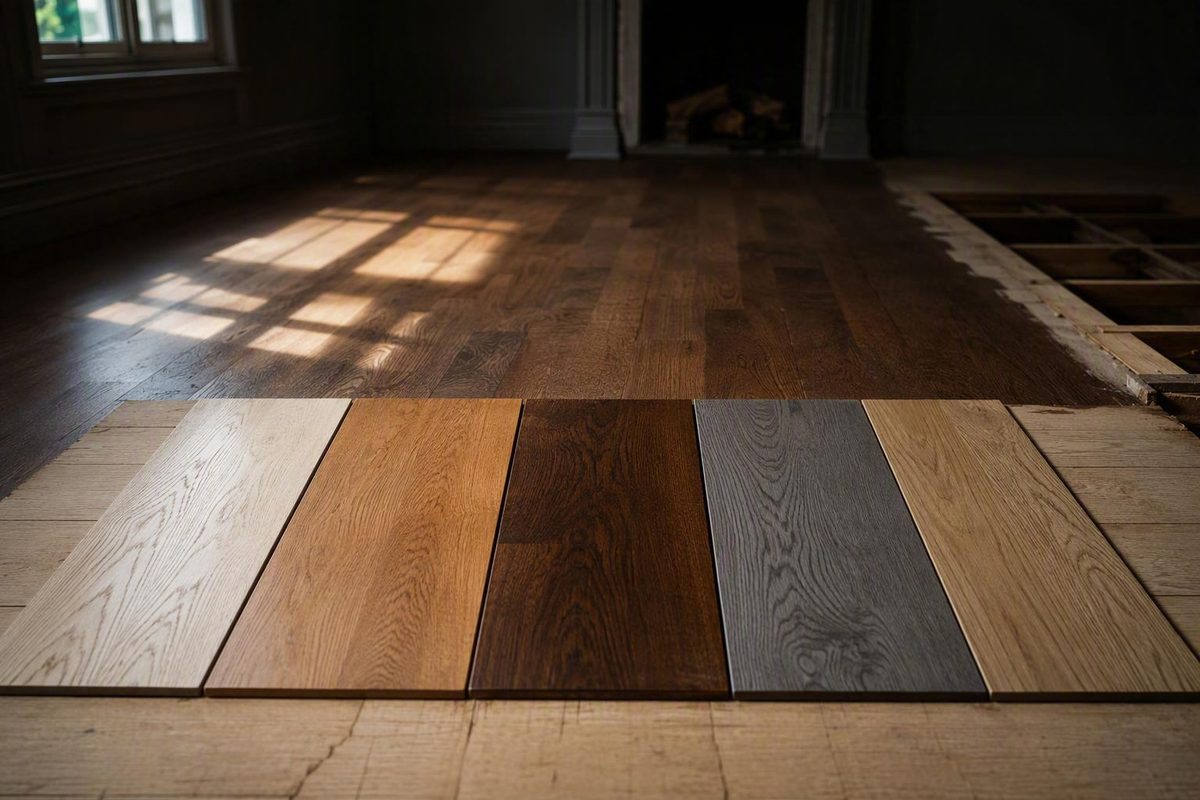
There is no universally best stain color for hardwood floors. Start with a broad color family that suits the room and your tolerance for visible dust and wear. Then account for the wood species, undertone, existing finish, and lighting. Make the final choice only after comparing controlled samples on the actual sanded floor—or identical flooring—under daylight and the room’s normal artificial lights. When the selected finish system permits it, also evaluate the finalists with the intended compatible topcoat and sheen.
Start With a Color Family, Not a Single Branded Shade
“Dark Walnut,” “Natural,” and “Classic Gray” can differ by manufacturer, product line, wood species, surface preparation, and application technique. Treat each name as a direction to investigate rather than a finished-floor specification.
| Desired direction | Representative names | What it emphasizes | Main tradeoff to investigate |
|---|---|---|---|
| Natural or golden | Natural, Neutral, Golden Oak, Golden Pecan | Lighter, wood-forward appearance | Existing pink, tan, yellow, or amber tones may remain prominent |
| Medium brown | Provincial, Special Walnut, Early American, Antique Brown, Jacobean | Warm brown depth without going near-black | May become warmer, redder, or darker than the chart suggests |
| Dark brown or black | Dark Walnut, Espresso, Ebony, True Black, Coffee Brown | Strong contrast and deeper color | Dust, scratches, and pale pet hair may be more visible |
| Red-toned | Cherry, Red Mahogany, Sedona Red, Royal Mahogany | Red, burgundy, or mahogany influence | Can amplify warmth already present in the wood |
| Gray, weathered, or greige | Classic Gray, Weathered Oak, Driftwood, Warm Gray, Rustic Beige, greige | Cooler, muted, aged, or beige-gray direction | Blue, brown, beige, or other undertones may emerge |
| Whitewashed | White, Nordic White, Country White, Birch | Pale or washed appearance with visible wood character | Natural color may show through and shift the result |
Hardwood-floor catalogs include natural, brown, red, gray, white, and near-black choices, along with stains, dyes, tints, powders, and color pretreatments. That breadth is useful for building a palette, but it does not establish how any product will look or perform on a particular floor. The categories and representative names can be seen in the hardwood-floor colorant catalog from City Floor Supply.
Use the families this way:
- Natural and golden colors retain more visible wood character. “Natural” does not necessarily mean colorless or pale because the wood’s own warmth remains part of the result.
-
Medium browns provide more depth without the contrast of a near-black floor. Compare adjacent browns carefully; a modest difference on one board can become much more noticeable across a room.
-
Red-toned colors can produce a deliberate mahogany or burgundy influence, but they require careful testing on naturally pink or warm wood.
- Gray and weathered colors are not one neutral category. Some lean blue or cool; others lean beige or brown. Greige combines gray and beige influences, but the balance varies.
Do not spend too long comparing tiny digital swatches. Select a manageable range—perhaps a natural direction, a few browns, and a weathered option—then move to physical testing.
Compare Light, Medium, and Dark Floors by Everyday Tradeoffs
Floor color affects reflected light and how readily debris or surface marks catch the eye. It does not automatically make a room modern, traditional, elegant, rustic, or timeless. Those impressions also depend on the architecture, furnishings, wall colors, board pattern, lighting, and sheen.
| Consideration | Light floor | Medium floor | Dark floor |
|---|---|---|---|
| Reflected light | Generally reflects more visible light | Falls between the endpoints, with substantial variation | Generally reflects less visible light |
| Apparent spaciousness | Can make a room feel more open | Depends on undertone, lighting, and surrounding finishes | Can create stronger contrast and visual weight |
| Dust and pet hair | Often less conspicuous, depending on color | Visibility varies | Pale dust and hair tend to stand out |
| Scratches and scuffs | Often better disguised | Visibility varies | Scratches commonly create more contrast |
| Board variation | Usually remains apparent | May moderate some variation | May visually reduce some variation, though not uniformly |
Bona’s color-selection guidance similarly says lighter floors reflect more light and tend to conceal scuffs and scratches better, while dark floors make dust and scratches easier to see. Its style descriptions are subjective, but these practical visibility differences are useful when comparing light and dark hardwood-floor stains.
Base the decision on the room and household:
- How much daylight reaches the floor?
- Are the walls pale, saturated, warm, or cool?
- Will rugs cover much of the finished surface?
- Does the furniture contrast strongly with the proposed color?
- Will pets, children, or heavy traffic make frequent cleaning impractical?
- Does the color fit the architecture and fixed finishes?
- Are you choosing solely for yourself, or do possible resale plans matter?
There is no winner across all these priorities. A pale floor may help a dim room feel lighter and make scuffs less conspicuous, yet preserve more board variation than you want. A dark brown can provide strong contrast while making pale fibers and scratches easier to notice. A medium brown may sit between those endpoints, but its undertone still has to work with the wood and room.
Account for the Wood Under the Stain
Stain generally leaves the natural color and grain influential rather than replacing them with an opaque, standardized surface. The same product can therefore look different on red oak, white oak, or neighboring boards.
Red oak has a naturally pinkish tint, while white oak is generally tan. Grain also varies among boards and with the way lumber was cut. Plain-sawn and quarter-sawn boards of the same oak species can show different grain patterns. Minwax explains these species, pore-color, and grain effects in its stain-matching guidance.
Use undertones as a screening tool, not a formula:
| Underlying wood | Possible effect | What to verify |
|---|---|---|
| Red or pink | Warmth may remain visible through natural, brown, gray, or pale stain | Whether the result looks pleasantly warm, too pink, or sufficiently muted |
| Tan | Natural and brown stains may read differently than on red oak | Whether the result appears neutral, golden, brown, or cooler than intended |
| Mixed boards | Color and grain may vary across the floor | Whether the stain moderates variation without becoming heavier than desired |
These are variables to control and verify on the flooring, not inputs for predicting an exact color.
Contact time is especially easy to overlook. If one sample is wiped almost immediately and another is left longer, the test compares both color and application method. Longer contact before wiping can alter intensity. Use the same timing and wiping technique for every candidate unless the purpose is to compare application schedules expressly allowed by the product instructions.
Do not assume a color selected for white oak will transfer directly to red oak. Likewise, a replacement board may not match an older board merely because both carry the same species label. The physical sample remains the useful comparison.
Let the Room’s Lighting Challenge the Shortlist
The same stained board can appear different in sunlight and under different artificial lights. A gray may read blue, beige, or brown depending on its formulation, the wood beneath it, and the room’s lighting.
Gray and weathered options need particular scrutiny. The commercial flooring contractor Hardwood Floor Guys characterizes Driftwood as gray with a blue undertone, but that description cannot predict its appearance on another wood species, under another finish system, or in another room. Its charts are presented as graphical representations rather than guarantees of the completed floor.
Use online charts, photographs, and visualizers to answer broad questions:
- Is near-black clearly too dark?
- Does a red-toned direction conflict with the furniture?
- Is a whitewashed floor too stark?
- Does medium brown fit the architecture better than gray?
- Which candidates are worth obtaining for a physical test?
Do not rely on a digital preview for fine distinctions. A screen cannot reproduce the exact species, age, grain, preparation, stain application, finish system, or lighting of the floor. Functional Floors, a commercial contractor and visualizer provider, likewise describes its room-based stain visualizer as a preview useful for ruling colors out, not proof of the final result.
After the physical samples have dried as directed, inspect them:
- In daylight near the main windows.
- Farther from the windows, where the room is naturally darker.
- Under the artificial lights normally used at night.
- Beside fixed elements such as cabinets, stone, tile, stairs, or built-ins.
- Near the wall colors and major furniture that will remain.
If the flooring continues through several rooms, check the brightest and darkest relevant areas and any space with substantially different bulbs, window exposure, or wall color. One convenient viewing spot cannot represent every room.
When the exact floor-approved system permits a sample build, apply the intended compatible topcoat and sheen to the finalists according to its instructions.
Separate a Fully Sanded Floor From an Existing Finished Floor
Before testing color, identify the surface you have. Bare or fully sanded wood and an existing finished floor are different starting points.
Path 1: Bare or fully sanded wood
Test finalists only after the sample surface has reached the preparation condition intended for the whole floor. Species, age, grain, moisture condition, preparation, contact time, and wiping method may still affect the result. Use the actual flooring or genuinely identical flooring prepared the same way.
Path 2: Existing stain or clear finish remains
A newly applied color interacts with the old color and coating rather than neutral bare wood. The visible result is a combination, and compatibility cannot be assumed when the existing finish chemistry is unknown.
Applying a pale product over a dark finished surface will not turn it into a light floor. Moving from dark to light generally requires removal of the existing color, but the appropriate removal method must come from current floor-specific instructions or a qualified floor refinisher. Do not improvise with a chemical stripper: a general finished-wood recoloring guide does not establish that its products or removal methods are suitable for hardwood-floor traffic or compatible with the intended floor system. Minwax’s general guidance supports only the limited principles that old and new colors combine, a light coating does not lighten a dark existing finish, and adhesion testing matters on an existing coating.
For a previously finished floor:
- Identify the existing finish system if possible.
- Confirm that every proposed stain, coating, and preparation method is explicitly approved for hardwood floors.
- Verify compatibility with the coating already present.
- Follow the current floor-specific preparation and adhesion-test instructions.
- Treat unknown finish chemistry as a reason for controlled compatibility checks, not guesswork.
- Do not transfer furniture or trim directions to a floor without explicit approval for floor traffic.
Color is only one part of the decision. If the layers cannot form a compatible floor system, an attractive sample is not enough.
Before sanding, staining, or creating samples, read the exact product label, technical data, and safety data. Follow the specified ventilation, personal-protective-equipment, ignition-control, and cleanup requirements.
Run a Controlled On-Floor Color Test
A useful test isolates color as much as practical. Casual patches made with different preparation, timing, or wiping methods can mislead more than a digital swatch.
Use this workflow:
- Narrow the direction digitally. Use charts, photographs, and visualizers to eliminate color families that plainly conflict with the room.
- Choose a manageable set of finalists. Include enough variation to clarify the decision without prescribing a universal number.
- Plan the sample location and removal. Coordinate on-floor patches and any later resanding with the refinishing plan and exact product instructions so the tests do not leave residual color, uneven absorption, or visible boundaries. If destructive testing cannot be integrated safely, use genuinely identical flooring prepared the same way.
- Prepare every test surface consistently. Match the intended floor preparation.
- Apply each product in a controlled way. Keep stain quantity, contact time, wiping technique, and drying conditions consistent.
- Label every sample immediately. Similar browns and grays are difficult to identify accurately from memory.
- Let each sample dry as directed. Use the exact product instructions rather than a generic drying-time rule.
- Complete the sample system when permitted. If the instructions allow it, add the intended compatible topcoat and sheen to finalists.
- Inspect in relevant lighting. Check daylight and normal nighttime lighting in each materially different room.
- Record the result before committing. Keep enough information to reproduce the selected sample and support later repairs.
A concise sample log is easier to preserve than loose notes:
| Field | Record |
|---|---|
| Product identity | Manufacturer, product line, color name |
| Formula | Oil- or water-based; measured blend ratio if applicable |
| Preparation | Flooring, sanding condition, and relevant system preparation |
| Application | Quantity, application time, contact time, and wipe time |
| Conditions | Date, room or test area, and drying conditions |
| Observations | Daylight, artificial light, topcoat, and sheen observations |
If testing a custom blend, measure the components rather than estimating by eye. Record the exact products, ratio, and total batch quantity. Oil-based and water-based stains should not be mixed together, and Minwax’s stain-matching guidance specifically recommends precise measurement and retaining the formula for later duplication. Only blend products whose current instructions permit mixing within the same compatible line or system.
Consistency turns samples into usable evidence. A patch sanded differently, flooded with more stain, left wet longer, or judged before it dried as directed is not a fair comparison.
Do Not Confuse Color With the Rest of the Finish System
A stain color name does not identify the complete product or floor system. “Ebony” describes a color direction; it does not by itself specify the formulation, transparency, preparation, compatible topcoat, or suitability for an existing finish.
Keep these variables separate:
- Color: The visual direction, such as Natural, Provincial, Weathered Oak, or Ebony.
- Formulation: Oil-based, water-based, powder, dye, tint, or another specified colorant system.
- Transparency: Transparent, semi-transparent, or another labeled level of grain visibility.
- Pretreatment: A compatible preparation product used where the selected system calls for it.
- Combination product: A product that combines stain with another coating rather than functioning as stain alone.
- Protective topcoat: The floor-approved wear layer specified as part of the system.
- Sheen: The reflectivity of the completed surface, selected separately from the stain color.
Retail categories include oil- and water-based products, transparent and semi-transparent stains, and products that combine stain with another coating. Those labels identify meaningful product characteristics, not alternate names for the same color. The Home Depot floor-stain category illustrates that familiar colors may appear across different formulations and product types, but a catalog cannot determine which one suits a particular floor.
Those details depend on the exact formula, conditions, and finish system. Follow the current floor-specific label, technical data, and safety data for preparation, ventilation, protective equipment, ignition precautions, application, drying, recoating, cleanup, waste disposal, and compatible topcoats.
For a custom color, use only blends permitted by the product instructions. Keep oil-based and water-based stains separate, measure every component accurately, and preserve the manufacturer, product line, formulation, ratio, total batch quantity, preparation, contact time, and wiping method.
Choose the color family according to the room and your maintenance priorities. Narrow it according to the wood’s undertone and whether the floor is bare, fully sanded, or still finished. Commit only after controlled samples—including the intended compatible topcoat and sheen when permitted—have been viewed on the actual floor or identical flooring in both daylight and artificial light. Save the labeled product and application record for future repairs; the color name alone is not enough.