
How to Choose a Red Oak Floor Color Without Trusting the Swatch
Medium brown can make pink less prominent without making the room very dark. Compare five color directions on the actual floor with the final topcoat.
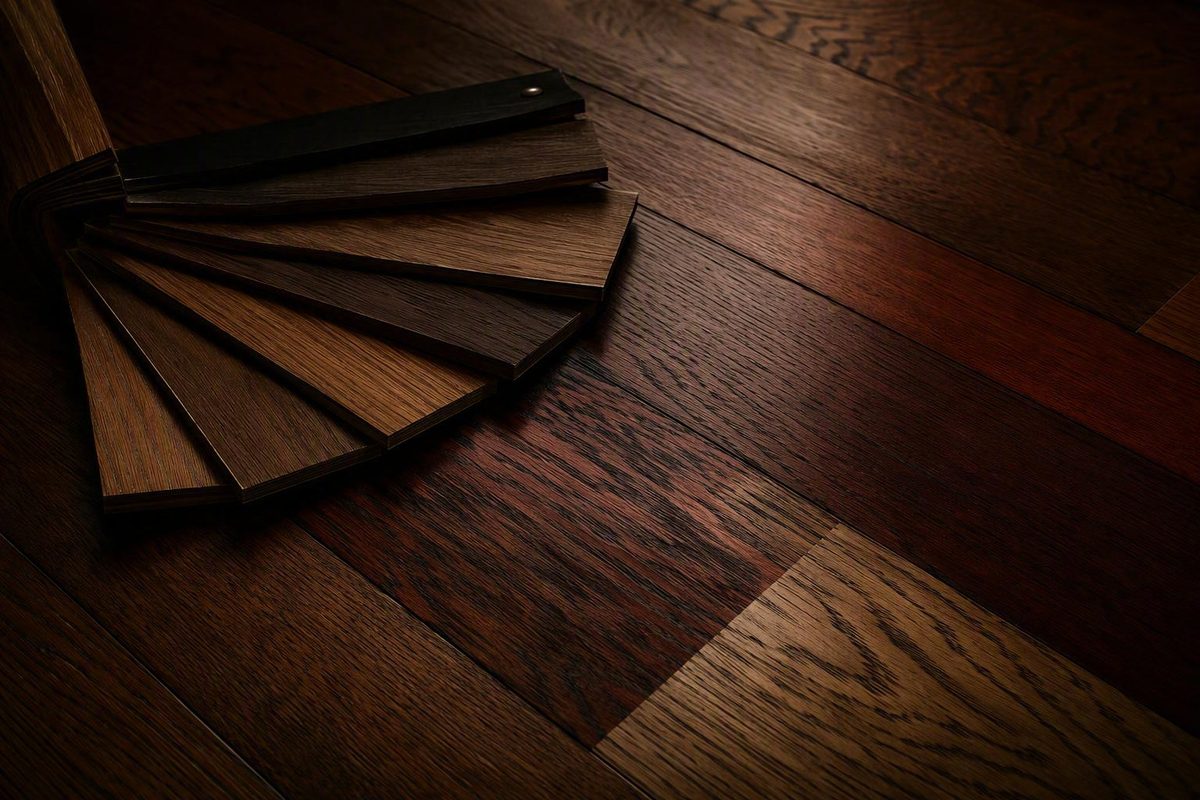
A stain swatch can help you reject a color family, but it cannot reliably predict a finished red oak floor. The wood contributes pink, red, tan, and brown tones; its prominent grain creates contrast; and sanding, application, lighting, topcoat, and sheen can all change the result.
There is no universally best stain on red oak floors. A dependable choice starts with three decisions:
- Define the appearance you want.
- Distinguish among the products that color, seal, and protect the wood.
- Test the complete treatment system on representative areas of the actual sanded floor.
The “complete system” matters. A promising stain can look substantially different after a sealer, protective finish, or change in sheen is applied.
Start With the Result You Want, Not a Stain Name
“Natural” may mean little added pigment, not the absence of pink or warmth.
Begin by choosing among five broad directions.
Pale natural
A pale natural floor stays close to freshly sanded red oak. The usual goals are brightness, visible grain, and minimal darkening rather than strong color correction.
This direction works best when you already like the bare floor and can accept some warmth. A clear or lightly tinted system may deepen the grain and make the wood look warmer than it did while raw. If the pinkest boards already bother you, a clear finish alone may not solve the problem.
White-oak-inspired
This target combines a light overall value with restrained pink, red, orange, and yellow. It may require a red-tone pretreatment, pale tinted sealer, lightly pigmented stain, or tested custom blend rather than a conventional stain alone.
Red oak can move toward this palette, but it does not become white oak. Its underlying color can still vary from board to board, and its prominent grain remains part of the floor’s visual identity. Treat “white-oak-inspired” as a direction, not a promise of species-level imitation.
Very pale and gray treatments are especially floor-sensitive. In one renovation involving both old and new red oak, Weathered Oak, gray, and a blend of the two appeared pink on portions of the floor. The homeowner ultimately chose Special Walnut instead (see the project’s on-site comparisons).
Warm natural
A warm natural floor embraces some of red oak’s character while controlling how yellow, orange, or red the room feels. Honey, tan, muted gold, and light brown can all fit this direction.
Golden Oak illustrates why broad recommendations are unreliable. One homeowner liked it beneath a water-based topcoat, while a separate small-board comparison warned that yellow- or red-toned colors could emphasize warmth when the goal was to minimize pink. These results are not contradictory: Golden Oak may suit a deliberately warm floor while being a poor candidate for a cool or highly neutral one.
Medium brown
Medium brown is often a practical middle ground. It adds enough brown pigment to make pink areas less visually dominant while preserving substantial grain and board variation.
The brown does not remove red oak’s undertone. It changes the balance of the completed color so the undertone is less prominent.
Special Walnut is one reported example, not a guaranteed recommendation. A DIY project’s 50/50 Minwax Dark Walnut and Special Walnut blend is another reported medium-brown example, but its formula and result should not be assumed to transfer to another floor (review that project’s mixture and process).
Dark brown
Dark brown can overpower pink more readily than pale colors, but it brings different tradeoffs. Dark pigment also does not erase red oak’s grain.
Provincial, Jacobean, Dark Walnut, and True Black are reasonable sample candidates because they appear in reported red oak projects and comparisons. They are not assured outcomes. Every dark candidate should be tested with the intended topcoat because added warmth, depth, and reflection can materially alter its appearance.
For the first sample round, compare genuinely different systems:
- One pale or minimally colored system
- One white-oak-inspired neutralizing or tinted system
- One warm natural option
- One medium brown
- One dark brown
This teaches you more than testing numerous nearly identical beige-gray or medium-brown swatches.
Separate the Four Layers: Neutralizer, Stain, Sealer, and Finish
Many disappointing selections begin with imprecise terminology. A pretreatment, stain, tinted sealer, and protective finish may all affect color, but they perform different jobs.
Stain is a colorant used to darken or otherwise change the wood. It ordinarily provides little protection by itself.
Finish is the protective coating that seals the wood and supplies wear resistance and sheen. It can also change perceived warmth, clarity, contrast, and depth. A flooring specialist’s explanation of stain versus finish also notes that stain can emphasize surface defects and ordinarily needs protective clear coats.
A color neutralizer is a pretreatment intended to modify an unwanted underlying hue before compatible staining, sealing, or finishing steps.
A tinted sealer seals the floor while depositing color. It should not automatically be described as a conventional penetrating stain.
| Product category | Purpose | Application stage | Likely color role | Key limitation |
|---|---|---|---|---|
| Color neutralizer | Modify an underlying wood tone | After specified preparation and before compatible color, sealer, or finish layers | Can reduce the prominence of pink or red | Does not guarantee complete neutralization and must fit the full system |
| Conventional stain | Add pigment or dye to change and usually darken the wood | After preparation and any approved pretreatment | Creates a light, medium, or dark color | Provides little protection and can emphasize sanding defects |
| Tinted sealer | Seal while depositing a pale or colored base | Before the protective finish | Can create a whitewashed, natural, or softly toned appearance | Is not interchangeable with every stain or neutralizer |
| Protective finish | Protect the floor and establish sheen | Over an approved, adequately dried color system | Can add clarity, depth, warmth, or a flatter visual effect | Cannot correct a fundamentally wrong color and may be incompatible with preceding layers |
Bona describes Red Out as a two-step waterborne color neutralizer intended to minimize red and pink hues before compatible Bona staining, sealing, and finishing products. The manufacturer also says water popping is unnecessary after the treatment. These are manufacturer claims about its own system, not independent proof that the product will eliminate red or outperform every alternative (review Bona’s Red Out description).
In one homeowner project, one coat of NordicSeal was followed by one coat of Bona Traffic HD Satin to produce a lighter, white-oak-inspired result (view the project and its test patches). That makes the system worth considering as a sample candidate, but it does not establish universal superiority or guarantee that every red oak floor will resemble white oak.
The useful question is therefore not simply, “Which stain should I buy?” It is:
What combination of preparation, pretreatment, color or sealer, coat sequence, protective finish, and sheen will create the intended result on this floor?
Compare Light, Medium, and Dark Directions on Red Oak
Once you have selected a target appearance, reduce the field to a few systems that differ meaningfully.
Pale and white-oak-inspired candidates
For a nearly raw or softly whitewashed effect, compare at least one low-color system with one treatment intended to address red directly. Possible sample categories include:
- Clear or minimally colored sealer and finish
- Pale tinted sealer
- Red-tone neutralizer followed by a compatible pale system
- Light conventional stain
- Restrained white-gray or beige blend
A different homeowner selected a blend of two parts Weathered Oak to one part Simply White and felt the completed red oak floor was not excessively pink. The final ratio had not been part of the earlier sample set, illustrating both the possibilities and the risk of last-minute custom mixing (read the homeowner’s account).
Do not carry that ratio directly to another project. Product line, formulation, wood age, sanding, application, wiping, and topcoat can all change the result. If you use a custom mixture, define a repeatable measuring and mixing procedure before production begins.
Warm natural candidates
A warm natural color can be appropriate when you want brightness without attempting to erase every red oak characteristic. Include one restrained tan, honey, or light-brown candidate and compare it with the bare wood under the intended topcoat.
One homeowner selected DuraSeal Golden Oak beneath Loba Satin Water-Based Polyurethane after testing numerous colors. That renovation used new, wider red oak intended to coordinate with older, narrower boards, reinforcing the need to test every flooring group rather than assuming all red oak will respond alike (see the Golden Oak renovation account).
A separate small-board comparison advised against Golden Oak when the specific goal was minimizing pink or warm undertones. The samples in that comparison were not topcoated, so they are more useful for forming a shortlist than predicting a completed floor.
Medium-brown candidates
Medium brown often gives red oak enough color to reduce the visual prominence of pink without making the room feel very dark.
Special Walnut is one reported example. In the old-and-new flooring project discussed earlier, the homeowner chose it with a water-based finish after lighter and gray samples appeared pink on some boards.
A custom brown mixture introduces additional production variables. At minimum, record:
- Brand and exact product line
- Mixing ratio and measurement method
- Surface preparation
- Approved pretreatment, if any
- Application and wiping method
- Intended coat sequence
- Protective finish and sheen
“Half and half” is not a complete production specification unless the measuring and mixing method is defined.
Dark-brown and near-black candidates
Provincial, Jacobean, Dark Walnut, and True Black can serve as darker anchors in a sample set. The goal is not to assume one will hide red, but to determine how much brown or black pigment the floor can accept before grain contrast, room brightness, and maintenance visibility exceed your preferences.
One DIY comparison across several wood species favored Provincial, Dark Walnut, and True Black on its red oak board. It also showed that wood species materially changed the appearance of every color. Because the samples were small and had no topcoat, use them to identify possibilities rather than predict a room (compare the tested colors).
For an efficient selection process, compare color families first. Once one direction wins, run a second round with two or three close variations.
Use an On-Floor Test That Includes the Final Topcoat
The actual, properly prepared floor is usually the most representative practical test substrate because it captures variables that a printed card, online photograph, or unrelated retail board cannot:
- Natural variation among installed boards
- Age and previous oxidation
- Old versus newly installed flooring
- Actual sanding and repair conditions
- Room light and surrounding colors
- The planned application technique
If direct on-floor tests are impractical, use offcuts or loose boards that closely match the installed floor’s species, grade, age, and preparation. A retail red oak sample is more useful than a printed swatch, but it may not reproduce an older installed floor.
Build a representative test grid
Place sample fields in more than one room. Include bright and dim exposures, daylight and artificial lighting, and areas near visually influential surfaces such as cabinets, paint, trim, and stone.
At each location, cross several boards rather than coloring only one. Deliberately include:
- Pinker boards
- Browner or tan boards
- Pale boards
- Naturally darker boards
- Boards with pronounced grain contrast
- Both old and new flooring, when present
Make each sample large enough to reveal board-to-board variation.
Test the complete stack
Each candidate should receive the intended sequence:
- Approved surface preparation
- Neutralizer or other pretreatment, if used
- Stain or tinted sealer
- Intended color or sealer coat sequence
- Compatible protective topcoat
- Proposed sheen
Do not compare a raw stain patch with another sample that has already been finished. The visible difference may come from the topcoat rather than the colorant.
If you are choosing between approved waterborne and oil-based finishes, apply them over separate copies of the same color sample. Compare matte and satin in the same way.
Watch the samples through changing light
Inspect the samples in daylight, at dusk, and under the lamps normally used in the room. Look from standing height and from room entrances, not only while kneeling over the patch.
One homeowner case study recommends observing on-floor samples in daylight and artificial light for 24 hours to see how the color changes with the room (see the sampling method). Final approval should nevertheless wait until each sample has dried or cured to the stage specified for that exact system.
Photography is useful for labels and location records, but not for establishing true color. Two photographs of the same floor can look markedly different.
Account for whole-room scale
Across hundreds of boards, color outliers become part of the overall pattern. A pale system that looks neutral across several boards may reveal repeated pink streaks throughout a room. A dark stain may create stronger grain contrast than a small patch suggested.
Before approval, ask:
- Can I accept the pinkest board in this sample?
- Can I accept the darkest grain line?
- What happens where daylight changes between rooms?
- Does the sheen emphasize or soften the variation?
- Does the floor work with fixed cabinets, trim, paint, and stone?
- Would I still choose this treatment if the room resembled the least-favorite part of the sample?
When old and new red oak meet, apply every finalist to both groups. Age, previous finish, prior sanding, grade, and porosity can affect baseline color and absorption. A realistic goal may be an acceptable visual blend rather than an invisible transition.
Preparation Determines Whether the Color Looks Even
Stain does not cover a floor the way paint covers a wall. Pigment can collect in pores, scratches, gouges, seams, and depressions. Those areas may therefore appear darker after staining.
A raw floor can look clean and uniform yet reveal arcs, stripes, or halos as soon as color is applied.
Common causes of visible defects
Edger swirls: Circular or cross-grain scratches near walls can absorb pigment differently and form dark arcs.
Field-to-edge mismatch: If the central floor and perimeter are sanded to different effective smoothness, they may accept color differently.
Drum or belt marks: Chatter, waves, stop marks, and abrupt sanding transitions can become repeated dark areas.
Gouges and open seams: Depressions collect pigment and may remain conspicuous after excess stain is removed.
Uneven porosity: Repairs, replacement boards, and old and new flooring can absorb at different rates.
Dust or contamination: Residue can interfere with penetration or create a rough, inconsistent surface. A flooring specialist recommends vacuuming and using dry microfiber rather than casually wet-mopping freshly sanded wood before staining.
Red oak generally accepts stain more evenly than difficult species such as maple or pine, but that does not mean it behaves like a uniformly colored sheet. Its porous earlywood can take more pigment than denser latewood, producing pronounced striped grain contrast.
Keep preparation consistent
Coordinate the sanding process across the field, perimeter, corners, thresholds, and hand-sanded details. Blend transitions between tools and inspect the floor under strong, low-angle light before applying color.
Do not adopt one universal final sanding grit from a blog or forum. The supplied project accounts conflict: one contractor describes stopping at a particular grit to retain absorption, while a forum participant reported sanding much finer. The correct endpoint depends on the exact stain or sealer, equipment sequence, and current product instructions.
Water popping, conditioner, or direct staining?
These are distinct preparation choices:
- Water popping intentionally wets prepared wood to raise the grain before color application.
- Pre-stain conditioner modifies absorption before stain.
- Direct staining applies color to cleaned, sanded wood without either step.
A flooring contractor favors water popping for deeper and more uniform stain acceptance. One DIY homeowner used conditioner instead, while forum contributors have reported staining oak directly. These accounts do not establish a universal rule.
Use only a preparation method permitted by the exact system. Do not add water popping or conditioner to a proprietary neutralizer process unless the current manufacturer documentation allows it. Do not omit a required step because a different product worked without it.
For mixed old and new boards, side-by-side preparation samples can reveal whether the flooring groups begin with different colors or absorb differently. Changing the stain name alone may not create a convincing match.
Plan the Application Before Opening the Stain
A successful sample can still become a poor floor if the production method changes. Plan the route, section boundaries, and working sequence before applying material.
Establish an exit route
Begin where you can work away from walls, closets, and dead ends toward a usable exit. Connected rooms need particular care because long board runs can cross doorways and make arbitrary stopping points conspicuous.
Divide the floor into manageable zones without creating boundaries that will dry before adjoining work can be completed as directed. Depending on the layout and product, possible boundaries may include transitions, doorways, or complete board runs.
Work with the boards and maintain a wet edge
Apply along the board direction and keep the leading edge active. Wipe excess consistently within the product’s stated working window.
Plan to keep these variables as stable as practical:
- Section size
- Amount of material applied
- Dwell time
- Wiping method and pressure
- Pace
- Site conditions covered by the product instructions
Custom mixtures require a repeatable ratio and consistent mixing. Follow the product documentation for maintaining uniformity during use.
Avoid accidental double-staining
In one DIY red oak project, the homeowner reported that reworking stain too soon could lift previously applied color, while overlapping an area after it had sat longer could make it darker. That observation is project-specific, but it demonstrates why section boundaries should be planned before work begins.
If a section appears to be going wrong, follow the exact product procedure instead of repeatedly wiping, adding stain, or blending into material at a different stage of drying.
There is no universally best applicator. Pads, brushes, rags, and floor-specific tools all appear in project accounts, but the suitable choice depends on the formulation, floor area, working time, and manufacturer’s instructions.
Consider hiring an experienced floor refinisher when the project involves:
- Large connected rooms
- Fast-drying or low-tolerance products
- A custom blend
- Old and new flooring that must coordinate
- A chemical neutralizer
- Strong color correction
- Limited stopping points
- Uncertain sanding quality
Correcting a full-floor color problem may require sanding back to uniformly prepared wood.
Choose the Topcoat as Part of the Color System
Stain establishes much of the color, but the protective topcoat determines how that color is presented and protected. It can change warmth, depth, clarity, contrast, and reflection.
Waterborne finish for pale or neutral goals
Many waterborne finishes are selected over pale, gray, whitewashed, or neutral colors because they generally add less amber warmth than many oil-based alternatives. That makes them useful candidates when the goal is to retain a raw-looking or restrained appearance.
“Water-based” does not mean perfectly colorless. Products and systems vary, so test the exact finish rather than relying on the category name.
Oil-based finish for added warmth
Many oil-based finishes add amber or yellow warmth. That can complement a warm natural, medium-brown, or dark-brown floor, while working against a cool gray or white-oak-inspired target.
This does not mean every oil-based finish turns red oak orange. The amount and character of warmth are product- and floor-dependent. A flooring contractor’s overview similarly presents waterborne finishes as candidates for pale, raw-looking floors and oil-based finishes as options for enriching medium-to-dark colors, while acknowledging that such category comparisons are generalizations (read the finish overview).
Do not rank durability by carrier alone
Avoid claims that waterborne finish is always harder or oil-based finish is always more durable. Performance varies among oil-based products, one-component waterborne finishes, and two-component waterborne systems.
Preparation, film build, coat sequence, cure, maintenance, and use conditions also matter. Compare exact products approved for the floor rather than deciding from “oil versus water” alone.
Matte versus satin
Sheen changes perceived color and contrast. Matte creates a flatter impression, but it does not make damage disappear or guarantee easier maintenance.
Both are legitimate choices. One pale-floor homeowner selected satin; another homeowner using a Weathered Oak and Simply White blend selected matte partly because she wanted white dog hair and scratches to be less conspicuous. These are personal outcomes, not universal rankings.
Include sheen in the finished sample and view it from the room entrance under both daylight and artificial light.
Verify compatibility and timing
A stain and topcoat are not automatically compatible because both are marketed for wood floors. Verification is especially important when mixing brands or applying a waterborne finish over an oil-based stain.
For each exact product, confirm from current manufacturer documentation:
- Permitted substrates and preceding layers
- Required dryness before the next layer
- Minimum or maximum application intervals
- Whether abrasion is required between coats
- Number and thickness of coats
- Temperature, humidity, and ventilation limits
- Mixing or pot-life requirements
- Sheen-specific application instructions
Keep the meanings of “dry” separate. Do not substitute a generic online schedule for the instructions governing the actual system and site conditions.
Prevent Drying, Adhesion, and Safety Failures
Color approval is not the end of the risk. A floor can look correct after staining and still fail beneath the protective finish.
Allow the color layer to dry as specified
Excess stain, incomplete wiping, low temperature, high humidity, heavy application, material retained in seams, and poor air exchange can lengthen drying. A surface that feels dry may not yet satisfy the topcoat manufacturer’s requirements.
Applying finish over incompletely dried stain can contribute to smudging, pigment movement, poor bonding, peeling, or failure to cure. A flooring specialist discusses these failure modes while emphasizing that drying varies with product and conditions (review the drying and topcoat cautions).
If the color layer does not meet the manufacturer’s stated readiness criteria, do not cover it merely to preserve the schedule. Identify the cause and follow the product manufacturer’s corrective procedure.
Use current technical and safety documents
Before work begins, obtain the current technical data sheet and safety data sheet for every product in the system. Use them to establish:
- Preparation and application requirements
- Drying and recoating conditions
- Compatibility
- Ventilation and personal protective equipment
- Mixing and handling
- Ignition precautions
- Cleanup, storage, and disposal
- Return-to-service requirements
Instructions can differ among formulations and may change over time. Advice for an older container or another product line may not apply.
Treat oil-contaminated materials as a fire hazard
A DIY stain comparison specifically warns that rags contaminated with oil-based stain or topcoat can present a spontaneous-combustion risk (see the published warning). Because disposal requirements depend on the product and location, follow the current safety data sheet, manufacturer instructions, and applicable local fire-safety and waste rules. Do not improvise a disposal method from a casual project post.
Use only the ventilation, protective equipment, storage, and ignition-control measures specified for the products being applied. Low odor is not a substitute for following the safety data sheet.
Know when to stop
Pause and consult an experienced floor refinisher or the product manufacturer if:
- A full-floor stain is striped, blotchy, or visibly overlapped
- The color layer does not dry under the documented conditions
- A finish wrinkles, peels, smears, or fails to bond
- Product compatibility is uncertain
- A neutralizing treatment produces inconsistent color
- Old and new boards diverge after sampling
- A custom blend cannot be reproduced consistently
- Connected rooms cannot be divided into workable sections
Do not keep adding color or finish in the hope that another coat will hide the problem. Some failures require sanding back to sound, uniformly prepared wood. Resolve uncertainty during sampling, when correction is still limited in scale.
Frequently Asked Questions
What stain colors make red oak look less pink?
Medium and dark browns often make pink less visually dominant than very pale treatments. Special Walnut, Provincial, Dark Walnut, and Jacobean are reported sample candidates, not guaranteed fixes.
For a light floor, consider testing a red-tone neutralizer, pale tinted sealer, or restrained custom blend. Gray and very pale colors can look neutral on some boards while revealing pink on others.
Apply each candidate across both the pinkest and brownest boards and include the intended topcoat. Judge the least-favorable part of the completed sample, not only its best board.
Can red oak floors be made to look like white oak?
Red oak can be shifted toward a pale, neutral, white-oak-inspired palette, but it cannot reliably be made visually identical to white oak. Its underlying color, prominent grain, board variation, and age remain influential.
Possible approaches include a compatible red-tone neutralizer, pale tinted sealer, or carefully tested light blend. Define success as “lighter and less pink” or “white-oak-inspired,” then approve the complete system on the actual floor.
What is the difference between Bona Red Out and NordicSeal?
Bona Red Out is a two-step waterborne pretreatment that Bona describes as a color neutralizer intended to minimize red and pink hues before compatible staining, sealing, and finishing steps (see the manufacturer’s description).
NordicSeal is a pale tinted sealer. It adds a light, whitewashed tone during the sealing stage and requires a compatible protective finish.
They occupy different stages of the system and should not be treated as interchangeable names for “light stain.” Consult Bona’s current documentation to determine whether and how the products fit a particular project.
Should red oak be water-popped or treated with wood conditioner before staining?
Not automatically. Water popping, conditioner, and direct staining are product- and floor-dependent options.
Some refinishers favor water popping, one reported DIY project used conditioner, and other project accounts describe direct staining. This evidence does not establish one method as universally superior.
Follow the current preparation requirements for the exact neutralizer, stain, or sealer. If more than one method is permitted, compare the alternatives with otherwise identical sanding, color application, topcoat, and sheen.
How long should stain dry before a protective finish is applied?
Until the stain meets the exact stain and topcoat manufacturers’ requirements under the actual application and site conditions. There is no reliable universal number.
Dry-to-touch does not necessarily mean ready for topcoat. Excess stain, cold conditions, high humidity, inadequate wiping, and poor air exchange can extend the wait. Covering incompletely dried stain can contribute to pigment movement, smudging, poor adhesion, peeling, or curing failure.
Check the current technical documents for both products, confirm compatibility, and distinguish stain-dry time from finish recoat time, light-traffic time, full cure, and furniture or rug replacement.
The dependable selection process is simple: choose a color direction, compare a few genuinely different systems, and test every layer on representative parts of the sanded floor. Judge the completed samples in the home’s real light, verify preparation and compatibility in current product documentation, and favor professional application when custom blends, neutralizers, connected spaces, coating problems, or old-and-new flooring make failure especially costly.