
How to Flatten an Uneven Floor Without Hiding a Bigger Problem
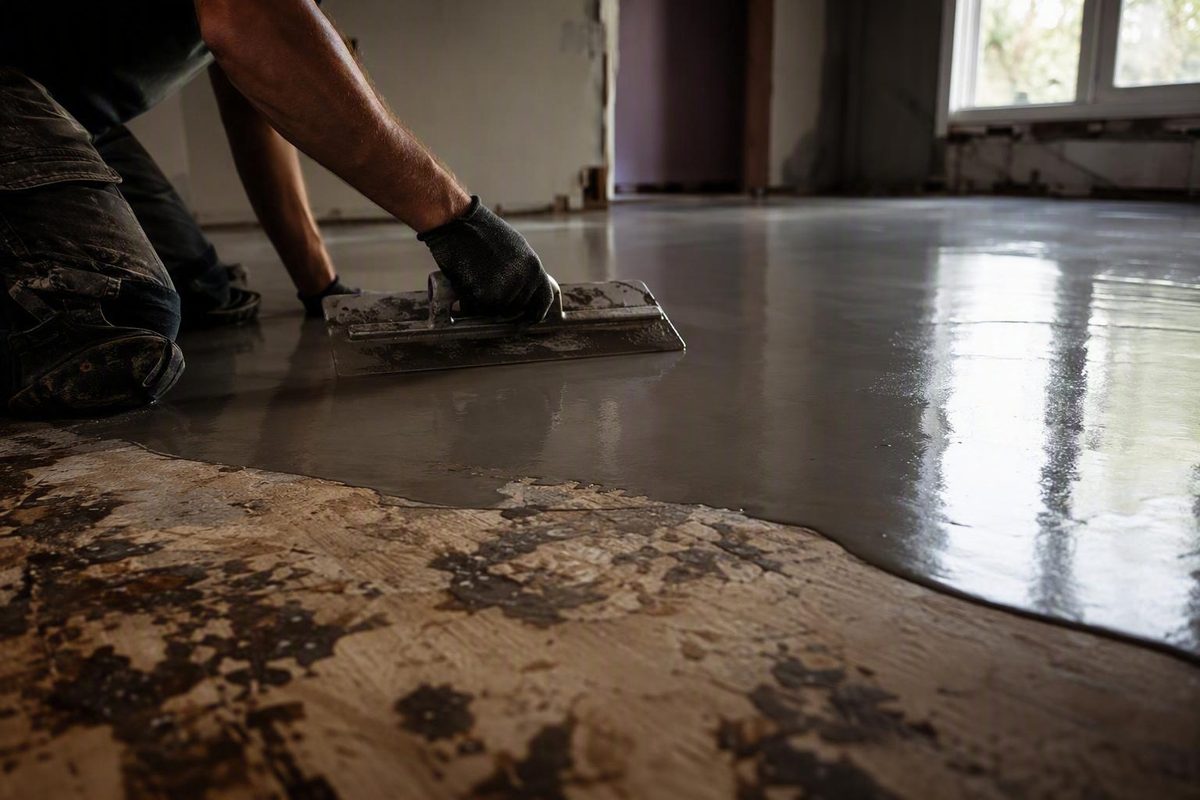
Leveling a subfloor is not simply a matter of pouring compound into every dip. Unevenness may be a stable surface defect, but it can also indicate moisture damage, weak panels, unsupported seams, sagging framing, or slab movement.
Use this sequence:
- Expose and inspect the structural subfloor.
- Identify the substrate and finish-floor requirements.
- Map high and low areas.
- Check for moisture, damage, and movement.
- Repair the underlying cause.
- Choose a compatible flattening method.
- Let the repair cure as specified.
- Remeasure the same locations before installing flooring.
That process applies whether the finish will be hardwood, laminate, vinyl, a floating floor, a glue-down product, a nail-down floor, or tile.
Related: 4 Steps to Fix a Sagging Floor Over a Crawl Space.
Set the Right Target: Flat Is Not Always Level
A level floor is horizontal relative to gravity. A flat floor has no unacceptable localized humps, ridges, valleys, or depressions across the measurement span specified by the flooring manufacturer.
Those conditions are not interchangeable. A room can slope consistently from one wall to another while remaining flat enough for some flooring systems. Conversely, a room may be broadly level but contain a sharp plywood seam or concrete hump that prevents flooring from lying correctly.
Most finish-floor preparation focuses on flatness rather than correcting the overall slope of the building. The cause still matters. A stable, uniform slope is different from a dip that moves underfoot, a floor that has recently changed, or a depression associated with damaged framing.
Before setting a target, obtain the current installation instructions for every relevant part of the proposed system:
- Finish flooring
- Adhesive, if applicable
- Underlayment or backer
- Patch or self-leveling underlayment
- Moisture-control product
- Fastening method
Record both the permitted variation and the span over which it must be measured. Do not substitute a familiar rule of thumb for the actual specification.
For example, 3/16 inch over 10 feet appears in general preparation guidance for some hardwood, laminate, and vinyl installations, but it is not a universal tolerance for every flooring product or assembly. Lowe’s uses that measurement in its wood and concrete floor-leveling guidance; another manufacturer may specify a different limit or span.
Classify the condition before deciding how to correct it:
- Consistent slope with no local gaps: potentially flat but not level.
- Straightedge rocks at one point: localized high spot.
- Gap under the straightedge: localized or broad low spot.
- Panel flexes or the depression changes under load: movement, not just unevenness.
- Floor has changed over time: possible moisture, framing, slab, or foundation issue.
The working sequence is straightforward: inspect, measure, diagnose, repair the cause, flatten, cure, and verify.
Inspect Before You Add or Remove Material
Remove the finish flooring and loose underlayment until you can identify the actual structural subfloor. Determine whether the base is plywood, OSB, concrete, plank decking, or another substrate accepted by the planned flooring system.
Do not assume the visible top layer is structural. Thin plywood, cement board, foam, or resilient material may be an underlayment over the subfloor. An underlayment can provide a flooring surface, but it cannot make damaged framing or a moving slab structurally sound.
Clean enough of the surface to perform a meaningful inspection. Look and feel for:
- Soft or weak areas
- Rot or water staining
- Damp surfaces or musty odors
- Swollen or delaminated panel edges
- Loose panels
- Squeaks or movement under load
- Unsupported or flexing seams
- Protruding, missing, or ineffective fasteners
- Cracks, chips, and spalled concrete
- Adhesive, paint, wax, oil, sealer, or other residues
- Previous patches that have cracked or debonded
Rotten, badly water-damaged, or structurally weak wood should be replaced rather than coated. Active moisture must be diagnosed and controlled before leveling material or finish flooring is installed. A preparation sequence of inspection, cleaning, repair, drying, and moisture evaluation is outlined in Wagner Meters’ subfloor-preparation overview.
Refastening a sound and adequately supported panel may help, but screws cannot restore rotten wood or create support where none exists.
Check whether the defect is stable:
- Does the dip deepen when someone walks across it?
- Does one panel edge move independently of the next?
- Has an earlier patch cracked in the same location?
- Does the depression extend across several framing members?
- Is the sag accompanied by other signs of ongoing building movement?
- Is a slab crack vertically displaced or apparently changing?
A depression that moves, returns after repair, or extends across framing members should not be treated as a routine filling problem.
Stop surface-leveling work if you find active or unexplained moisture, widespread rot, soft panels, recurring movement, substantial sagging, excessive deflection, major or changing slab cracks, apparent settlement, or suspected framing or foundation failure. Commercial subfloor guidance likewise directs readers to repair or replace damaged materials and address structural or moisture defects instead of concealing them beneath an overlay or leveler (America’s Floor Source).
These conditions warrant evaluation by an appropriate qualified professional. Depending on the symptom, that may be a flooring contractor, building professional, structural engineer, moisture specialist, or other relevant trade. Do not improvise structural jacking, joist reinforcement, or foundation work as part of a surface-leveling project.
If the symptoms originate over a crawl space, HFI Flooring’s related article on diagnosing a sagging floor over a crawl space provides background on possible causes. It does not replace project-specific evaluation, and surface leveling should wait until continuing moisture or structural movement has been resolved.
Map High and Low Spots and Plan the Finished Height
Once the exposed subfloor is clean enough to measure, use a long, known-straight level or straightedge. A straight board is useful only if you have confirmed that it is not bowed or twisted.
Move the straightedge across the room in several directions:
- Parallel to the long walls
- Perpendicular to the long walls
- Diagonally
- Across panel seams
- Across visible cracks or earlier patches
- Along the proposed direction of plank flooring
If the straightedge rocks or pivots, the contact point is probably high. If its ends rest on the floor while a gap appears underneath, the area below is low. This high-versus-low distinction is illustrated in a practical subfloor-mapping guide.
A laser can supplement the straightedge by comparing relative elevations throughout the room. It does not replace the straightedge: two points can be at similar elevations while a hump exists between them.
Use feeler gauges, measured spacers, or another repeatable method to quantify gaps. Do not rely only on whether light is visible beneath the tool.
Create a floor map:
- Draw the room, including doorways, cabinets, appliances, stairs, drains, and adjacent floors.
- Add a simple grid with repeatable reference points.
- Record the straightedge length.
- Mark its orientation at each measurement.
- Circle depressions and mark peaks differently.
- Record the largest measured gap in each low area.
- Note movement, squeaks, cracks, seams, and residues separately.
- Write the finish-floor flatness requirement on the map.
- Photograph the layout before beginning work.
Use the same reference points and straightedge orientation after each correction. A before-and-after comparison is meaningful only when the measurement method remains consistent.
The map also helps control repair volume. Before filling an entire room to its highest elevation, determine whether a safe, isolated high spot can be reduced. Removing a small, nonstructural raised seam may substantially reduce the average fill depth elsewhere.
Do not remove material merely because it produces the highest reading. On a wood floor, the high area may represent the original framing elevation while surrounding panels or framing have sagged. Diagnosis must precede sanding or grinding.
Calculate the effect of every proposed layer on finished height. Account for:
- Door swing and clearance
- Exterior and interior thresholds
- Transitions to adjacent flooring
- Dishwasher and refrigerator clearance
- Cabinets and toe kicks
- Floor-mounted fixtures
- Drains and intended drainage planes
- Stair-riser relationships
- Baseboard and trim elevations
- Radiant-floor components
- Appliance connections
Resolve those dimensions before choosing the repair thickness.
Choose the Repair by Substrate, Defect, and Flooring Method
Base the repair decision on five inputs:
- Substrate: wood panel or concrete
- Defect: high or low
- Extent: localized or broad
- Condition: stable or moving
- Flooring method: floating, glue-down, nail-down, or tile
If the base is moving, rotten, damp, or structurally deficient, stop. Sanding, grinding, patching, pouring, and overlaying prepare a stable substrate; they do not substitute for structural or moisture repair.
Stable high spot on plywood or OSB
First determine why the area is high. Secure a loose but sound panel to adequate framing, reset or replace protruding fasteners, and confirm that the seam has the support required by the floor assembly. A localized raised seam or ridge may then be sanded carefully.
Vacuum the area and repeat the original straightedge test. Do not attempt to erase a broad framing problem by thinning the subfloor.
Stable high spot on concrete
A sound localized hump may be ground using equipment intended for concrete. Remove material gradually and check the floor frequently with the same straightedge. Follow the equipment manufacturer’s operating and protective-equipment instructions, and keep the work area controlled so other occupants are not exposed to the grinding operation.
Clean the slab completely afterward. The next patch, primer, adhesive, or coating must be applied to a surface prepared as its manufacturer requires.
Small, stable low area
A compatible trowel-applied patch or feather-finish product may be easier to control than a broad flowable pour. Confirm that the product permits:
- The substrate
- The required minimum and maximum depth
- Feathering, if needed
- The planned flooring
- The planned adhesive or fastening method
- Application over any residue that is allowed to remain
Do not assume every patch can be used over wood or that every cementitious patch can accept flooring nails.
Broad, stable low area
Self-leveling underlayment may be suitable when its current technical data approves the substrate, measured depth, preparation method, and complete flooring assembly. Requirements may include primer, reinforcement, joint treatment, minimum substrate stiffness, or a minimum placement depth.
“Self-leveling” describes flow behavior. It does not mean that the material can be dumped and left unattended. The selected product may require a gauge rake, smoothing paddle, squeegee, roller, screed, or trowel.
Sheet underlayment or overlay
Plywood and other approved underlayment panels can provide a new flooring base, improve the surface, or add height. They do not automatically eliminate a meaningful depression beneath them. Thin panels may follow the existing contour or perform poorly over unsupported areas.
Sheet underlayment and self-leveling material therefore serve different functions. A flooring trade discussion of underlayment versus self-leveling material distinguishes a new panel surface from a material intended to fill and smooth uneven areas.
Layer order can be product-specific. SurePly’s manufacturer, for example, directs users who need self-leveler to apply it to the structural subfloor or existing floor before installing SurePly panels—not over them. That instruction applies to SurePly and should not be generalized to every plywood underlayment; consult the manufacturer’s FAQ for the complete product requirements.
Do not use cardboard, generic felt, asphalt shingles, luan strips, or cedar shims as improvised fillers unless the manufacturers responsible for the complete flooring system expressly approve that assembly. Community suggestions do not establish compatibility, dimensional stability, fastening performance, or warranty acceptance.
Flattening Plywood and OSB Safely
A wood-panel subfloor must be firm, dry, structurally adequate, clean, and securely supported before it receives a surface repair.
Begin with the fundamentals:
- Locate framing and panel edges.
- Confirm that seams have the support required by the floor assembly.
- Secure loose but sound panels to adequate framing.
- Reset or replace protruding fasteners.
- Remove abandoned staples and nails.
- Replace weak, swollen, delaminated, rotten, or water-damaged material.
- Vacuum dust and remove incompatible contaminants.
- Remeasure before adding material.
Refastening is not a universal cure for squeaks. If the panel or framing continues to move, determine why. Additional screws cannot restore rotten wood, create missing support, or correct inadequate stiffness.
When sanding a raised seam, remove only what is necessary. Aggressive sanding unnecessarily reduces panel thickness. Work over a controlled area, blend the edge, vacuum the surface, and check repeatedly with the straightedge.
Self-leveling cement can be used over some plywood and OSB assemblies, but not all. The selected product controls:
- Accepted panel type and grade
- Minimum panel thickness
- Required framing and support
- Allowable deflection or stiffness
- Surface preparation
- Treatment of seams and penetrations
- Primer selection and application
- Mesh or metal-lath requirements
- Minimum and maximum placement depth
- Water ratio and mixing method
- Placement tools
- Cure and flooring-readiness criteria
Duraamen’s wood-subfloor article illustrates how demanding one product-specific assembly can be: it discusses structural adequacy, replacement of damaged areas, panel fastening, joint treatment, primer, metal lath, controlled mixing, and placement tools. The page also contains inconsistent statements about whether primer is necessary and conflicting minimum-thickness guidance. Those inconsistencies are a reason to obtain current technical data and written clarification rather than treating the general Duraamen installation article as a complete specification.
Do not copy that example’s primer, reinforcement, thickness, mixing, or cure details to another product. Some systems require reinforcement over wood; another may specify a different assembly or prohibit the proposed application.
Most importantly, a cementitious topping does not make deficient framing stiff. If panels flex, seams move, or the floor has unresolved deflection, correct the underlying condition before pouring. Otherwise, that movement remains beneath the new surface.
Flattening a Concrete Subfloor
Start by cleaning and inspecting the slab. Mark:
- Localized humps
- Broad depressions
- Cracks and crack intersections
- Chips or spalled areas
- Paint and coatings
- Adhesive and sealer
- Oil, grease, or wax
- Damp or discolored areas
- Existing patches
- Elevation changes across joints
A sound localized high spot may be ground with concrete-rated equipment. Remove material in small increments and check frequently. Do not grind broadly merely to chase horizontal level when the flooring specification requires only flatness.
Concrete grinding creates fine dust. The Home Depot’s floor-preparation guidance states that a dust mask is insufficient and calls for a respirator, along with eye, hand, and hearing protection where applicable (The Home Depot). That general guide does not establish the controls required for every grinder, wheel, worksite, or jurisdiction. Follow the equipment instructions and applicable exposure-control requirements; if you cannot determine or implement the necessary controls, use a qualified contractor rather than proceeding with an improvised setup.
After grinding, vacuum and prepare the slab as required by the next product. Do not assume a visibly dust-free surface automatically satisfies the primer, patch, adhesive, or coating instructions.
For a low area, select a patch or leveling product approved for:
- Concrete in its existing condition
- The measured application depth
- The specified primer or bonding system
- Existing cracks or joints
- Any approved residue that will remain
- The selected flooring and adhesive
- The expected service environment
A shallow chip may require a different product from a broad depression. Do not assume one flowable compound is suitable at both featheredge and deep-fill thicknesses.
Cracks require diagnosis. A stable crack may be treated as directed by the repair and flooring manufacturers. Significant cracking, vertical displacement, recurring movement, or evidence of settlement warrants evaluation before resurfacing. Filling the visible opening does not stop continuing movement beneath it.
Residues must be removed or treated by a system expressly approved for the condition. This is especially important beneath glue-down flooring, where the patch, primer, sealer, moisture-control layer, and adhesive must all be compatible.
Do not sand or grind old black adhesive until it has been appropriately assessed or tested for asbestos. Appearance alone cannot establish whether the material contains asbestos or is safe to disturb. This precaution is also stated in a flooring retailer’s overview of common subfloor problems. Because that overview is not a hazardous-material standard, arrange qualified assessment when the material’s status is uncertain rather than relying on visual identification.
Moisture readiness cannot be established by appearance, touch, or a casual water-drop check. Use the slab test method and acceptance limits required by the flooring, adhesive, moisture-control system, and leveling product. Resolve conflicting requirements with the manufacturers before proceeding.
Using Self-Leveling Underlayment Without Guesswork
Before buying material, complete a compatibility checklist:
- Is the substrate explicitly approved?
- Is the substrate structurally stiff enough?
- Is the measured depth within the product’s limits?
- Is primer required, and which primer?
- Is reinforcement required?
- How must seams, cracks, and joints be treated?
- What moisture conditions are permitted?
- Is the product approved beneath the planned flooring?
- Is it compatible with the flooring adhesive?
- Can it accept nails or staples, if required?
- What cure and readiness criteria apply?
Do not treat “for wood” or “for concrete” on the front of a bag as the complete specification. Review the current technical data, installation instructions, and relevant system documents.
Contain the pour
Flowable material can escape through small openings. Seal seams, penetrations, floor vents, pipe openings, perimeter gaps, doorways, and routes into walls or rooms below as directed by the product manufacturer.
Build containment at room boundaries and protect surfaces that should not receive material. Use only containment materials and methods compatible with the selected system.
Prepare and prime
Remove dust, weak material, coatings, and other contaminants using the method specified for the product. Apply only the required primer at the stated coverage, and observe its drying, recoat, and application windows.
Do not assume extra primer improves the result. Follow the stated application method rather than improvising the product, quantity, or timing.
Calculate material from actual depth
Use the manufacturer’s coverage table and the measured average fill depth. Room area alone is insufficient: a depression that deepens toward one side can require much more material than a uniform skim.
Include only the waste allowance appropriate to the product and installation plan. Bag yield varies by formulation and placement depth, so there is no universal coverage figure.
Stage the operation
Before mixing, arrange:
- Precisely measured water
- All required bags
- Clean mixing vessels
- The specified drill and paddle
- Approved placement and smoothing tools
- Spiked footwear, if the product permits it
- Containment materials
- A timer
- A planned batch sequence
- Crew assignments
- An unobstructed exit route
Larger rooms may benefit from one person measuring and mixing while another places and works the material. Many products have limited working times, so missing tools or unmeasured water can disrupt batch continuity.
Control the mix
Follow the exact water-to-powder ratio and mixing time. Do not add water merely because the material appears less fluid than expected. Incorrect proportions or incomplete mixing can affect flow and material performance.
Use clean water, clean vessels, and consistent batch sizes.
Place rather than merely pour
Work within the stated application time and follow the planned sequence toward the exit. Use only the tools identified by the product instructions, such as a rake, smoothing paddle, squeegee, roller, screed, or trowel.
A self-leveling product may flow, but it may still need to be moved into position, joined between batches, and maintained within its approved depth range. Assuming gravity will finish the entire surface can leave ridges, uncovered areas, or poor transitions.
Primer, reinforcement, depth, working time, cure, and covering readiness are system-specific. There is no universal rule that every wood floor needs lath, every slab needs the same primer, or every product can be covered the next morning.
Match the Repair to Floating, Glue-Down, Nail-Down, or Tile Flooring
The same depression may require different treatment depending on how the finished floor will be installed.
Floating flooring
A floating floor needs a stable, clean, dry base that satisfies the flooring manufacturer’s flatness requirement. The patch or leveler must be approved beneath that flooring and any separate pad or moisture-control layer.
Do not assume a soft underlayment will compensate for a hard subfloor defect. Padding is not a substitute for correcting a hump, unsupported seam, or out-of-tolerance depression.
Glue-down flooring
A glue-down system adds bond compatibility to the decision. Remove or appropriately treat oil, wax, paint, dust, incompatible adhesive, and other residues. Confirm that the flooring adhesive is approved over the cured patch, leveler, primer, sealer, or moisture-control layer.
Approval must cover the complete sequence. A primer or sealer that bonds to the substrate may still be unsuitable beneath a particular flooring adhesive.
Nail-down or staple-down hardwood
Use only a repair material expressly approved for fastener penetration and the intended wood-floor assembly. A compound suitable beneath floating flooring is not automatically suitable beneath flooring nails or staples.
Contributors in a community discussion disagree about using ordinary cementitious leveler beneath nail-down hardwood, and one reports the material breaking when nails were driven through it. Those reports are anecdotal, not universal evidence, but they reinforce the need for written product approval rather than assumption (Home Improvement Stack Exchange).
Tile
Tile requires a sound substrate and an approved direct-bond, backer, or membrane assembly. Installing cement board or another backer does not eliminate movement, rot, significant unevenness, or inadequate support beneath it.
Follow the tile, mortar, membrane, backer, and substrate requirements as a complete system. Do not use a backer panel to bridge a structural depression unless the specified assembly expressly permits that condition.
| Substrate | Floating | Glue-down | Nail-down | Tile |
|---|---|---|---|---|
| Plywood | A wood-approved patch or leveler may be possible; verify the exact system | Confirm patch, primer, adhesive, and moisture compatibility | Use only material approved for fastener penetration; verify the exact system | Correct defects first, then use the specified tile assembly |
| OSB | Verify that both flooring and repair product approve OSB | Verify the exact bond and primer system | Verify the exact system; do not assume a cementitious product accepts fasteners | Verify OSB acceptance and the complete backer or membrane assembly |
| Concrete | Grind stable highs or use a compatible patch or leveler; verify moisture requirements | Confirm residue treatment, moisture limits, and adhesive compatibility | Requires a specifically designed wood-floor assembly; verify the exact system | Repair and flatten the slab, then follow the approved tile or membrane system |
When instructions conflict, do not select whichever requirement is easiest. Ask the relevant manufacturers to resolve layer sequence, preparation, moisture limits, and fastening compatibility before installation.
Cure, Inspect, Remeasure, and Troubleshoot
Follow the selected product’s cure and floor-covering readiness criteria under the actual temperature, humidity, thickness, and substrate conditions.
Once the repair has cured as specified, inspect it for:
- Cracks
- Ridges between batches
- Proud edges
- Pinholes or voids
- Soft or powdery areas
- Visible separation
- Hollow-sounding areas
- Leakage damage below
- Movement under load
- Remaining high and low spots
Correct remaining high areas only by a method permitted for the cured product. Remove the resulting dust before installing flooring or another layer.
Repeat the original measurement grid:
- Use the same straightedge.
- Place it at the same reference points.
- Match the original orientation.
- Measure gaps using the same method.
- Compare the results with the exact finish-floor tolerance.
- Record any areas that still fail.
Complete the moisture test required by the entire flooring system. A cured patch does not prove that the underlying wood or concrete satisfies the flooring and adhesive limits.
Do not cover a repair that is cracked, loose, visibly debonded, moving, soft, or persistently outside tolerance. Consult the repair-material manufacturer or a qualified installer about removal, renewed preparation, or reapplication.
Before installation, every answer below should be yes:
- Structurally sound: No unresolved framing, panel, slab, or foundation movement
- Dry: Required moisture testing has passed
- Clean: Dust and incompatible contaminants are gone
- Compatible: Every layer is approved for the substrate and flooring method
- Cured: Product-specific readiness requirements have been met
- Bonded: No loose, soft, or visibly separated repair remains
- Within tolerance: The original measurement grid now passes
- Height-resolved: Doors, transitions, appliances, drains, and stairs have been addressed
Frequently Asked Questions
Does a subfloor need to be level or just flat?
Usually, the finish-floor requirement is primarily about flatness: the absence of unacceptable localized humps and depressions across a specified span. The entire floor does not necessarily need to be horizontally level.
A consistently sloped but flat floor is different from a sharp ridge, dip, or moving panel. The exact allowable variation must come from the selected flooring manufacturer rather than a universal rule.
Can self-leveling compound be poured over plywood or OSB?
Sometimes. The specific product must explicitly approve the plywood or OSB assembly. Its instructions control panel type and thickness, structural stiffness, primer, joint treatment, reinforcement, placement depth, mixing, and cure requirements.
The panels must be firm, dry, adequately supported, and free of weak or water-damaged areas. Self-leveling compound cannot stabilize deficient framing or a flexing subfloor.
Can you nail hardwood through self-leveling compound?
Only when the leveling product and flooring assembly expressly permit nail or staple penetration. Do not assume that an ordinary cementitious leveler can accept flooring fasteners without affecting the repair or fastening system.
If the technical data does not clearly approve the application, obtain written guidance or select a manufacturer-approved alternative.
Can plywood underlayment fix an uneven subfloor?
Plywood underlayment can create a new flooring surface, cover minor imperfections, or add height, but it does not automatically correct a meaningful depression. Thin panels may follow the existing contour or perform poorly over unsupported areas.
Repair rot, movement, framing defects, and major low areas first. Verify the required layer order as well: some underlayment manufacturers direct users to place an approved self-leveler beneath their panels rather than on top.
When should I stop leveling and call a professional?
Stop when you find active moisture, widespread rot, soft panels, recurring movement, substantial sagging, major or changing slab cracks, apparent settlement, excessive deflection, or suspected framing or foundation failure.
Qualified evaluation is also appropriate when a defect returns after repair, spans several framing members, changes under load, or cannot be reconciled with the flooring and leveling-product instructions. Those conditions may involve more than surface flattening.
The Diagnosis-First Rule
Do not pour over uncertainty. Verify the flooring specification, distinguish flatness from level, and repair moisture, damage, or movement before selecting a surface treatment.
Use only a method approved for the substrate and complete installation system. Account for the added height at doors, transitions, appliances, drains, and stairs. Install the finish floor only after the repair has cured and passed the same measurement grid used at the start.