
Choose the Right Plastic for the Moisture Path—not Just the Mil Thickness
For certain floating laminate, luxury vinyl plank and engineered-wood installations over concrete, 6-mil polyethylene is a common manufacturer-recommended option.
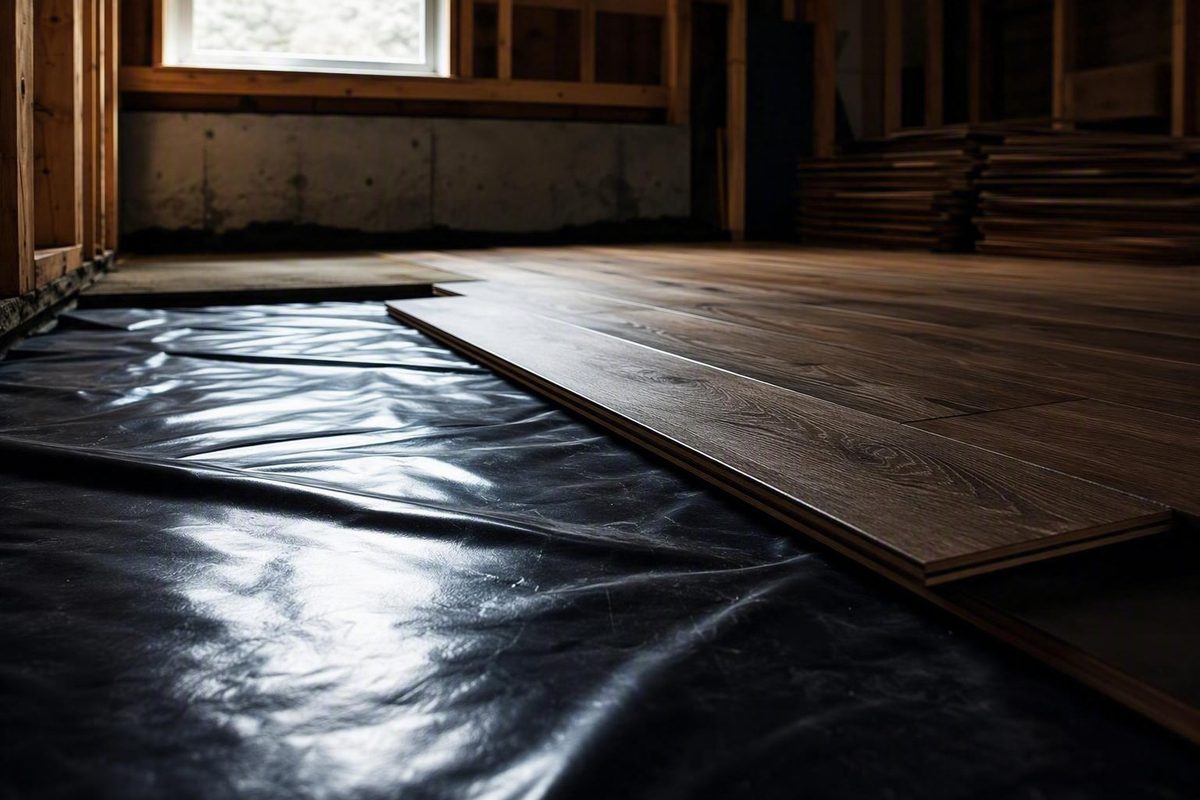
A plastic moisture barrier may be a simple sheet beneath a floating floor, a durable ground cover in a crawl space, or one component of a purpose-built slab or foundation system. Those uses may look similar on a shopping page, but they impose very different demands on the material.
The right choice begins with diagnosis. Determine whether the problem is water-vapor diffusion, moisture carried through air leaks, capillary movement, or bulk water from plumbing, drainage, groundwater, or flooding. Then identify where the sheet will sit, how the assembly needs to dry, how much physical abuse the material will face, and what the flooring or membrane manufacturer requires.
Only after answering those questions should you compare permeance, construction, thickness, reinforcement, roll size, accessories, and installed cost.
What a plastic moisture barrier can—and cannot—control
A plastic moisture barrier is a low-permeability sheet used to limit water-vapor movement through an assembly. Polyethylene is common, but plastic membranes vary in composition, permeance, strength, reinforcement, and approved use.
Terminology alone is unreliable. Manufacturers and sellers may use moisture barrier, vapor barrier, and vapor retarder interchangeably, while other sources distinguish them by permeability or by whether the product manages vapor or liquid water. Product documentation is more useful than the front-label description. Look for a reported permeance, a named test method, an intended application, and clearly stated limitations.
A vapor-control sheet principally addresses diffusion: water vapor moving through a material because of vapor-pressure differences. It does not necessarily control the other ways moisture enters a floor, wall, or foundation:
- Air leakage: Humid air travels through cracks, joints, penetrations, and unsealed transitions.
- Capillary movement: Liquid moisture moves through porous soil, masonry, or concrete.
- Bulk-water leakage: Rain, plumbing leaks, failed flashing, or overflowing gutters introduce liquid water.
- Groundwater and flooding: Water enters from saturated soil or rising water levels.
- Hydrostatic pressure: Water pressure acts against below-grade construction.
These pathways require different control layers. An air barrier limits air movement. Grading and drainage direct bulk water away. Dampproofing is intended for conditions without hydrostatic pressure, while waterproofing is designed for more demanding liquid-water exposure. Polyguard’s terminology guide similarly distinguishes vapor diffusion from bulk-water management and presents polyethylene as vapor control rather than a universal water solution (Polyguard’s vapor and moisture barrier comparison).
Plastic therefore does not:
- Repair a plumbing, roof, window, or foundation leak
- Correct poor grading, clogged gutters, or failed perimeter drainage
- Eliminate standing water, flooding, or groundwater pressure
- Kill mold already growing on wood or other materials
- Restore rotted or structurally weakened framing
- Automatically create a radon-control system
- Replace air sealing in a wall or floor assembly
A sheet may conceal evidence of a problem without correcting its source. If water is visibly entering, diagnose and address that condition before covering the area.
The governing rule is simple: identify the moisture source and the assembly before comparing thickness or price.
Choose by application, permeance, and exposure—not thickness alone
Start product selection with five questions:
- Where will the sheet go? Beneath protected floating flooring, over crawl-space soil, below a new slab, inside a framed wall, or outside a foundation?
- What moisture pathway must it control? Vapor diffusion, capillary moisture, air-carried moisture, or liquid water?
- Must the assembly dry in a particular direction? A low-permeability sheet may help on one side while preventing needed drying toward that same side.
- What physical exposure will it face? Consider sharp aggregate, construction traffic, service access, tools, fasteners, reinforcement, and backfill.
- What do the connected systems require? Flooring, adhesive, underlayment, membrane, project specifications, and locally adopted requirements may impose compatibility or performance conditions.
Permeance and thickness measure different things
Permeance reports how readily water vapor passes through a material under stated test conditions. Lower permeance means less vapor transmission.
Polyguard describes materials rated at 0.1 perm or less as Class I under the ASTM E96 framework it cites and lists polyethylene sheets as an example. That is a manufacturer’s summary, not a substitute for the current standard, applicable code text, or a test report for the exact product. Verify the test method, conditions, product documentation, and locally applicable requirements.
Thickness, usually stated in mils, is a physical dimension. A thicker sheet generally provides more material to withstand handling and puncture exposure, but thickness alone does not establish:
- A particular perm rating
- Resistance to liquid water under pressure
- Compliance with a standard or project specification
- Suitability for permanent soil contact
- Compatibility with flooring or adhesive
- Long-term service life
Application comparison
| Application | Primary moisture pathway | Documentation to seek | Typical physical exposure | Installation priorities | Major limitations |
|---|---|---|---|---|---|
| Protected flooring over existing concrete | Vapor moving upward through the slab | Flooring instructions, approved underlayment or membrane, required slab test and limit, reported permeance, approved tape | Usually low after flooring is installed, but vulnerable during layout | Clean slab, continuous coverage, approved seams, sealed penetrations, correct perimeter detail | Does not correct active leakage, flooding, or an incompatible flooring system |
| Crawl-space ground cover | Vapor and capillary moisture originating in soil | Approval for crawl-space and soil-contact use, permeance, strength data, seam and wall accessories | Foot traffic, tools, piers, stones, debris, service work | Broad sheets, few seams, sealed joints, detailed piers and perimeter transitions | Ground coverage alone is not full encapsulation and does not stop groundwater |
| New below-slab construction | Soil vapor and capillary moisture beneath concrete | Named test methods, reported permeance, physical-strength results, project standard, approved accessories | Aggregate, reinforcement, boots, tools, concrete placement | Prepared base, minimized seams, protected penetrations, repaired damage, inspection before placement | Generic film may lack the strength or documentation required for construction conditions |
| Framed walls | Vapor diffusion through the enclosure | Assembly-specific design, vapor class, locally adopted provisions, compatibility with other layers | Usually protected after enclosure but vulnerable during construction | Correct placement, continuity where required, preserved drying path, separate air sealing | Incorrect placement can restrict drying; no universal interior-or-exterior rule applies |
| Exterior foundation work | Bulk water, soil moisture, and potentially groundwater | Waterproofing or water-management intent, substrate requirements, drainage details, seam system, termination and backfill instructions | Trenching, corners, irregular masonry, backfill, roots, and stones | Drainage integration, few seams, sound terminations, compatible transitions | Generic polyethylene does not solve hydrostatic pressure or failed drainage |
Market examples vary sharply by application. Certain flooring films are sold at 6 mil, one crawl-space seller promotes a 12-mil product, concrete-membrane sellers list products from 10 to 20 mil, and exterior HDPE products may start at 30 mil. These figures illustrate different product categories, not a universal progression from “adequate” to “best.”
Reinforced film can be worth considering where installation creates tearing or puncture stress. Scrim or another reinforcement may improve mechanical behavior, but reinforcement does not independently prove low vapor permeance, waterproofing performance, or compliance with a project requirement.
Do not substitute lightweight painting, greenhouse, landscaping, or temporary-containment plastic merely because it is labeled “heavy duty” or “waterproof.” A general-purpose 3-mil marketplace sheet, for example, may be advertised for construction, painting, landscaping, and DIY coverage without providing permeance data, permanent soil-contact approval, or construction-standard documentation (example of broadly marketed general-purpose sheeting). Use such film as a permanent membrane only if its technical documentation expressly approves the intended conditions.
Plastic beneath finished flooring over concrete
Flooring advertised as waterproof commonly addresses spills and surface water from above. That does not automatically protect its underside from vapor moving through concrete. Whether an additional barrier is appropriate depends on the slab, flooring construction, installation method, underlayment, adhesive, and manufacturer’s moisture limits.
Six-mil polyethylene is a common manufacturer-recommended option for certain floating laminate, luxury vinyl plank, and engineered-wood installations over concrete. MP Global, for example, describes a 6-mil film for those flooring categories and directs installers to follow the flooring manufacturer’s instructions (manufacturer guidance for 6-mil film over concrete). That is product guidance, not a rule for every floor.
Before adding plastic, confirm:
- Whether a separate barrier is required, optional, integrated, or prohibited
- Whether the floor is floating, glued, or mechanically fastened
- Which slab moisture test the manufacturer requires
- The applicable acceptance limit for that system
- Whether the underlayment already provides vapor resistance
- Which tapes and seam details are approved
- Whether added layers affect warranty coverage
Three broad moisture-control options
1. Separate polyethylene beneath a floating system
This is often the simplest configuration when the flooring manufacturer expressly approves it. The film is installed continuously over the prepared slab, seams are joined by the specified method, and penetrations and edges are detailed before the floating floor is placed. Loose polyethylene is not automatically suitable beneath glue-down flooring.
2. Underlayment with integrated vapor resistance
Some underlayments combine cushioning or acoustic functions with a vapor-resistant layer. This can reduce the number of separate materials, but only if the underlayment is approved for the flooring, slab, and documented moisture conditions.
3. Liquid-applied membrane
Some liquid moisture-control products use epoxy- or urethane-based formulations that cure into a continuous membrane. Chemistry, application rate, permitted slab conditions, cure state, and compatibility vary by product. Manufacturer guidance generally calls for substrate cleaning and testing, uniform application, the specified curing period, and inspection for gaps or pinholes before flooring is installed (Junckers’ liquid-barrier application overview).
More layers are not necessarily better. Combining separate polyethylene with vapor-resistant underlayment may create an unapproved configuration or place moisture-sensitive material between two low-permeability layers. Retailer guidance also warns that an unnecessary or incorrectly installed barrier may interfere with the system’s moisture-management design or affect warranty coverage; those consequences must be confirmed against the exact flooring documentation (discussion of barriers beneath waterproof flooring).
Pre-installation workflow
- Inspect the slab and room. Look for visible dampness, staining, active leakage, efflorescence, cracks, or water entering at the perimeter.
- Resolve active water. Do not treat loose polyethylene as a repair for leakage, drainage defects, or flooding.
- Test the slab. Use the method and acceptance criteria required by the selected flooring, adhesive, underlayment, or membrane.
- Clean the surface. Remove dust, grit, fasteners, dried compound, and sharp debris that could puncture the film or prevent flat installation.
- Repair as specified. Fill significant holes, gaps, or breaks where the selected system requires it.
- Confirm the entire assembly. Verify the barrier, underlayment, flooring, adhesive if applicable, tape, wall detail, penetrations, and transitions.
- Plan sheet direction. Choose an orientation that reduces joints and awkward cuts.
During installation, provide continuous coverage. Join adjacent sheets using the product-approved tape, attached sealing edge, adhesive, or other specified method. Detail pipes and columns without leaving open cuts, follow the required wall turn-up or perimeter termination, and inspect for punctures before the flooring hides the membrane.
Some manufacturer guidance mentions overlaps of about six inches and short wall extensions, but those dimensions are not universal. A membrane with self-sealing edges may use a different joint from plain polyethylene. The selected flooring and barrier instructions must determine the actual overlap, wall extension, trimming, and sealing method.
Crawl-space ground cover versus full encapsulation
Covering exposed soil can reduce the amount of ground vapor entering a crawl space. It is still only one part of moisture management.
Before installing plastic, look for standing water, wet foundation walls, plumbing leaks, failed gutters, downspouts discharging near the building, low exterior grades, blocked drains, and saturated soil. Ground plastic does not correct those sources.
Ground coverage and encapsulation are not the same
Basic ground coverage places a vapor-control sheet over exposed soil. The work focuses on field coverage, seams, piers, penetrations, and perimeter edges.
Full encapsulation is a more complete system. In addition to covering the soil, it addresses foundation walls, perimeter transitions, piers, seams, penetrations, terminations, and related environmental controls. The appropriate approach depends on the crawl-space design, water conditions, climate, equipment, and applicable requirements.
One crawl-space seller recommends its 12-mil polyethylene as a balance among flexibility, durability, installation ease, and cost. The same seller describes complete encapsulation as covering both the crawl-space floor and foundation walls. Its instructions contain differing seam guidance—one passage specifies a 6-inch overlap, while another gives an approximate range of 6 to 12 inches—showing why current product instructions must control (12-mil crawl-space product and seller guidance). These are vendor recommendations, not proof that 12 mil or either overlap dimension is optimum for every crawl space.
Preparation sequence
- Diagnose the water source. Determine whether the problem is ground vapor, surface drainage, plumbing leakage, groundwater, or a combination.
- Remove sharp debris. Clear stones, scrap metal, nails, broken masonry, and other puncture hazards.
- Inspect any existing sheet. Note trapped water, dirt, deterioration, open seams, poor placement, and possible interference with the new system.
- Measure the floor and walls involved. Include piers, irregular edges, specified overlaps, vertical coverage, and waste.
- Plan roll orientation. Use broad sheets and arrange them to reduce the number of joints.
- Gather compatible accessories. Include the seam tape, wall adhesive or tape, fasteners, termination materials, and repair patches specified by the system.
All required overlaps must be sealed. Overlap alone does not make the system continuous.
Thicker crawl-space film may tolerate routine service access better than lightweight plastic, but no ordinary sheet is puncture-proof. Do not drag tools, ducts, blocks, or sharp equipment across it. Use temporary protection where repeated work is expected, then inspect and patch the membrane afterward.
Plastic also does not kill existing mold. Mold growth, soft wood, widespread decay, or unsafe crawl-space conditions require separate assessment and corrective work. Where floor distortion accompanies dampness, diagnose moisture and wood condition before concealing the area; crawl-space repair guidance likewise begins with checking for moisture and rot before structural intervention (diagnosing a sagging floor over a crawl space).
There is no sound universal rule that every old barrier must remain or every old barrier must be removed. Inspect whether it is clean, intact, correctly placed, free of trapped water, and compatible with the proposed system. Then follow the new membrane manufacturer’s instructions and the actual site conditions.
Below-slab and exterior-foundation applications need purpose-built systems
For new below-slab work, seek purpose-built documentation identifying:
- Material composition and thickness
- Reported permeance and test method
- Tensile, puncture, or other relevant physical-strength results
- Approved seam tape, boots, patches, and penetration details
- Subgrade preparation requirements
- Suitability for contact with the specified materials
- Installation and inspection requirements
- Current standard or project-specification documentation
ASTM E1745 is commonly cited in concrete vapor-barrier marketing, but the supplied seller guidance does not provide the underlying standard or supporting test reports. Treat a compliance badge as an assertion to verify, not proof. Confirm the exact product, current standard edition, reported class or result, and project specification.
Concrete-focused sellers offer products in 10-, 15-, and 20-mil versions, illustrating the range within that market category (examples of concrete vapor-barrier thicknesses). Those dimensions do not prove that one thickness is required or that every product of the same thickness has equal permeance, strength, or standards documentation.
Exterior foundations present a different problem
Vapor control beneath concrete is not the same as exterior foundation waterproofing or water management. A wall exposed to recurring leakage may require coordinated grading, gutters, drainage, crack treatment, a suitable membrane, protection material, footing drains, and a reliable discharge arrangement. The correct system depends on where the water originates and whether water pressure is present.
Simply placing generic plastic beside a foundation does not correct groundwater, poor drainage, failed grading, or hydrostatic pressure.
Thick HDPE foundation products illustrate how different this category is from flooring film. One seller offers HDPE in thicknesses beginning at 30 mil and describes limitations involving bends, wall height, trench placement, seam tape, and adhesive. It identifies seams as the weakest and most leak-prone locations and specifies a four-foot overlap for that particular product (exterior HDPE product and installation details). That unusually large overlap is product-specific and must not be transferred to flooring film, crawl-space polyethylene, or another foundation membrane.
Minimizing seams is especially important below grade because joints may become inaccessible after backfilling or concrete placement. Corners, utility entries, elevation changes, terminations, and connections to drainage components deserve as much planning as the field membrane.
Seek qualified drainage or waterproofing assessment for recurring foundation leakage, standing water, persistent efflorescence, foundation damage, or suspected hydrostatic pressure. Covering the symptom without resolving the water path can make later diagnosis more difficult.
Why plastic placement in walls is climate- and assembly-sensitive
There is no universal rule that polyethylene belongs on the inside or outside of every framed wall. Safe placement depends on climate, indoor humidity, seasonal operation, air conditioning, insulation, cladding, air leakage, and the direction in which the wall is intended to dry.
In a hot-humid, air-conditioned building, humid exterior air can enter a wall cavity and encounter a cool interior polyethylene layer. The low-permeability sheet can also restrict inward drying. If moisture enters through leakage, construction moisture, or rain penetration, the assembly may remain wet longer.
Cold-weather conditions create a different concern. Indoor moisture entering a wall can reach cold exterior sheathing, while a low-permeability exterior layer may restrict outward drying. Whether interior vapor control is appropriate still depends on the complete wall rather than winter temperature alone.
A vapor barrier slows diffusion, but it does not seal every air leak. Air sealing around plates, electrical and plumbing penetrations, window openings, and transitions remains a separate priority. Bulk-water management through roofing, flashing, cladding, and drainage planes is separate again.
Low-permeability layers on both sides of a wall can reduce its ability to dry after a leak, seasonal condensation, or enclosure of damp construction materials. That does not mean every assembly with two resistant layers will fail; it means drying potential must be evaluated rather than assumed. Energy Vanguard’s wall analysis explains why interior and exterior polyethylene can create different seasonal risks and why vapor control cannot replace air sealing (analysis of polyethylene in wall assemblies).
Do not adopt a wall-poly recommendation solely because a climate is described as “cold,” “mixed,” or “humid.” Obtain assembly-specific guidance and verify locally adopted provisions. Details used under flooring or over crawl-space soil should never be copied automatically into framed walls.
Installation checklist: continuity matters more than the label
Even an appropriate membrane performs as a system, not as a loose collection of sheets. Its effectiveness depends on substrate preparation, joint design, perimeter transitions, penetration details, compatible accessories, and protection from later damage.
Plan before opening the roll
- Diagnose the moisture source.
- Confirm that the membrane is approved for the substrate and assembly.
- Review the flooring, adhesive, underlayment, membrane, and project instructions together.
- Measure the nominal area.
- Add material for specified overlaps, perimeter extensions, walls, piers, and irregular details.
- Orient sheets to minimize joints.
- Identify pipes, drains, columns, corners, doorways, wall transitions, and terminations.
- Plan how later work will avoid damaging the completed membrane.
Prepare the substrate
For slabs and subfloors:
- Complete required moisture testing before covering the surface.
- Sweep or vacuum dust and loose particles.
- Remove sharp debris, fasteners, dried adhesive, and protrusions.
- Repair significant holes, gaps, or breaks as the selected system directs.
- Let repairs or coatings reach the condition required by their instructions.
For crawl spaces and soil-contact work:
- Inspect for standing water and active leakage.
- Remove sharp rocks and construction debris.
- Level isolated hazards where the system permits.
- Lay out broad sheets before making difficult cuts.
- Move tools carefully and protect completed areas from traffic.
- Plan separate, sealable details around piers and penetrations.
Use compatible seam materials
Do not assume ordinary household tape is suitable.
Use the product’s specified tape, adhesive, mastic, fastener, patch, and termination method. Systems differ substantially. One 6-mil flooring product, for example, uses attached self-sealing tape to join adjacent sheets, while other applications require taped overlaps or specialized seam assemblies (CALI Floors’ self-sealing flooring membrane).
Inspect every continuity point
Pay particular attention to:
- Field seams
- Inside and outside corners
- Pipes and conduits
- Columns and crawl-space piers
- Drains and cleanouts
- Wall-to-floor transitions
- Doorways and elevation changes
- Perimeter terminations
- Fastener locations
- Cuts around obstacles
- Accidental punctures
- Patches over damaged areas
Conduct a final inspection before flooring, concrete, backfill, or another trade hides the membrane. Inspect again if workers or equipment cross it.
Calculate installed cost, not roll price
A realistic purchasing calculation includes:
- Nominal floor or wall area
- Overlap waste
- Perimeter and wall coverage
- Irregular cuts
- Extra material for patches
- Approved tape and adhesive
- Mastic or sealant
- Fasteners and termination bars where required
- Cleaning and preparation supplies
- Protective materials for construction traffic
- Labor for detailing and inspection
Roll width, documented performance, and system completeness may matter more than price per square foot.
How to verify a product claim—and when to call a professional
A product page may make a membrane sound suitable for nearly every application. Before buying, convert its marketing language into verifiable questions.
Product claim-verification checklist
Confirm each of the following:
- Intended application: Is the product expressly approved for flooring, crawl spaces, below-slab work, walls, exterior foundations, or the exact proposed use?
- Material construction: Is it polyethylene, HDPE, reinforced film, or a multilayer membrane?
- Thickness: Is the stated thickness nominal, minimum, or otherwise defined?
- Permeance: Is a value reported for the exact product?
- Test method: Does the documentation identify the method and test conditions?
- Technical data: Is there a current data sheet for the exact product?
- Standards: Is claimed compliance supported by current documentation and test results rather than a category-page badge?
- Soil-contact suitability: Is permanent ground contact expressly approved where relevant?
- Accessories: Which tapes, adhesives, mastics, fasteners, and patches are approved?
- Installation limits: Are there temperature, substrate, traffic, bend, wall-height, exposure, or curing restrictions?
- System compatibility: Is the membrane approved with the selected flooring, underlayment, adhesive, insulation, or waterproofing components?
- Warranty exclusions: Could slab moisture, unapproved tape, an added underlayment, active water, or the installation method affect coverage?
Terms such as “waterproof,” “heavy duty,” “lifetime,” and “industry standard” do not establish field performance on their own.
Seller pages may also contain conflicting dimensions, overlap instructions, availability, or suitability claims. Resolve discrepancies through current manufacturer data sheets and written installation instructions before ordering. If compatibility affects a flooring warranty, obtain clarification from the responsible manufacturer rather than relying on a retailer’s general statement.
Customer ratings can reveal difficult handling, damaged packaging, or confusing instructions. They cannot establish permeance, code compliance, puncture resistance, service life, or suitability for another assembly. A small review sample is particularly weak technical evidence.
Conditions that call for professional assessment
Bring in appropriate expertise when the project involves:
- Active foundation leakage
- Flooding, groundwater, or suspected hydrostatic pressure
- Persistent standing water or major drainage failure
- Widespread mold, decay, or soft structural wood
- Foundation cracking, movement, or widespread floor distortion
- A radon-control objective rather than ground-vapor control alone
- A climate-sensitive wall assembly
- Uncertain locally adopted requirements
- A below-slab system governed by a project specification
- Unresolved slab moisture tests or flooring-warranty conditions
- Complex exterior waterproofing and drainage transitions
For structural floor symptoms above a damp crawl space, diagnose the water source and wood condition before concealing the area. Widespread rot, foundation cracking, or movement calls for qualified structural assessment rather than a membrane-only response.
Frequently asked questions
Is 6-mil plastic thick enough beneath flooring over concrete?
It can be. Six-mil polyethylene is commonly recommended for certain floating laminate, luxury vinyl plank, and engineered-wood floors over concrete. It is not a universal minimum or a guarantee of suitability.
Check the exact flooring and underlayment instructions, required slab test, acceptance limit, installation method, reported permeance, and approved seam details. A glue-down system, severe moisture condition, or incompatible underlayment may require a different solution.
What perm rating should a plastic moisture barrier have?
There is no single rating for every use. Lower permeance means less water vapor passes through the material, but the appropriate value depends on the assembly and applicable requirements.
Polyguard’s summary identifies 0.1 perm or less as the Class I threshold under the ASTM E96 framework it cites (manufacturer overview of vapor-barrier classifications). Verify the current framework, product test report, test conditions, and locally applicable requirements rather than assuming a sheet qualifies because it is polyethylene.
Can a plastic moisture barrier trap moisture?
Yes. A low-permeability sheet can restrict drying if installed on the wrong side of an assembly or paired with another resistant layer. The risk depends on climate, indoor humidity, seasonal operation, air leakage, construction moisture, and the materials on both sides.
This is especially important in framed walls and flooring systems with vapor-resistant underlayment. Confirm the intended drying direction and manufacturer-approved assembly before adding plastic.
Does crawl-space plastic kill mold or stop groundwater?
No. Ground plastic can reduce water-vapor entry from exposed soil, but it does not kill existing mold or stop groundwater, flooding, plumbing leaks, failed grading, or hydrostatic pressure.
Those conditions require separate diagnosis and corrective work. Mold, damaged wood, or unsafe access conditions may also require qualified assessment before the area is covered.
How much should plastic moisture-barrier seams overlap?
Use the dimension specified for the selected membrane and application. Instructions vary among flooring films, crawl-space membranes, below-slab products, and exterior HDPE systems.
Do not transfer an overlap dimension from one product category to another. The overlap must also be joined with the approved tape, adhesive, sealing edge, or seam assembly; overlap without a compatible seal does not create a continuous system.
The final selection rule is straightforward: first identify whether the problem is vapor diffusion, air leakage, capillary moisture, or bulk water. Then match the membrane to the specific floor, crawl space, slab, wall, or foundation assembly. Verify permeance, intended use, compatible accessories, flooring requirements, and locally applicable rules before installation.
A carefully documented, continuously sealed system is more defensible than plastic chosen by thickness or marketing language alone. Active water, mold, structural deterioration, radon objectives, and climate-sensitive walls require separate diagnosis and, where appropriate, qualified expertise.