
Is a Buff and Coat Enough? Diagnose the Finish Before Touching the Floor
Bare or gray wood, moisture distortion, unresolved contamination, or an unidentified finish may trap defects beneath clear finish or prevent adhesion.
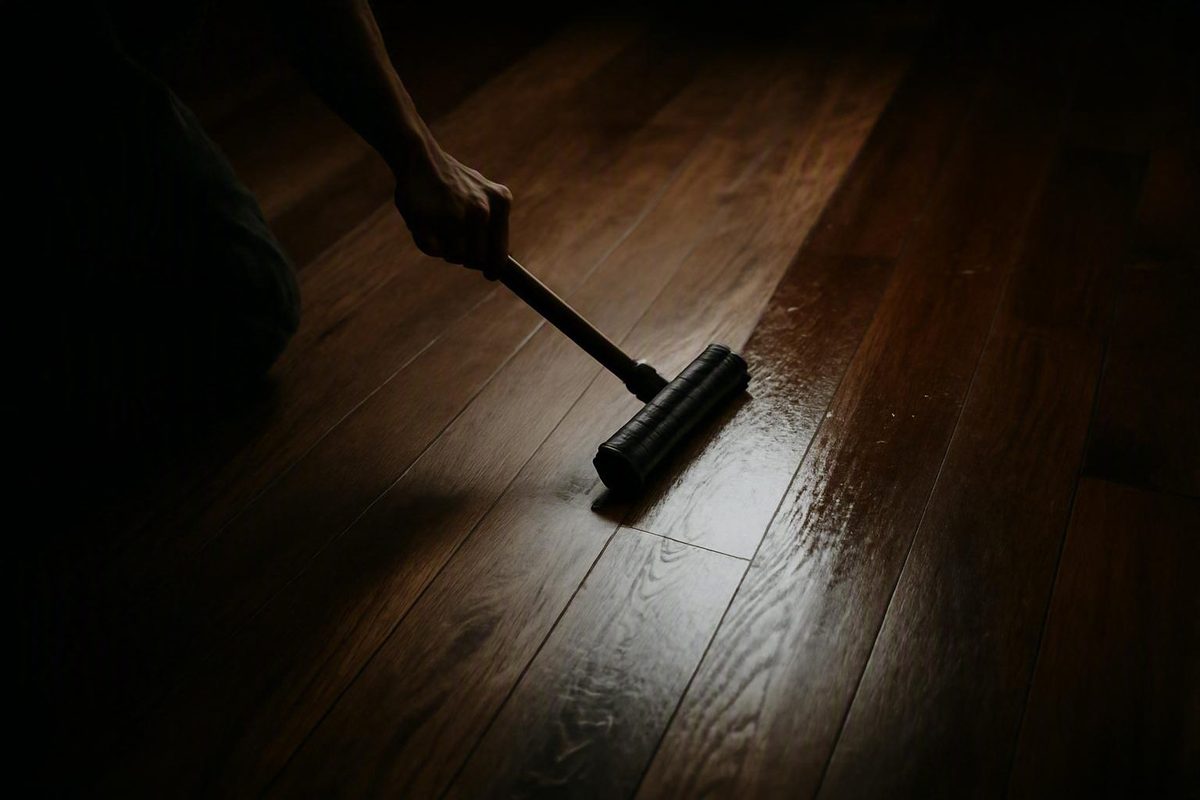
A dull hardwood floor does not automatically need sanding. It also does not automatically qualify for a quick coat of polyurethane. The deciding issue is whether wear remains within a sound, compatible finish or has reached the stain, wood, or floor structure.
When the existing coating is intact, a screen and recoat can renew protection without intentionally removing wood. When bare or gray wood is showing, moisture has distorted the boards, contamination remains unresolved, or the finish cannot be identified, the same procedure may preserve defects beneath clear finish or fail to adhere.
The practical rule is simple: diagnose first, then choose among recoating, full refinishing, repair, moisture correction, or specialist testing.
What a screen and recoat actually does
A screen and recoat, screen and coat, or buff and coat is a finish-maintenance process. The existing coating is cleaned, lightly abraded, and covered with a compatible new topcoat. The word screen refers to the mesh abrasive commonly driven by a floor buffer; buff and coat refers to the machine action followed by coating.
The abrasive does not polish the floor smooth. It creates microscopic scratches that give the next coating a textured surface to grip. Because a screen distributes abrasive across an open mesh, it generally cuts less aggressively than ordinary sandpaper with the same nominal grit. Proper screening should remove only a small fraction of the existing finish—not expose the stain or wood beneath it. Pete’s Hardwood Floors provides a useful explanation of screening as a light adhesion treatment.
Think of the finish as a sacrificial protective layer. Foot traffic, grit, chair movement, pets, and routine cleaning gradually scratch and thin that layer. A timely recoat restores coating protection before traffic reaches the wood. It is condition-based preventive maintenance, not a cure for wood that is already damaged.
Screening and full sanding are fundamentally different operations:
- Screening works within the coating. It deglosses and textures the existing finish without intentionally reaching bare wood.
- Full refinishing removes the coating and reaches bare wood. It also removes a thin amount of wood so the surface can be corrected, restained, and refinished.
- Screening preserves the existing stain color. The new topcoat may change sheen or perceived warmth, but the stain remains in place.
- Full refinishing creates broader corrective options. It can address uneven stain wear and many wood-level scratches, although deep gouges and penetrating stains may still require board repair.
Service names are not standardized. Providers may advertise resurfacing, sandless refinishing, gentle sanding, or light sanding for processes ranging from cleaning and chemical preparation to actual wood removal. Do not select a service by its label. Ask:
- Will the operation abrade only the finish, or will it reach bare wood?
- How will the existing finish be identified?
- How will wax, polish, silicone, oil soap, and restorer residue be addressed?
- What exact coating will be applied?
- How will adhesion be checked before the entire floor is coated?
A successful recoat can improve uniformity, renew sheen, and add a fresh protective film. It cannot rebuild a dented board, flatten a cupped floor, remove a pet stain embedded in the wood, or erase a deep scratch.
The eligibility test: recoat, refinish, repair, or stop
Do not judge eligibility by age alone. A relatively new floor can be disqualified by wax contamination or a leak, while an older floor with an intact, compatible coating may remain a reasonable recoat candidate.
Start under bright, low-angle light. Inspect traffic lanes, exterior-door approaches, kitchens, desk-chair areas, pet routes, and transitions between rooms. Then classify the symptoms.
| What you observe | Likely route | Why |
|---|---|---|
| Uniform dullness, ordinary scuffs, micro-scratches, and shallow marks confined to an intact coating | Likely recoat candidate | The protective film may still be continuous and able to accept a compatible topcoat after proper preparation |
| Exposed wood, gray traffic lanes, uneven stain loss, deep scratches, widespread peeling, dents, penetrating stains, or a desired stain-color change | Likely full-refinish candidate | The problem extends below the surface coating or requires access to bare wood |
| Cupping, crowning, warping, active leakage, loose boards, movement, or extensive damaged-board replacement | Repair or moisture diagnosis first | A cosmetic coating will not correct the underlying defect and may complicate later repairs |
| Unknown finish, uncertain cleaning history, wax or polish use, factory-applied coating, textured surface, or mixed coating systems | Professional compatibility testing required | Adhesion cannot be assumed from appearance or abrasion alone |
Favorable signs
A plausible candidate is flat, sound, and free of exposed wood. Its finish may look tired, hazy, or uniformly dull, but the protective film remains continuous. Scuffs and fine scratches appear to lie in the coating rather than cutting into the wood.
Some superficial marks may become less prominent during preparation and recoating. Do not, however, make scratch removal the basis of the project. The safer expectation is that recoating renews protection and may reduce the visibility of finish-level wear.
Signs that favor full refinishing
Full sanding deserves consideration when you find:
- Bare wood in traffic lanes or beneath worn finish
- Gray or darkened wood where the coating has failed
- Uneven stain wear
- Deep scratches extending through the finish
- Dents, gouges, or widespread damage
- Peeling or broadly poorly bonded coatings
- Pet, water, or other stains that have penetrated the wood
- A need to change the underlying stain color
Even full sanding has limits. Deep gouges may extend below a practical sanding depth, and some pet or water stains penetrate too far to remove without excessive material loss. Board repair, selective replacement, or acceptance of residual discoloration may be necessary. A-MAX Hardwood Flooring similarly notes that deep gouges and some pet stains can remain after full sanding.
Conditions that must be diagnosed first
Cupping means the edges of a plank are higher than its center. Crowning means the center is higher than its edges. Warping is a broader distortion that may include twisting or bending. These conditions can indicate unresolved moisture or another installation or structural problem. Benjamin Moore’s professional guide likewise routes bare wood, uneven stain wear, cupping, crowning, and water or pet staining toward a more involved assessment and provides the same definitions of cupping and crowning.
Do not abrade a deformed floor merely to make it appear flatter. Identify and correct the underlying cause, allow the floor to stabilize as appropriate, and then determine whether it needs repair, sanding, replacement, or no further intervention.
Loose boards, protruding fasteners, extensive patches, and unstable repairs also belong ahead of coating. Finish is not a structural repair.
Useful clues that are not definitive tests
Homeowners often try three quick checks:
- Observing whether a small water drop beads or darkens the wood
- Comparing the color of a scratch with the surrounding floor
- Checking whether a fingernail catches in the scratch
These observations can provide clues. Rapid darkening may suggest a compromised finish, while a pronounced catch may indicate that a scratch extends below the topcoat. None of them establishes coating chemistry, contamination, bond strength, or recoat eligibility by itself.
Avoid deliberately wetting questionable bare or swollen wood. When the answer is uncertain, a thorough inspection and product-appropriate adhesion check are more useful than a household rule of thumb.
Mixed-condition rooms
Different rooms do not always need identical treatment. A lightly worn bedroom may qualify for recoating while an adjoining kitchen needs full refinishing or board repair.
The drawback is visual continuity. Transitions can reveal differences in sheen, tone, color, or wear. Where mixed treatments are practical, plan boundaries at walls, doorways, or logical board lines. Do not assume that stopping halfway through an open floor plan will be invisible.
Compatibility and contamination: why recoats peel
The central technical risk in a screen and recoat is adhesion failure. Abrasion helps a coating grip, but it cannot make incompatible products compatible or neutralize residue spread across the surface.
A floor may look clean and still contain a thin film of wax, silicone, acrylic polish, oil soap, or floor restorer. When a new finish encounters that residue, it may pull away into fisheyes, crawl instead of wetting the surface, remain poorly bonded, or peel after drying.
Before choosing a coating, reconstruct the floor’s maintenance history as well as possible:
- Was paste wax or a wax-containing cleaner used?
- Was an acrylic polish, “reviver,” or floor restorer applied?
- Were silicone-containing sprays used on or near the floor?
- Was oil soap part of routine cleaning?
- Was a mop treatment intended to leave shine behind?
- Has the floor been spot-coated with an unknown product?
- Is it factory-finished rather than site-finished?
- Has a penetrating oil, shellac, varnish, or another non-polyurethane finish been applied?
OC Flooring identifies wax, silicone polish, acrylic restorers, and some wood-soap residues as possible causes of peeling or fisheyes and recommends an adhesion patch when the maintenance history is uncertain. That is provider guidance rather than a universal test protocol, but it illustrates why contamination must be considered before whole-floor coating.
If the history is unknown, pause. Look for invoices, leftover containers, installation records, manufacturer documentation, or product markings. Contact the flooring manufacturer and proposed coating manufacturer where possible.
A representative test area is sensible, but there is no universal test-patch recipe, cure period, or pass/fail method for every finish. Preparation, application, timing, and evaluation should come from the proposed coating’s current technical data or a qualified flooring professional.
Finish categories are not interchangeable
A cured, conventional, site-applied polyurethane finish is the clearest candidate for ordinary mechanical screening. Other surfaces require more caution:
- Wax: Polyurethane may not bond reliably over wax residue.
- Penetrating oil: Oil-maintained surfaces do not necessarily accept the same preparation or topcoat as film-forming polyurethane.
- Shellac or varnish: Compatibility depends on the exact existing and proposed products.
- Textured or hand-scraped boards: A flat screen may abrade high points while missing recesses.
- Factory-finished boards: Specialized coating layers may not respond like site-applied polyurethane.
- Mixed or repaired surfaces: Different areas may wet, absorb, or bond differently.
Factory-applied aluminum-oxide finishes deserve particular caution. Ordinary screening may not create an adequate bonding profile, so a manufacturer-approved chemical or specialized preparation system may be required. Textured floors and older shellac or varnish coatings can also require specialized treatment.
Some waterborne polyurethane products can be applied over cured oil-based polyurethane. That is not blanket permission. Proceed only when the new product allows the application, the old coating is sufficiently cured and sound, contamination has been removed, the prescribed abrasion is complete, and the specified adhesion check is satisfactory.
Do not improvise a universal cleaning formula. Vinegar, water, paint thinner, commercial tack cloths, and proprietary cleaners appear in different instructions, but they are not interchangeable. Use only preparation materials approved for the selected coating and the contamination actually present.
Screen and recoat versus full sanding and refinishing
Both processes restore a protective coating, but they begin at different depths.
| Factor | Screen and recoat | Full sanding and refinishing |
|---|---|---|
| Material removed | A small fraction of the existing finish | Existing finish plus a thin layer of wood |
| Suitable damage | Dullness, scuffs, micro-scratches, and shallow finish-layer wear | Wood-level scratches, uneven stain wear, broader coating failure, and some staining |
| Ability to flatten | Does not flatten boards | Can improve some surface unevenness after underlying causes are resolved |
| Stain-color change | No substantive stain change; sheen can change | Bare wood can generally be restained |
| Dust and disruption | Usually less than bare-wood sanding, but not dustless | More sanding dust, equipment, and room disruption |
| Project duration | Preparation and coating may be completed in one working day on some suitable projects | Commonly a multiday process |
| Wear-layer consumption | Preserves the wood surface | Consumes some of the finite sandable wood |
| Consequence of error | Poor adhesion may affect the entire coated area | Machine marks, uneven sanding, and excess wood removal can be difficult or impossible to reverse |
Recoating preserves the original wood surface and stain. That is valuable when the color is acceptable and the coating remains intact. It also avoids consuming material that may be needed for future repairs or refinishing.
Full refinishing is the broader reset. Once the floor reaches bare wood, the worker can address uneven stain, many deeper scratches, and some discoloration before applying a new finish system. Sanding is not board reconstruction, however. A deep gouge may require repair, and a penetrating stain may remain after substantial sanding.
Recoating generally creates less dust because it abrades a coating rather than removing finish and wood across the entire floor. It is still not dustless. Field screening, edge work, and hand abrasion create fine debris, while coating application may introduce odor and ventilation requirements.
The available sandable layer matters most during full refinishing. Solid hardwood generally offers more future sanding capacity than engineered or some factory-finished flooring, but broad labels are not enough. Previous sanding, board construction, veneer thickness, and the amount of wood remaining above the tongue all matter. This Old House advises checking the remaining face wood because repeatedly sanded floors may no longer tolerate another full refinish and also distinguishes screening from sanding to bare wood.
A finish-only recoat can be particularly useful on an engineered floor because it does not intentionally consume the veneer. That does not make every engineered floor eligible. Factory coating, texture, bevels, surface damage, manufacturer instructions, and compatibility still control the decision.
Most importantly, floor age is not the dividing line. Condition is. Recoating before wear reaches the wood can preserve the original surface, but it cannot guarantee a fixed service-life extension or eliminate all future sanding.
The process from room preparation to the final coat
A sound workflow moves from diagnosis to controlled preparation—not directly from “dull floor” to rented buffer.
1. Inspect the floor
Map the floor’s condition before moving furniture. Note exposed wood, gray lanes, stains, loose boards, protruding fasteners, repairs, peeling, deformation, and changes between rooms.
Decide which areas appear suitable for finish-only work and which require repair or diagnosis. If the floor is deformed by moisture, stop the cosmetic project.
2. Identify the finish and contamination risks
Determine whether the floor is site-finished polyurethane, waxed, oiled, factory-finished, textured, or unknown. List every cleaner, polish, restorer, and spot-treatment product used on it.
Select a proposed coating only after understanding what is already on the floor. If identification remains uncertain, consult the flooring manufacturer, coating manufacturer, or a flooring specialist.
3. Clear and isolate the work area
Remove furniture, rugs, floor-length curtains, and other obstructions. Move appliances only where appropriate and plan storage before coating begins so heavy items are not placed on an insufficiently cured floor.
Protect adjacent spaces and isolate openings or vents so abrasion dust does not circulate through the house. Inspect for protruding nails, staples, or fasteners that could damage the machine or screen. Establish the ventilation required by the coating instructions and plan a clean route out of the room.
4. Clean and decontaminate before abrasion
Vacuum loose grit first. Then use the cleaning or decontamination process appropriate to the suspected residue and selected finish.
This order matters. Screening a contaminated surface can spread residue into previously cleaner areas rather than remove it. Intensive cleaning therefore belongs before full-floor screening, not merely as a final dust wipe. Naperville Hardwood’s documented workflow similarly places mechanical cleaning and residue removal ahead of screening.
Allow the floor to reach the condition required by the coating system before continuing. Do not leave standing liquid on the wood or assume a generic household cleaner removes wax, silicone, polish, or oil residue.
5. Perform the required compatibility or adhesion check
Prepare and evaluate a representative area according to the proposed finish manufacturer’s instructions or a flooring professional’s documented method. Include questionable traffic lanes or previously treated areas rather than testing only the cleanest corner.
If the test area fisheyes, crawls, remains soft, peels, or otherwise fails the specified evaluation, stop. Do not assume a more aggressive screen will solve a chemical or contamination problem.
6. Abrade the field evenly
Use the abrasive, screen, pad, and equipment specified for the existing finish and proposed topcoat. There is no universal grit. Published procedures vary substantially, so the coating system, floor condition, equipment, and manufacturer’s instructions must control abrasive selection.
Make controlled, overlapping passes and keep the buffer moving. Do not dwell over a stubborn scratch or improvise an increasingly aggressive sequence simply because one defect remains visible.
The objective is a consistent bonding profile—not defect removal at any cost.
7. Detail edges and corners
A floor buffer cannot prepare every area along walls, beneath toe kicks, or inside corners. Treat those locations separately with the approved hand abrasive or small tool.
The perimeter should not remain glossy while the field is dull.
8. Inspect the deglossed surface
After abrasion, the finish should look consistently dulled or deglossed.
Stop if stain or bare wood becomes visible. That changes the job from a routine maintenance recoat to a repair or refinishing decision. Continuing may create a patchwork that clear finish cannot conceal.
9. Remove all dust
Vacuum methodically, including edges, corners, baseboards, sills, and adjacent horizontal surfaces. Dust left above the floor can later fall into the wet coating.
Use only the final cleaning method approved for the selected finish. Some published procedures call for tack cloths, while other specialists warn that certain tack-cloth residues may interfere with adhesion. The product system—not habit—should determine the final method.
10. Apply the compatible coating
Prepare the finish exactly as directed. Do not combine components, cleaners, reducers, or solvents from unrelated systems.
During application:
- Follow the grain where the product or applicator requires it.
- Maintain a wet edge to reduce lap marks.
- Apply thin, even coats at the specified spread rate.
- Keep dust, hair, and fibers out of the wet finish.
- Use the specified applicator.
- Observe the required temperature, humidity, and ventilation ranges.
- Respect minimum and maximum recoat windows.
- Perform intercoat abrasion only when the product requires it.
11. Protect the coating through drying and cure
Prevent premature traffic, pet access, furniture placement, rug replacement, mopping, and spill exposure. Dry-to-touch, ready for another coat, ready for socks, and fully cured are separate milestones.
Post the actual schedule at room entrances so nobody substitutes “probably dry by now” for the selected coating’s technical data.
Choosing the finish, sheen, and number of coats
Finish selection begins with compatibility, not with a generic argument over whether water-based or oil-based polyurethane is “best.”
Waterborne products are commonly associated with a clearer appearance and shorter drying intervals. Oil-based products commonly dry more slowly and can add an amber tone. These are useful starting distinctions, not universal performance rankings. Formulations differ, so the current technical data for the actual product should control.
Do not assume one chemistry is always more durable, safer, lower odor, or faster curing. Those conclusions require product-level comparisons that account for formulation, application, film thickness, site conditions, and maintenance.
A compatible topcoat can change sheen. For example, a floor may move from gloss toward satin or matte. It does not substantively change the underlying stain color because the old stain remains beneath the coating.
Sheen can nevertheless change how the floor is perceived:
- Gloss reflects more light and can emphasize scratches, dust, and surface waviness.
- Lower sheens may make some variation less conspicuous.
- An amber-toned topcoat may make the existing color appear warmer.
- A clearer topcoat may preserve the existing tone more closely.
One finish coat is typical in some maintenance systems, while a second may be used in some high-wear situations. The approved coating system controls coat count; Pete’s Hardwood Floors, for example, describes one coat as typical and a possible second coat for higher-wear settings in its screen-and-recoat procedure.
The same product-specific approach applies to:
- Intercoat abrasion
- Application tool
- Coat thickness and spread rate
- Drying interval
- Maximum recoat window
- Environmental limits
- Return-to-service schedule
Do not assemble an improvised system from an unrelated cleaner, adhesion treatment, and topcoat unless the manufacturers explicitly support that combination. Compatibility should be documented rather than inferred because every container uses the word polyurethane.
Time, access, cost, and realistic project expectations
Treat the schedule as several distinct phases:
- Room preparation and furniture removal
- Initial vacuuming, cleaning, and decontamination
- Compatibility or adhesion assessment
- Abrasion and edge work
- Dust removal
- Coating application
- Initial drying
- Sock traffic
- Normal footwear
- Pet return
- Furniture replacement
- Rug replacement
- Routine cleaning
- Full chemical cure
Some contractors report completing cleaning, abrasion, and coating application in one working day on suitable projects, but that is provider-specific and dependent on size and scope. It does not mean the floor is ready for normal use that evening or fully cured; Naperville Hardwood’s case study, for example, reports a one-day project and sock traffic the following day for its process. Those timing claims apply to that contractor’s workflow, not every floor or finish.
The timeline changes with finish chemistry, coat count, room size, contamination, temperature, humidity, ventilation, and product requirements. Published consumer estimates also vary: Lowe’s gives different recoating durations for water-based and oil-based systems and warns that timing depends on room size, humidity, and other conditions. Its recoating and refinishing estimates can help with preliminary planning, but the selected product’s technical data remains controlling.
Do not infer furniture or rug readiness from a general statement about sock traffic. Use the coating documentation to schedule each return-to-service milestone separately.
What might professional work cost?
Regional contractor pages in the supplied evidence advertise roughly $1 to $3.50 per square foot for recoating and about $3 to $8 or more per square foot for full refinishing. Buff & Coat Virginia publishes those professional recoat and full-refinishing price bands.
These are promotional regional rates, not national averages or guaranteed prices. A headline per-square-foot figure may exclude:
- Furniture or appliance handling
- Intensive decontamination
- Adhesion testing
- Repairs or board replacement
- Additional finish coats
- Stairs, landings, closets, or transitions
- Small-project minimums
- Specialized factory-finish preparation
- Moisture investigation
- Difficult access
- Failed-coating removal
Compare proposals by scope rather than headline price. Each estimate should identify:
- Measured floor area
- Observed floor condition
- Existing-finish identification or assumptions
- Cleaning and decontamination protocol
- Test-area process
- Abrasive and preparation system
- Exact coating product and sheen
- Number of coats
- Dust controls and ventilation requirements
- Access and cure schedule
- Included repairs
- Furniture and rug handling
- Explicit exclusions
- Response if adhesion testing fails
- Written warranty terms and maintenance conditions
Be skeptical of promises that the work is dustless, savings are guaranteed, normal occupancy can resume the same evening, or one coat will extend floor life by a fixed number of years. A realistic proposal separates application completion from cure and identifies conditions that could change the scope.
DIY or professional work—and how to protect the new finish
A screen and recoat can look simpler than full refinishing because it does not use a drum sander. The lower material-removal rate does not eliminate risk.
Use this matrix to decide whether the project fits your experience.
| Project factor | More reasonable for experienced DIY | Stronger case for a professional |
|---|---|---|
| Buffer experience | Comfortable controlling a rotary floor machine | Never used one or cannot keep it stable and moving |
| Project size | Small, open, easy-to-exit room | Large connected area, many edges, closets, or stairs |
| Finish identification | Documented conventional finish with an approved recoat system | Unknown, mixed, waxed, oiled, shellac, or varnish |
| Cleaning history | Known use of approved maintenance products | Wax, polish, oil soap, silicone, restorer, or unknown products |
| Factory coating | Manufacturer provides a specific approved procedure | Aluminum oxide or unusual factory finish without documentation |
| Floor texture | Flat, smooth boards | Hand-scraped, wire-brushed, distressed, or heavily beveled boards |
| Moisture condition | Flat, stable floor with no active damage | Cupping, crowning, warping, staining, or active leakage |
| Floor significance | Common, replaceable material | Historic, rare, custom, or irreplaceable floor |
| Construction | Known product and intact surface | Engineered veneer or remaining wood thickness is uncertain |
| Ventilation | Product requirements can be met and maintained | Occupied setting where ventilation or isolation is inadequate |
| Failure consequence | Small area can be corrected without major loss | Whole-floor peeling would create severe financial or access problems |
Stop-work conditions
Stop and reassess if:
- Abrasion exposes stain or bare wood.
- The finish is unknown or appears waxed.
- The test area fails or behaves unpredictably.
- The floor has an aluminum-oxide or unusual factory coating without an approved preparation system.
- Floor construction or remaining wear layer is uncertain.
- Active cupping, crowning, warping, or leakage is present.
- Repairs or replacement boards are extensive.
- You cannot control the buffer smoothly.
- Contamination cannot be identified or addressed through an approved process.
- Ventilation and isolation requirements cannot be met.
Unique, historic, highly textured, and engineered floors with uncertain specifications deserve specialist evaluation. Professional value is not limited to faster machine work; it includes identifying the existing system, recognizing contamination, controlling the abrasion profile, and responding appropriately when a test area fails.
Work safely
Abrasion and coating work can involve airborne dust, noise, rotating machinery, and chemical exposure. Use eye protection, hearing protection, suitable respiratory protection, kneepads, dust isolation, and the ventilation required by the selected coating. Benjamin Moore’s professional guidance specifically includes eye, hearing, respiratory, and knee protection; product labels and safety data should control chemical handling.
Keep the buffer moving in controlled, overlapping passes. Do not use aggressive or improvised grit sequences to chase a deep scratch. If a defect cannot be removed without reaching the wood, it is outside the scope of a finish-only recoat.
Protect the new finish
Once the coating reaches the appropriate return-to-service stage:
- Sweep or vacuum regularly so grit does not become an abrasive.
- Use entrance mats suitable for the finish.
- Add appropriate pads beneath furniture legs.
- Lift furniture instead of dragging it.
- Clean spills promptly.
- Avoid excessive water.
- Use only cleaners approved for the finish.
- Keep pet nails managed.
- Do not apply polishes or restorers merely because the floor looks less shiny.
Inspect the floor’s actual condition over time. There is no reliable universal calendar requiring every floor to be recoated after a fixed number of years. Traffic, footwear, pets, grit, sunlight, maintenance, finish system, and room use vary too much. The useful trigger is observable wear in an otherwise intact coating—before bare or gray wood appears.
Questions to ask a contractor
Before accepting a buff-and-coat proposal, ask:
- What is the existing finish, and how did you identify it?
- What contamination risks do you see?
- How will wax, polish, silicone, oil soap, or restorer residue be addressed?
- Will you perform an adhesion or compatibility test?
- How will that test be prepared and evaluated?
- What abrasive, pad, and machine system will you use?
- Will the process reach bare wood anywhere?
- What exact coating product and sheen are proposed?
- Is that coating approved over the existing finish?
- How many coats are included?
- Is intercoat abrasion required?
- What are the sock, shoe, pet, furniture, rug, cleaning, and full-cure milestones?
- What dust isolation and ventilation will be used?
- Which repairs, transitions, closets, stairs, and furniture moves are excluded?
- What happens if the test fails?
- What is the written response if adhesion fails after completion?
- Which future cleaning products or maintenance practices affect the warranty?
Frequently asked questions
Will a screen and recoat remove scratches, pet stains, gray areas, or dents?
It may reduce the visibility of superficial scratches that exist entirely within the finish. It will not remove deep scratches, dents, gray wood, sun fading, or pet and water stains that extend into the wood. Those defects remain beneath the clear coat and may become more noticeable when the surrounding sheen is renewed.
Full sanding can address more wood-level damage, but it is not guaranteed to remove deep gouges or penetrating stains. Selective board repair or replacement may still be required.
Can engineered or factory-finished hardwood be screened and recoated?
Sometimes. Because a proper recoat abrades the finish rather than intentionally sanding the wood, an engineered floor’s thinner veneer does not automatically rule it out. Eligibility still depends on the product’s construction, texture, bevels, damage, factory coating, and manufacturer instructions.
Factory-applied aluminum-oxide coatings may resist ordinary mechanical preparation. Textured floors can also abrade unevenly because a flat screen contacts high points more than recesses. Obtain the flooring manufacturer’s approved recoat system or use a specialist; do not rely on a universal veneer-thickness rule.
Can water-based polyurethane be applied over an existing oil-based finish?
Some waterborne polyurethane products can be applied over cured oil-based polyurethane, but only when the new product permits it. The old coating must be sound and sufficiently cured, contamination must be removed, the prescribed abrasion must be completed, and the required adhesion check must succeed.
“Water over oil” is therefore a product-specific compatibility decision, not a universal rule.
Can recoating change the floor color or only the sheen?
Recoating can change sheen when a compatible matte, satin, semigloss, or gloss topcoat is available. It does not substantively change the underlying stain color because the floor is not sanded back to bare wood.
The floor may still look somewhat different. Sheen affects reflected light and defect visibility, while an amber-toned finish can make the existing color appear warmer and a clearer finish may preserve the existing tone more closely. A genuinely different stain color generally requires full sanding and restaining.
How soon can people, pets, furniture, and rugs return after recoating?
There is no universal schedule. Initial drying, sock traffic, normal shoes, pets, furniture, rugs, cleaning, and full chemical cure are separate milestones. They vary with the exact finish, number of coats, spread rate, temperature, humidity, ventilation, and site conditions.
Use the selected coating’s current technical data for each milestone. A contractor completing application in one day—or allowing sock traffic the following day—does not establish that pets, furniture, rugs, or cleaning can return on the same schedule.
The deciding line
The deciding line is whether the protective finish remains intact and compatible—not simply whether the floor has lost its shine. If wear is confined to a conventional, well-bonded coating, careful cleaning, verified adhesion, even abrasion, and a compatible topcoat can renew protection without removing wood.
If wear has reached the wood, moisture has distorted the boards, contamination remains unresolved, or the finish cannot be identified, stop treating the project as a routine buff and coat. Move instead to repair, full refinishing, moisture correction, manufacturer guidance, or professional testing, and let the selected coating’s technical data—not a generic one-day promise—control preparation, application, and return to service.