
Can a Fresh Topcoat Save Your Worn Hardwood Floor?
Proceed only when the wood is sound, the finish is intact and compatible, contamination and moisture are addressed, and an adhesion test passes.
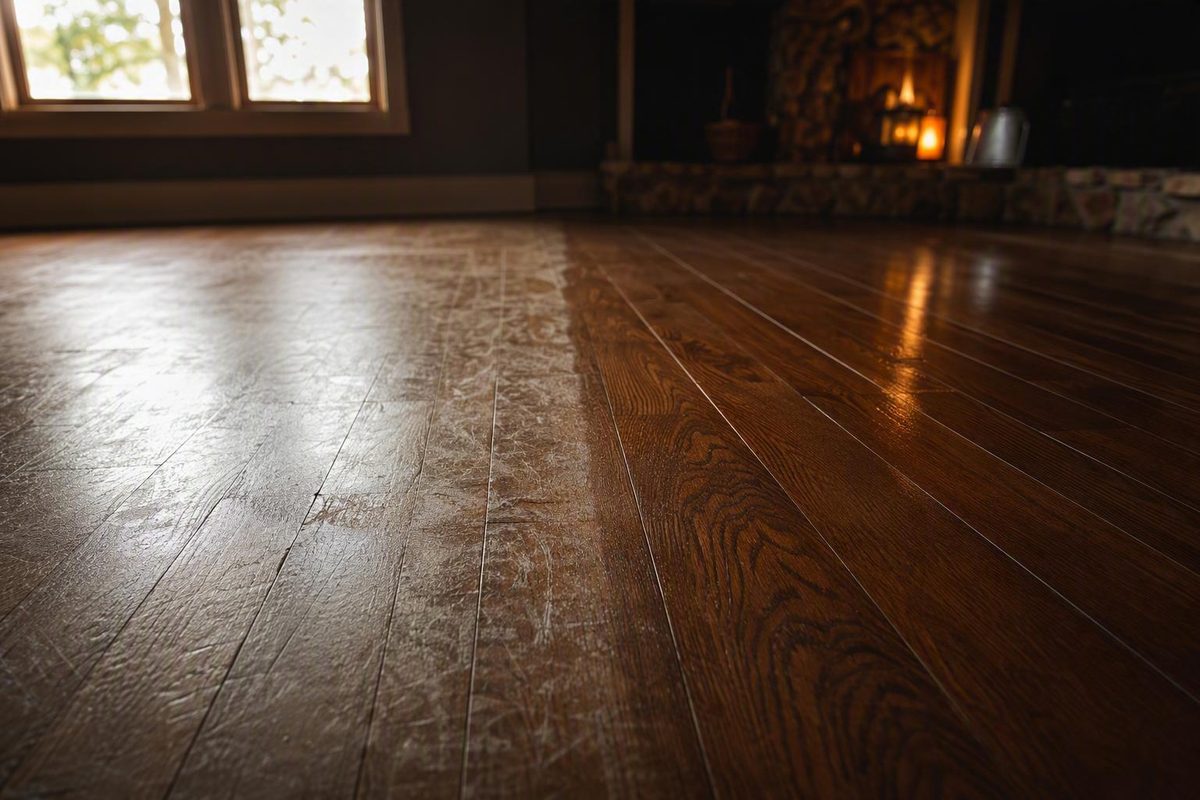
A dull hardwood floor does not automatically need to be sanded to bare wood. If the boards remain sound and the wear is confined to a compatible clear finish, screening and recoating a wood floor can restore a more uniform sheen and renew its protective surface with substantially less intervention than full refinishing.
The important qualification is if. Recoating is preventive finish maintenance, not a shortcut for repairing damaged wood. Deep scratches, gray traffic lanes, penetrating stains, moisture deformation, exposed wood, and incompatible residues remain problems even when covered with a fresh clear coat. The right decision begins with diagnosis—not a buffer, a chosen grit, or a promise that the room will be finished in a day.
What a screen and recoat actually does
A screen and recoat, buff and coat, and screen and coat are common names for the same general treatment:
- Clean and assess the existing floor finish.
- Lightly abrade that finish.
- Remove the resulting dust.
- Apply a compatible new topcoat.
The screen is an abrasive-coated mesh, usually driven by a floor buffer or another suitable sanding tool. It leaves a fine, uniform texture in the existing coating so the new finish can establish a mechanical bond instead of being applied over a slick surface. Because a screen has fewer abrasive particles per area than conventional sandpaper of the same stated grit, it is generally less aggressive, according to this specialist guide to screening materials and polyurethane recoating.
Proper screening disturbs or removes only a small portion of the existing coating. It does not ordinarily strip the boards to bare wood, remove the stain, or flatten physical damage in the boards. Full refinishing, by contrast, sands through the old finish and exposes sound wood so deeper surface damage, discoloration, and the existing stain can be addressed.
One way to understand the difference is to treat polyurethane as a sacrificial layer. Shoes, pet claws, grit, furniture movement, and routine traffic wear the clear coating first. If that coating is renewed while it remains intact, it can continue protecting the stain and wood beneath it. If maintenance is delayed until traffic has exposed or grayed the wood, another clear coat cannot reconstruct what has been lost.
That places recoating between routine cleaning and full refinishing:
- Cleaning removes soil but does not renew a worn coating.
- Screening and recoating renews a serviceable coating without intentionally exposing the wood.
- Full refinishing removes the finish to reach the wood, allowing more substantial correction and a new stain color.
- Repair or replacement addresses failed boards, subfloor trouble, severe deformation, or a floor without enough usable material for further work.
Terms such as “sandless” can be misleading. Screening is mechanical abrasion even though it is gentler than sanding to bare wood. It also produces dust. The amount is generally lower than with full sanding, particularly when effective dust collection is used, but the process is not literally dust-free.
Because the stain is normally left undisturbed, the underlying color usually remains much the same. A compatible topcoat can change the sheen—for example, from gloss to satin or matte. Oil-based polyurethane may also add an amber tone. These are finish effects, not the same as changing the floor’s stain color.
The candidate test: recoat, refinish, repair, or replace?
Start with a four-way decision rather than asking only whether recoating is possible:
- Recoat when wear remains primarily in a sound, compatible clear finish.
- Refinish when sound wood must be exposed to address substantial finish loss, deeper damage, discoloration, or the existing stain.
- Repair when individual boards, fasteners, moisture damage, or the subfloor require correction.
- Consider replacement when the floor is structurally unsound, extensively failed, or lacks enough usable wood for the necessary work.
A favorable candidate is relatively flat and structurally stable, with no obvious bare wood and no active moisture problem. Its finish is intact but looks dull, lightly scuffed, micro-scratched, or shallowly scratched. Its coating and maintenance history are known well enough to establish compatibility with the proposed topcoat.
Scratch depth matters more than the number of scratches. A pale or whitish mark visible only in the clear coating may be softened during uniform screening and become less obvious under a new coat. A scratch that changes the wood’s color, exposes fibers, or remains visibly deep from different viewing angles will still exist after recoating. A fingernail catching on a mark may suggest depth, but it is not a definitive qualification test.
Full refinishing becomes more likely when the floor has:
- Bare or gray wood in traffic lanes
- Deep scratches or gouges
- Dents and crushed fibers
- Widespread loss of finish
- Pet stains or water stains that penetrated the wood
- Uneven stain wear or significant discoloration
- A desired stain-color change
A hardwood-floor refinishing guide from This Old House distinguishes screening, which treats the polyurethane surface, from sanding that reaches bare wood. It also warns that repeatedly sanded floors may eventually have too little usable face wood for further refinishing.
Other symptoms point away from cosmetic coating work altogether. Cupping, crowning, buckling, loose or warped boards, recurring moisture, subfloor movement, and unexplained structural movement require diagnosis before a finish treatment is selected. A glossy new coat cannot stabilize a moving board or correct a damp subfloor.
The following matrix is a practical starting point, not a substitute for an on-site assessment:
| Observed defect | Recoat classification | What to expect |
|---|---|---|
| Uniform dullness | Likely recoat candidate | Sheen can often be renewed if the coating is intact and compatible. |
| Shallow finish scratches | Likely recoat candidate | Uniform abrasion may reduce their appearance, but not every mark will disappear. |
| Deep scratches | Unchanged by recoating | Scratches extending into the stain or wood remain visible. |
| Gray traffic lanes | Disqualifying | Gray areas commonly indicate exposed or damaged wood requiring more extensive work. |
| Dents | Unchanged by recoating | Clear finish follows the existing shape; it does not raise crushed wood. |
| Pet stains | Unchanged by recoating | Penetrating discoloration remains beneath a clear topcoat. |
| UV discoloration | Unchanged by recoating | Screening does not remove color variation within the wood or stain. |
| Water marks | Conditionally treatable after diagnosis | Surface marks differ from stains or damage that reached the wood. Resolve the moisture source first. |
| Cloudiness | Conditionally treatable after diagnosis | It may be a coating defect, but moisture, drying conditions, and compatibility must be investigated. |
| Applicator streaks | Conditionally treatable after diagnosis | Finish-level streaks may respond after the application problem is corrected. |
| Topcoat bubbles | Conditionally treatable after diagnosis | Bubbles confined to the topcoat may be correctable; deeper failure requires more work. |
| Delamination | Disqualifying | Widespread loss of intercoat adhesion should not be buried under another coat. |
| Cupping | Disqualifying while active or unexplained | Determine and correct moisture conditions before assessing permanent deformation. |
| Exposed wood | Disqualifying | A simple recoat cannot uniformly recreate missing finish, stain, or damaged fibers. |
Certain finish defects occupy a gray area. Applicator streaks, cloudiness, fisheyes, chipping, cratering, alligatoring, and bubbles limited to the topcoat may respond to screening and recoating—but only after their causes have been identified and corrected. Causes can include contamination, incompatible finishes, insufficient drying, unsuitable temperature or airflow, excessive application, or premature recoating. Detailed floor-finish troubleshooting guidance distinguishes potentially correctable topcoat defects from delamination, serious moisture damage, and failures requiring sanding or repair.
That distinction is crucial. A new coat may initially make a troubled floor look more uniform while leaving the failure mechanism in place. Severe defects, permanent deformation, widespread coating failure, or structural problems may require complete sanding, board repair, reinstallation, or replacement.
Why finish history and contamination can make the new coat fail
Abrasion creates texture. It does not make incompatible materials compatible, nor does it reliably remove every residue that can interfere with adhesion.
Before screening, inventory everything known to have been applied to the floor. Pay particular attention to:
- Paste or liquid wax
- Acrylic polish
- Silicone-containing cleaners
- Oil soap
- Penetrating oil
- “Restorer,” “reviver,” or shine-enhancing products
- Previous coatings whose chemistry is unknown
These materials may leave residues that prevent polyurethane from wetting and bonding to the old surface. Possible results include peeling, flaking, bubbling, fisheyes, cratering, or larger-scale delamination.
Cleaning and contaminant removal must therefore be treated as a separate stage that precedes abrasion. Contractor guidance on the subject emphasizes intensive cleaning and testing because screening alone can spread contamination rather than remove it (Naperville Hardwood).
Ordinary household cleaning is not necessarily decontamination. Water and vinegar have not been established as a universal way to remove polish, silicone, oil-soap buildup, or penetrating products. No single solvent or commercial cleaner is suitable for every finish. The removal process must account for both the suspected contaminant and the floor’s existing coating.
An unknown history should be treated as a risk, not as proof that the floor has conventional polyurethane. A house may have passed through several owners who used different maintenance products. An inconspicuous glossy layer may be polish rather than the original coating, while an apparently dry surface may still contain wax or oil that ordinary cleaning does not remove.
Use the flooring manufacturer’s instructions when available, followed by the written preparation requirements for the proposed coating. Conduct adhesion tests in several inconspicuous areas before coating the entire room. Test locations should represent different traffic and maintenance zones, such as an entry, a protected corner, and a frequently cleaned area.
There is no responsible universal recipe for test size, dwell time, or pass/fail evaluation. Those details must come from the selected coating system.
Waxed, oiled, unidentified, and previously problematic floors are professional-assessment cases when compatibility cannot be established. If an adhesion test fails, the answer is not automatically to “screen harder.” The appropriate response may involve specialized contaminant removal, another coating system, full sanding, or declining to recoat the floor.
Special cases: engineered, factory-finished, and moisture-affected floors
“Wood floor” covers several constructions and coating systems. Solid hardwood, engineered wood, and factory-finished flooring should not be treated as interchangeable.
Solid hardwood
A conventional site-finished solid hardwood floor with cured oil-based or waterborne polyurethane is the best-supported candidate category—provided the finish is intact, compatible, and uncontaminated. Even then, board condition and remaining usable wood matter if diagnosis shows that full sanding is necessary.
Engineered wood
Engineered flooring has a real-wood surface over a layered core. Some engineered floors can be lightly screened and recoated, but suitability depends on:
- The product’s construction
- The condition of its wood surface
- The remaining surface layer
- The type of factory coating
- The manufacturer’s preparation requirements
- Whether deeper sanding might become necessary if recoating fails
Wear-layer thickness is especially consequential when a floor needs to be sanded to bare wood. There is no sound universal minimum for every engineered product and procedure, so eligibility should not be inferred from the word “engineered” alone. A thin or unidentified construction is a DIY stop condition.
Factory-finished flooring
Prefinished boards may carry aluminum oxide or another durable factory-applied coating. These surfaces can resist ordinary mechanical abrasion, making a generic screen-and-recoat procedure unreliable. The floor may require a tested, product-specific preparation system that differs from the method used on conventional site-applied polyurethane.
An unknown aluminum-oxide or factory finish is not a reason to improvise with a chemical etcher. It is a reason to stop and identify the product or obtain specialist assessment. A Benjamin Moore professional refinishing guide likewise emphasizes checking floor construction and available wear layer when deciding how extensively a floor can be treated.
Laminate should not be treated as a routine candidate. Its decorative surface is not equivalent to a sandable real-wood wear layer, and the available guidance does not establish broad suitability for screening and polyurethane recoating.
Moisture-affected floors
After a leak or flood, correct the water source first. Then allow both the flooring and subfloor to stabilize before choosing a cosmetic treatment. Visual flatness alone does not establish that internal moisture conditions have normalized.
A wet wood floor may cup when the underside or lower portion of the boards contains more moisture than the top. Sanding the high edges while the boards are still wet can create a temporarily flat surface that becomes crowned as the boards dry, according to published moisture and finish-failure guidance.
Persistent cupping, widespread loosening, buckling, permanent deformation, or structural movement belongs in professional repair—not in a recoat workflow. A previously wet floor might eventually qualify if the source has been corrected, the assembly has stabilized, the boards remain sound and flat, and the coating is otherwise compatible. That decision should be based on diagnosis rather than elapsed time alone.
The screen-and-recoat workflow from inspection to topcoat
A proper screen and recoat follows a controlled sequence:
- Inspection
- Room preparation
- Intensive cleaning
- Compatibility and adhesion assessment
- Even abrasion
- Dust removal
- Finish application
- Controlled drying and curing
Changing the order creates avoidable risks. In particular, screening before cleaning can spread dirt and incompatible residue across the floor.
1. Inspect the floor
Examine the room in both general and low-angle light. Look for:
- Bare or gray wood
- Deep scratches, dents, and stains
- Loose, moving, or damaged boards
- Cupping, crowning, or buckling
- Cloudiness, bubbles, peeling, or delamination
- Residue along edges and under rugs
- Differences between high-traffic and protected areas
- Signs of leaks, dampness, or recurring condensation
- Evidence of polish, wax, silicone, oil soap, or penetrating oil
Confirm whether the floor is solid, engineered, or laminate and whether it was site-finished or factory-finished. If the floor, coating, or maintenance history cannot be verified, pause before renting equipment.
2. Prepare the room
Remove furniture, rugs, floor-length window coverings, and other obstructions. Protect adjacent surfaces and isolate the work zone as required by the equipment and coating instructions. Inspect for protruding nails, staples, or fasteners and address them without damaging the boards.
Follow the coating label, safety data sheet, and equipment instructions for ventilation, respiratory protection, eye and hearing protection, ignition control, and safe buffer operation. Follow the same product-specific documentation for storing or disposing of finish-contaminated rags, pads, and applicators rather than placing them aside casually. Manufacturer professional guidance lists protective equipment and controlled ventilation among the required preparation measures for floor-finishing work (Benjamin Moore).
Appropriate ventilation does not always mean maximum airflow during application. Excessive air movement can interfere with leveling or cause some finishes to dry too quickly. The coating manufacturer’s environmental limits should control.
3. Clean before abrading
Vacuum loose grit first so it cannot be dragged beneath a pad. Then use the contaminant-removal and cleaning process approved for the existing floor and proposed topcoat. Areas near cooking spaces, entrances, pet zones, and places where shine products were applied may need additional attention.
Cleaning must remove relevant soil and residue rather than merely make the floor look clean. Allow the surface to reach the condition required by the coating system before testing or screening.
4. Establish compatibility and test adhesion
Confirm that the proposed topcoat is permitted over the existing coating after the planned preparation. Perform representative test areas and evaluate them according to the coating manufacturer’s instructions.
A failed or ambiguous test changes the project. Do not coat the rest of the room on the assumption that a thicker application will compensate for weak adhesion.
5. Abrade evenly
Screening should create a uniform scuff pattern across the existing finish without intentionally cutting into the stain or wood. Edges and corners require careful hand or specialized-machine work so their preparation matches the main field without becoming over-abraded.
A floor buffer must remain controlled and moving. Pausing, tilting the machine, catching an edge, or applying uneven pressure can cut some areas more aggressively than others. The result may be visible rings, over-abraded patches, exposed wood, or inconsistent sheen.
Published abrasive recommendations conflict. Pete’s Hardwood Floors describes fine screening with 120- and 150-grit abrasives, while This Old House presents a progressive sequence beginning with substantially coarser screens (This Old House). This disagreement is a reason not to prescribe a universal grit sequence.
The controlling process should be the tested preparation system approved for the specific floor, existing finish, new coating, abrasive, pad, and machine—not a grit number copied from a general article.
6. Remove dust thoroughly
Vacuum and remove all residue using methods approved for the selected finish system. Dust left behind can create roughness, visible particles, or bonding problems.
Do not assume that a commercial tack cloth, water wipe, paint thinner, or another solvent is universally suitable. A cloth may transfer residue, water may be inappropriate at a particular stage, and an unmatched solvent may soften or contaminate a coating. Follow the selected product’s instructions.
7. Apply the topcoat
Apply thin, even coats with an applicator approved for the product. Maintain a wet edge and consistent spread without repeatedly working areas that have begun to set.
Spread rate, applicator type, intercoat preparation, coat thickness, and acceptable environmental conditions are product-specific. Commercial guides describe applying one or two coats, but neither number is universal; coat count should follow the selected system and expected wear rather than being used to conceal poor preparation (Pete’s Hardwood Floors).
8. Control drying and curing
Protect the room from dust, uncontrolled airflow, contact, and premature traffic during the specified drying period. Keep temperature, humidity, and ventilation within the manufacturer’s stated range.
Do not judge readiness by touch alone. A surface can feel dry while remaining vulnerable to footwear, pets, furniture, rugs, water, or cleaning products. Return the room to service according to staged product instructions rather than a single “done” time.
Choosing a finish and setting realistic cure expectations
The most familiar choices are waterborne and oil-based polyurethane. Neither category is automatically best, and neither is always more durable. Performance varies with formulation, substrate preparation, coat thickness, application, maintenance, and use conditions.
Waterborne polyurethane
Waterborne products are generally associated with:
- Faster drying
- Lower odor
- A clearer appearance
- Less ambering than traditional oil-based products
Fast drying can reduce the interval between some stages, but it also demands organized application and control of airflow and environmental conditions. “Lower odor” does not eliminate the need to follow ventilation and safety instructions.
Oil-based polyurethane
Oil-based products are generally associated with:
- Slower drying
- Stronger odor
- An amber tone
- A traditional warm appearance on some wood species
Waterborne polyurethane may sometimes be applied over cured oil-based polyurethane after manufacturer-approved preparation and a successful adhesion test. It is not automatically compatible simply because both coatings are called polyurethane. Cure state, contamination, old coating condition, and the new product’s requirements all matter.
Sheen is usually easier to change than color. A compatible satin topcoat can reduce the apparent gloss of an intact glossy floor, while a gloss topcoat can increase reflectivity. Meaningful stain-color changes generally require sanding to bare wood so the old color can be removed or altered uniformly.
“Ready” is not one milestone
Ask for separate written times for:
- Dry to the touch
- Limited sock traffic
- Normal footwear
- Pet access
- Furniture replacement
- Rug placement
- Routine cleaning
- Full cure
Published estimates differ considerably. Lowe’s gives general recoating estimates of 24 hours for water-based finish and 48 to 72 hours for oil-based finish, while noting that room size, humidity, and other conditions can change the schedule in its comparison of recoating and refinishing. Other commercial guidance describes limited access within hours while full curing continues for several days.
Finish formulation, coat count, temperature, humidity, airflow, and actual site conditions all affect timing. The selected manufacturer’s written schedule should control. If the instructions do not clearly distinguish activities, use the more conservative restriction until the manufacturer or installer clarifies it.
A contractor’s statement that the work is a “one-day project” may describe labor completion, not unrestricted room use. The coating can still require staged protection after the crew and equipment are gone.
DIY or professional job? Use these stop conditions
Screening and recoating can be a DIY project under favorable conditions, but the correct question is not whether the steps look simple. It is whether the floor is well understood and whether you can tolerate the consequences of a mistake.
Favorable DIY conditions include:
- A small, uncomplicated area
- A confirmed conventional and compatible finish
- No bare wood, deep damage, or moisture problem
- A known cleaning and maintenance history
- Successful manufacturer-directed test areas
- Adequate ventilation and room control
- Confidence operating the selected buffer
- Confidence applying finish evenly at the required spread rate
Stop and obtain professional assessment if any of the following applies:
- The coating is unknown.
- Wax, silicone, polish, or oil-soap contamination is suspected.
- The floor has a penetrating-oil finish.
- It may have aluminum oxide or another factory coating.
- Engineered construction is thin, uncertain, or unidentified.
- Bare or gray wood is visible.
- Deep damage or penetrating stains are widespread.
- Moisture movement is active or unexplained.
- The coating is peeling or delaminating across multiple areas.
- You have no experience controlling a floor buffer.
- A test area fails or produces an ambiguous result.
Buffer mistakes can create swirls, over-abraded spots, exposed wood, and uneven gloss. Application mistakes can leave trapped debris, lap marks, streaks, bubbles, and inconsistent sheen. More seriously, contamination or incompatibility can cause widespread peeling. Correcting that failure may require the full sanding job the recoat was intended to avoid.
Unusual or historic floors, repeatedly sanded boards, mixed-species installations, contamination concerns, and floors whose construction cannot be verified also justify professional review.
When requesting quotes, ask each contractor:
- How will the floor be cleaned and decontaminated before abrasion?
- Which products or residues would disqualify it?
- Will moisture conditions be checked where symptoms or leak history exist?
- How many adhesion-test areas will be used, and how will they be evaluated?
- What happens if a test fails?
- How was the existing finish identified?
- What abrasive, pad, and equipment system will be used?
- How will edges be prepared?
- What dust collection and final dust-removal methods are included?
- What is the exact manufacturer and product name of the topcoat?
- How many coats are proposed, and why?
- What ventilation and environmental controls are required?
- When are people, pets, furniture, rugs, and cleaning permitted?
- Does the quoted duration describe labor time, cure time, or both?
Do not evaluate bids only by square-foot price. Floor area matters, but so do condition, contamination removal, test work, finish selection, accessibility, local labor, repairs, and coat count. Fixed national pricing obscures these differences.
Recoating is generally less invasive and less labor-intensive than sanding to bare wood because it retains the serviceable finish and stain. That does not guarantee a particular percentage saving, completion time, or service life. A properly scoped full refinish can be better value than a cheap recoat applied to a floor that was never eligible.
Protecting the new finish and recognizing early failure
Every aftercare step should begin only after the coating reaches the manufacturer-specified milestone for that activity. Do not equate light foot traffic with permission to replace heavy furniture or cover the surface with rugs.
Once permitted:
- Sweep or vacuum regularly with floor-safe tools.
- Use only cleaners approved for the coating.
- Clean spills promptly without flooding the floor.
- Fit furniture with clean felt pads.
- Use entrance mats compatible with the finish.
- Limit water exposure and avoid wet-mopping unless expressly allowed.
- Lift furniture rather than dragging it.
Avoid reintroducing wax, acrylic polish, silicone cleaners, oil soaps, or harsh chemicals unless the finish manufacturer explicitly approves them. A shine product may create a short-term cosmetic effect while making the next maintenance coat difficult or impossible to bond.
Rugs and furniture deserve separate timing.
Watch the new surface for:
- Peeling or flaking
- Bubbles
- Fisheyes or small areas where finish pulls away
- Persistent cloudiness
- Widespread roughness
- Soft or easily marked areas
- Intercoat delamination
- Pronounced applicator streaks or lap marks
These symptoms may indicate contamination, incompatibility, inadequate cleaning or abrasion, premature recoating, incorrect application, or unsuitable drying conditions. Isolated defects confined to the topcoat may sometimes be corrected after diagnosis. Widespread failure should not be buried under another coat because that adds material over a weakly bonded layer.
The most effective maintenance principle is to inspect the floor while its protective coating remains intact. Do not wait for gray lanes or bare patches before considering maintenance. There is no universal three-to-five-year recoat schedule: traffic, pets, grit, cleaning practices, sunlight, coating formulation, and room use vary too much. Use condition-based inspection and investigate changes before damage reaches the wood.
Frequently asked questions
Will a screen and recoat remove deep scratches, pet stains, or gray areas?
No. Recoating treats the clear finish, not damage within the wood. Deep scratches, pet stains, dents, discoloration, and gray traffic areas normally remain visible. Only shallow scratches confined to the coating may become less noticeable.
Can waterborne polyurethane be applied over an existing oil-based finish?
Sometimes. The existing finish must be cured, clean, sound, and permitted to receive the selected waterborne product. Follow the new coating manufacturer’s preparation instructions and require successful representative adhesion tests.
Can screening change the color or only the sheen of a wood floor?
Screening normally preserves the existing stain color. A compatible topcoat can change the sheen, and an oil-based product may add an amber tone. A substantial, uniform color change generally requires sanding to bare wood and refinishing.
How long after recoating can people, pets, furniture, and rugs return?
There is no universal deadline. Light foot traffic, normal footwear, pet access, furniture, rugs, cleaning, and full cure are separate product-dependent milestones. Use the selected finish manufacturer’s written schedule, adjusted for coat count and site conditions.
Can an engineered or prefinished wood floor be screened and recoated?
Possibly, but only after case-by-case review. Engineered flooring depends on its surface layer, condition, coating, and manufacturer requirements. Prefinished flooring may have an aluminum-oxide or other factory coating that requires specialized preparation. An unidentified factory finish is a DIY stop condition.
Conclusion: Make the decision based on condition
Choose a screen and recoat only when the wood remains sound, the existing finish is intact and compatible, contamination and moisture risks have been addressed, and a representative test confirms adhesion.
If the floor has bare wood, deep damage, penetrating stains, deformation, widespread coating failure, an unidentified factory finish, or a color-change goal, stop treating recoating as a shortcut. Move instead to professional assessment, repair, or full refinishing.