
Choose a Wood Finish That Fits the Wear, Look, and Repair Plan
Poly suits surfaces exposed to spills, heat or heavy wear. Shellac suits low-wear pieces when warmth and easier local repair matter more than toughness.
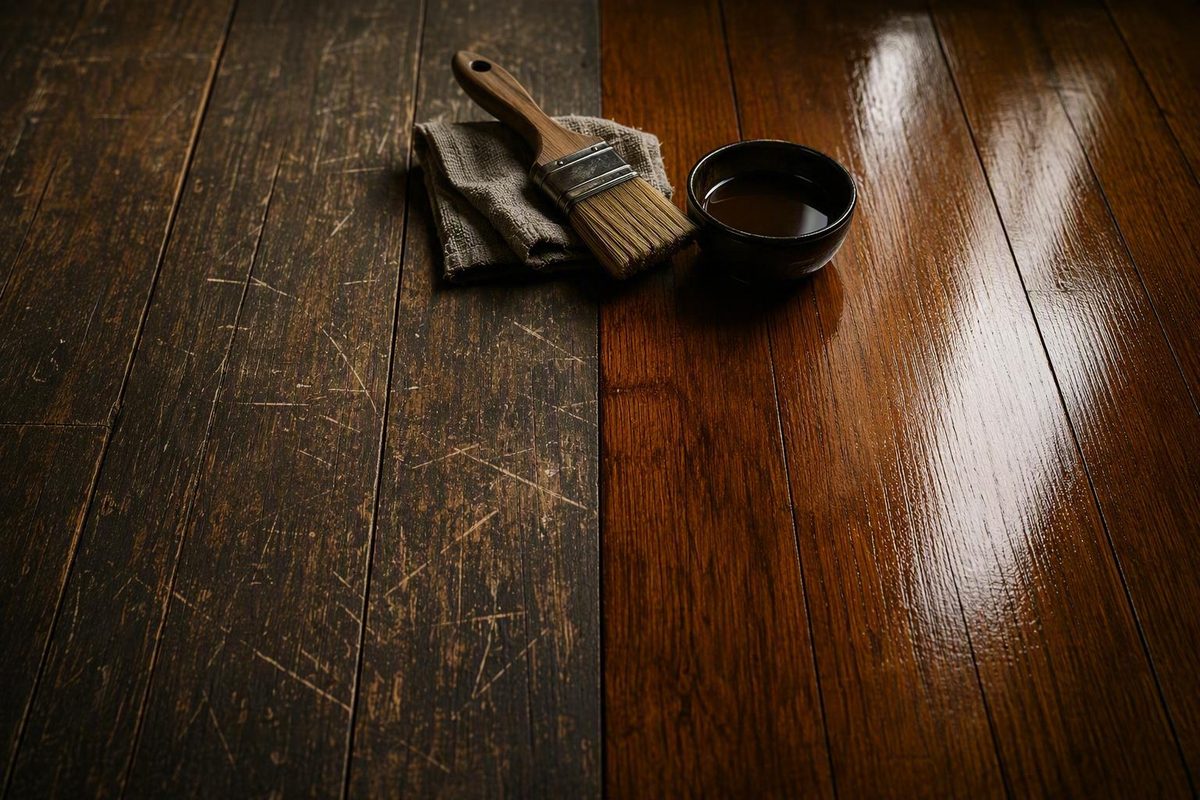
Choose a wood finish that fits the wear, look, and repair plan.
The short answer: choose protection or repairability
Choose polyurethane for most high-wear, spill-prone, or heat-exposed surfaces. That usually includes busy hardwood floors, kitchen and dining tables, bars, heavily used desks, and frequently handled cabinet doors.
Consider shellac when low wear, warm color, rapid recoating, historic continuity, or easier localized repair matters more than maximum resistance. Picture frames, jewelry boxes, display pieces, low-wear furniture, and compatible antique restoration are stronger candidates.
There is no universal winner in the shellac-or-poly decision because different objects face different hazards. A family-room floor encounters grit, shoes, pets, moving furniture, and spills. A picture frame does not. A kitchen table must tolerate wet glasses, cleaning products, alcohol, and hot serving dishes, while an antique cabinet may benefit more from a finish that preserves its appearance and can be renewed without leaving a conspicuous patch.
Before buying either finish, identify five variables:
- Abrasion: Will the surface receive foot traffic, sliding dishes, keys, toys, or frequent handling?
- Water and alcohol: Are wet glasses, drink spills, cleaners, or alcoholic beverages likely?
- Heat: Could hot mugs, bowls, pans, or serving dishes contact the finish?
- Color: Do you want the wood to remain pale, or should the finish add warmth and depth?
- Future repair: Do you prefer stronger initial protection or a finish that is easier to blend and renew locally?
“Poly” also needs clarification. Water-based and oil-based polyurethane are not interchangeable in appearance or workflow. Water-based polyurethane generally stays clearer, produces less odor during application, and permits faster recoating. Oil-based polyurethane generally adds more amber color, dries more slowly, and produces stronger solvent fumes. Exact performance depends on the formulation, and a product intended for furniture should not automatically be treated as a floor finish.
The practical rule is:
Demanding service generally favors polyurethane. Appearance, easier renewal, rapid work, or historic continuity may favor shellac.
Repairability is not the same as durability. Fresh shellac can partially redissolve an existing shellac film, which often makes local blending easier. That does not make shellac more resistant to foot traffic, moisture, alcohol, or heat. Polyurethane generally provides stronger protection against those hazards but is harder to patch invisibly.
This is a selection guide, not a universal application specification. Once you choose a finish category, the current label and technical instructions for the exact product must control compatibility, preparation, recoating, cure time, and intended use.
Shellac vs. polyurethane at a glance
Shellac and polyurethane form films differently. Shellac is an evaporative finish: its alcohol solvent leaves as the finish dries, and alcohol in a later coat can partially dissolve the earlier film. Polyurethane forms a curing film. Depending on the formulation and timing, another coat may bond within a manufacturer-defined recoat window or require label-directed abrasion after the preceding coat has cured. A later coat does not redissolve and merge with the old film in the same way as shellac (Kitchen Cabinet Kings’ finish comparison).
That distinction affects application, repair, and eventual refinishing.
| Decision factor | Shellac | Polyurethane |
|---|---|---|
| Abrasion and foot traffic | Better suited to low-wear or specialty applications; heavy traffic can wear it relatively quickly | Generally stronger for floors and frequently used furniture; floors require a floor-rated product |
| Water and spills | Can spot, stain, or become cloudy from moisture | Generally provides stronger moisture and spill protection, but is not waterproof |
| Alcohol | Particularly vulnerable because alcohol can soften or dissolve the film | Generally more suitable where alcoholic drinks or alcohol-containing products may spill |
| Heat | Hot objects can leave white rings or cloudy damage | Usually the safer choice for heat-exposed furniture, although trivets remain prudent |
| Color | Commonly adds warmth or amber color; intensity varies by grade | Water-based poly generally stays clearer; oil-based poly generally adds amber color |
| Recoating behavior | New coats partially dissolve into earlier coats, supporting blended renewal | Recoating and abrasion requirements depend on the formulation and stated recoat window |
| Spot repair | Often easier to blend locally, although severe damage can require broader refinishing | Local patches may leave visible boundaries or sheen differences |
| Application pace | Typically dries and recoats rapidly, but that speed can contribute to lap or brush marks | Water-based poly generally recoats faster than oil-based poly; exact schedules vary |
| Typical uses | Antiques, frames, boxes, decorative furniture, low-wear interiors, historic work, and specialty sealing | Floors, tables, bars, work surfaces, cabinet doors, and other demanding interior surfaces |
Shellac’s weaknesses should be considered individually rather than compressed into a single durability score. Alcohol can attack the film directly. Hot dishes may create white rings. Water may leave spots or haze. Repeated abrasion can wear through the coating. A project exposed to any one of those hazards may be a poor candidate for shellac as its final finish.
Polyurethane’s stronger protection still has limits. It can be scratched, worn, or damaged, and its performance depends on using a suitable formulation over a properly prepared surface. When a small area is repaired, the new material may differ from the surrounding film in sheen, thickness, or reflected light.
Color also deserves more than a “clear finish” label. Shellac commonly warms wood and emphasizes grain. Oil-based polyurethane also adds warmth but does not necessarily create the same color. Water-based polyurethane is usually the better starting point when the goal is to preserve pale maple, ash, birch, or a cool-toned stain with minimal ambering. Wood species, sanding, stain, film thickness, sheen, and lighting can all alter the result.
Do not use “dry” as shorthand for “ready.” Finishes pass through several milestones:
- Dry to the touch: Dust is less likely to stick, but the film may still mark easily.
- Ready to recoat: The manufacturer permits another coat, potentially after abrasion.
- Ready for light use: Gentle handling or limited foot traffic is allowed.
- Ready for normal service: The surface can accept more load, although restrictions may remain.
- Fully cured: The film has reached the product’s stated cure condition.
Shellac generally reaches the recoat stage quickly. Water-based polyurethane generally permits earlier recoating than oil-based polyurethane. Those relative statements are not a project schedule: formulation, coat thickness, temperature, humidity, and airflow all matter.
Best finish by project: floors, tables, cabinets, and antiques
Finish selection becomes easier when the object and its actual hazards take priority over broad claims about which product is “best.”
Hardwood floors
For most busy hardwood floors, choose a floor-rated polyurethane or another approved waterborne floor finish. Foot traffic carries abrasive grit across the surface, while shoes, pets, chair legs, toys, spills, and cleaning routines add further stress. Flooring guidance generally describes urethane finishes as more durable than shellac and notes that a surface film receives wear that would otherwise reach the wood (Vermont Plank Flooring’s overview of hardwood finishes).
Do not assume every can labeled polyurethane is approved for flooring. Look for an explicit floor-use statement and confirm that the product suits the wood, stain, existing finish, and required occupancy schedule.
A shellac floor is a specialty choice, not an impossibility. Retaining shellac may make sense when an existing historic or low-traffic floor already has it, preserving character is a primary goal, and the owner accepts lower spill resistance and more maintenance. Shellac’s blended renewal can be valuable in that setting. It does not establish shellac as the best default for a newly installed family-room floor.
An established shellac-and-wax floor requires particular caution. It is neither bare wood nor a neutral substrate. Wax and accumulated residues may interfere with another film finish, so maintaining the existing compatible system can be less risky than changing chemistry without complete removal or a product-approved conversion process.
Kitchen and dining tables
Polyurethane is usually the more defensible choice for dining tables, kitchen tables, bars, drink cabinets, and serving surfaces. Water, alcoholic drinks, cleaners, and hot dishes directly target shellac’s weaknesses. Consumer finishing guidance likewise warns that shellac can develop white rings from heat and be affected by chemicals, making it a poor fit for many kitchen tables (HGTV’s comparison of wood topcoats).
Polyurethane does not make a table immune to damage. Use coasters and trivets, wipe spills promptly, and avoid cleaners prohibited by the finish manufacturer.
Cabinets and shelving
“Cabinet” can describe very different service conditions:
- A display-cabinet interior may need visual enhancement and light protection.
- An antique cabinet may benefit from shellac’s warmth and repairability.
- Kitchen cabinet doors receive skin oils, moisture, cleaners, and repeated handling.
- A bar cabinet may encounter alcohol spills.
- A countertop or work surface experiences abrasion and standing moisture.
Shellac can suit decorative cabinet interiors, lightly handled pieces, and compatible antique work. Polyurethane is generally more practical for frequently handled doors, working shelves, bars, and spill-prone areas.
For pale maple shelving or light-colored cabinetry, consider a compatible water-based polyurethane when minimizing amber color is important. If warmth is intentional, either shellac or oil-based polyurethane may help, but test them rather than expecting identical color or grain contrast.
Antiques and decorative objects
Shellac is particularly useful for picture frames, jewelry boxes, display pieces, clocks, low-wear shelves, and decorative furniture. These objects can benefit from rapid drying, grain enhancement, and easier renewal without demanding floor-level abrasion resistance.
Historic work requires more than choosing a finish that looks traditional. Determine what is already present, whether retaining that finish contributes to the object’s value, and how the piece will now be used. A new polyurethane film may improve resistance but make later local treatment more difficult. Conversely, shellac chosen solely for tradition may be impractical if an antique table is now used for drinks.
Oily, sappy, or difficult wood
Shellac can also serve as a seal or barrier coat rather than the final wear surface. Flooring guidance identifies dewaxed shellac as a specialty sealer for woods whose oils, saps, or other components may interfere with another finish’s drying (Bob Vila’s guide to hardwood floor finishes).
That is a different decision from using shellac as the final coating. In a combined system, the topcoat receives service wear while the shellac performs a sealing or color-enhancing role. Dewaxed shellac removes one known compatibility concern, but it does not guarantee adhesion beneath every polyurethane or catalyzed finish. The complete schedule still needs approval from the relevant product manufacturer.
| Project scenario | Likely choice | Why |
|---|---|---|
| Busy family-room floor | Floor-rated polyurethane or approved waterborne floor finish | Wear, grit, spills, pets, and shoes prioritize resistance |
| Kitchen or dining table | Compatible polyurethane | Better fit for water, alcohol, cleaners, and occasional heat |
| Pale maple shelving | Water-based polyurethane | Provides protection while generally minimizing added amber color |
| Antique cabinet | Often shellac, subject to finish identification and conservation goals | Warm appearance, continuity, and blended repair may outweigh maximum resistance |
| Jewelry box | Shellac | Low wear allows rapid drying and visual depth to take priority |
| Historic shellac floor | Maintain the compatible shellac or established shellac-and-wax system, or obtain product-specific conversion guidance | Preserves character and avoids uncertain adhesion over an old system |
| Oily or pitchy wood | Dewaxed-shellac barrier coat beneath an explicitly approved topcoat | Uses shellac as a sealer rather than the final wear layer |
Test the color and complete finish schedule on project scrap. Include the actual sanding sequence, stain or dye, shellac, polyurethane, and intended sheen. Testing only a clear topcoat on unrelated wood will not answer the most important color and compatibility questions.
Where shellac wins—and where it fails
Shellac remains useful because durability is not the only measure of a good finish. It dries rapidly, adds warmth, can give grain considerable visual depth, and allows later applications to blend into the existing film. It can also be removed or renewed more readily than many cured film finishes.
Those qualities make it valuable for:
- Antiques and compatible historic restoration
- Decorative furniture and low-wear interior woodwork
- Picture frames, boxes, display pieces, and similar objects
- Projects in which rapid recoating is useful
- Local touch-ups where a hard-edged patch would be objectionable
- Specialty sealing beneath an explicitly approved finish system
Rapid drying is both a benefit and a challenge. It shortens the wait between applications, but a brushed section can begin setting before the adjoining area is complete. Repeatedly brushing partially dried shellac can create lap marks, brush marks, or uneven gloss.
Use thin, controlled applications and a method tested on scrap. Do not try to imitate a thick polyurethane film by automatically applying heavy shellac coats. The appropriate concentration, film build, and number of applications depend on the product, object, and desired appearance.
Shellac may be brushed, wiped, sprayed, or French polished, but no method is universally best:
- Brushing suits many flat surfaces but rewards fast, deliberate work.
- Wiping can help control thin applications on small pieces and simple shapes.
- Spraying may suit intricate geometry but requires appropriate equipment and product-specific safety controls.
- French polishing can produce a refined surface but is a skilled technique, not a shortcut.
Premixed liquid shellac can have a shorter useful shelf life than the other finishes commonly compared with it, so check the product’s date, storage guidance, and freshness instructions before using an old can on a valuable project.
Its principal limitations remain exposure-specific:
- Alcohol: Alcoholic drinks and some products can soften, dissolve, or mark the film.
- Heat: Hot mugs, bowls, and dishes can create white rings or cloudy damage.
- Moisture: Water can leave spots, staining, or haze.
- Abrasion: Shoes, grit, sliding objects, and repeated handling can wear it faster than a demanding surface warrants.
- Household chemicals: Some cleaners may damage or discolor it.
“Repairable” does not mean every defect will disappear under another coat. Deep stains, contamination, severe heat damage, uneven wear, or damage extending into the wood may require broader refinishing.
Natural origin also does not make liquid shellac hazard-free. It uses alcohol solvent and may contain denaturants or other ingredients. Application precautions must come from the current label and safety data sheet.
Water-based vs. oil-based polyurethane
Once polyurethane is the preferred finish category, the next decision is which type. Water-based and oil-based products should not be treated as interchangeable versions of one finish.
Water-based polyurethane
Water-based polyurethane generally:
- Stays clearer and adds less amber color
- Produces less odor than oil-based polyurethane
- Reaches the recoat stage sooner
- Allows faster multi-coat work
- Better preserves pale wood and cool-toned color
- Uses a different cleanup and application process from oil-based products
It is often the logical starting point for pale maple, birch, ash, or a finish schedule intended to minimize yellowing. Clearer does not mean visually invisible: sheen, film build, grain raising, sanding, and the underlying stain can still change the result.
Oil-based polyurethane
Oil-based polyurethane generally:
- Adds an amber or golden cast
- Deepens or yellows more over time
- Dries and cures more slowly
- Produces stronger solvent odors
- Requires more ventilation and project downtime
- May be selected specifically for its warmer appearance
That ambering can be desirable on oak or traditionally styled furniture. It can be objectionable on pale wood, white paint, or a cool gray stain. A sample board is more reliable than predicting the result from a label illustration.
Which is more durable?
Available consumer and flooring guidance conflicts over whether water-based or oil-based polyurethane is categorically harder, more scratch-resistant, or more durable. Some sources favor oil-based finishes, while others distinguish modern waterborne floor formulations from ordinary consumer topcoats. The sound conclusion is that the categories are too broad to establish performance on their own.
For a floor, prioritize:
- An explicit floor rating
- The intended residential or commercial use
- Compatibility with the stain, sealer, and existing finish
- Current technical and application instructions
- Required downtime and ventilation
- The manufacturer’s maintenance and recoating process
Do not choose a floor finish solely because the front label says “water-based” or “oil-based.”
Application variables
Coat count, abrasion requirements, tools, recoat windows, and cure periods are product-specific. Do not borrow a schedule from another can simply because both products say “polyurethane.”
Potential application problems include bubbles, dust nibs, visible sanding scratches, runs, uneven film, and poor adhesion. Agitation, overworking, contamination, unsuitable conditions, missed recoat requirements, or incompatible layers may contribute, but a visible defect rarely proves one cause by itself. Diagnose problems using the exact product’s instructions rather than a generic checklist.
If the label directs you to stir rather than shake, follow that instruction. Likewise, use the specified brush, pad, wiping method, or spray process. “Low odor” does not mean ventilation is optional, and neither polyurethane category should be assumed suitable for every floor or compatible with every existing coating.
Can polyurethane go over shellac?
Sometimes—but not as a universal rule.
Compatibility can depend on:
- Whether the shellac contains wax
- The exact shellac and polyurethane formulations
- Whether the polyurethane manufacturer approves shellac as an undercoat
- Surface condition and preparation
- Stain, dye, or other layers in the system
- Recoat timing and environmental conditions
- The condition and history of an existing finish
- Wax, polish, oil, or other surface contamination
When an approved schedule calls for polyurethane over shellac, dewaxed shellac is the conservative shellac choice. Natural wax in ordinary shellac creates an avoidable adhesion concern. Dewaxed shellac does not guarantee success; it only removes one source of uncertainty.
There is conflicting practical evidence. A small, explicitly non-scientific experiment reported no short-term lifting when polyurethane was tested over thin waxed and dewaxed shellac samples. Its author acknowledged that the test did not control the many variables involved or establish universal, long-term compatibility (the polyurethane-over-shellac adhesion experiment).
That experiment does not override a warning on a shellac can, polyurethane label, technical data sheet, or written manufacturer instruction. It also does not establish long-term performance on a floor, table, or other large surface.
Use this starting-condition flowchart:
What is on the wood now?
│
├── Bare wood
│   └── Select a complete system whose manufacturers approve every layer.
│       Test the actual stain, shellac, polyurethane, and preparation sequence.
│
├── Verified dewaxed shellac
│   └── Confirm that the exact polyurethane permits this undercoat.
│       Prepare and recoat only as the current instructions specify.
│
├── Verified wax-containing shellac
│   └── Do not assume adhesion.
│       Removal or a different approved finish schedule may be required.
│
└── Unknown existing finish
    └── Stop. Investigate the finish history and surface condition
        before selecting another coating.
For bare wood or a new finishing system, choose the stain, shellac, and polyurethane together rather than assembling the schedule after work begins. If the product companies will not approve the proposed layers, choose a simpler documented system.
An existing shellac or waxed floor is a different problem. Old wax and maintenance residues can remain even when the surface looks clean. Flooring guidance commonly recommends maintaining an existing shellac system with a compatible finish rather than treating it as bare wood and automatically applying polyurethane (Little “A” Wood Floors’ finish guide).
A test area can reveal obvious problems such as undesirable color, wrinkling, poor drying, or immediate adhesion failure. Passing a small short-term test cannot prove that an entire floor will remain bonded through years of movement, wear, and cleaning. No unsupported home test should be treated as conclusive proof of wax content or long-term compatibility.
Application planning without relying on generic coat schedules
A reliable finishing plan starts with the selected product’s current instructions, not a universal recipe. Use one of three planning paths.
Path 1: shellac as the final finish
- Prepare a clean, sound surface. Address dust, residue, and damaged material before applying the finish.
- Test the color and method. Use project scrap whenever possible.
- Apply controlled, thin layers. Do not attempt to build a heavy film in one pass.
- Maintain a wet edge. Work deliberately and avoid repeatedly brushing partially dried shellac.
- Watch for lap marks. Adjust the tested method rather than continually reworking a film that is setting.
- Use the stated recoat interval. Shellac products and concentrations do not all behave identically.
- Allow the stated service time. Rapid recoating does not automatically mean immediate readiness for hard use.
Rapidly drying brushed shellac can be less forgiving than beginners expect. Practice on scrap large enough to reproduce the real application, especially for a wide tabletop, long shelf, or detailed molding.
Path 2: polyurethane as the final finish
- Confirm intended use and compatibility. Floors require a product approved for floors.
- Prepare the surface as directed. Remove dust and address incompatible residue.
- Mix only as instructed. Stir rather than shake when the label calls for stirring.
- Apply thin, even coats with the specified tool.
- Observe the recoat window. Requirements may change depending on whether the next coat is applied within or after that window.
- Abrade only as directed. Do not assume every coat requires the same treatment.
- Remove sanding residue by a method compatible with the product.
- Leave the final coat untouched unless the instructions say otherwise.
- Protect the finish through its stated cure schedule.
Wipe-on polyurethane may be easier for a beginner to control on small furniture because its thinner application can reduce some brush-mark and sag problems. It also builds less film per pass, so its complete schedule must still come from that specific product.
Path 3: approved polyurethane over dewaxed shellac
Build a complete test panel containing:
- The actual project wood
- The project’s sanding sequence
- The selected stain or dye
- The exact dewaxed shellac
- The exact polyurethane
- Every required preparation or abrasion step
- Realistic recoat and cure periods
- The intended final sheen
A combined system can fail even when each product works well on its own. Testing the complete sequence is more useful than testing its components separately.
Exact timing cannot be universal. Shellac concentration, polyurethane chemistry, coat thickness, wood porosity, temperature, humidity, and airflow all affect drying and curing.
Build the project timeline from four separate milestones:
- Time before recoating
- Time before light handling or foot traffic
- Time before replacing furniture, rugs, or other loads
- Time to full cure and unrestricted normal use
Do not copy a coat count from another product or assume more film is always better. If a test panel remains soft, wrinkles, peels, develops persistent bubbles, or shows weak adhesion, stop and obtain product-specific guidance before coating the full project.
Safety, maintenance, and the next refinishing cycle
Finish choice affects application, cleaning, repairs, future recoating, and eventual removal.
For either finish, obtain the exact product label and safety data sheet. Follow their requirements for:
- Ventilation
- Respiratory, eye, skin, or other protective equipment
- Ignition control
- Solvent handling and cleanup
- Storage
- Spill response
- Waste management
- Disposal
Shellac’s natural resin does not make the liquid product hazard-free. Its alcohol solvent and possible denaturants require application-stage precautions. Oil-based polyurethane generally produces stronger solvent fumes than water-based polyurethane, but “water-based” is not permission to ignore ventilation or protective measures. Floor-finishing guidance specifically identifies shellac as flammable and calls for ventilation, protective equipment, and control of pilot lights during application (Bob Vila’s floor-finish safety guidance).
Keep vapors, liquid finish, and flammable materials away from pilot lights, flames, sparks, heaters, and other ignition sources as directed by the product. Do not invent a cleanup or disposal method when the label supplies one.
Maintaining shellac
Shellac’s principal maintenance advantage is that worn or damaged areas can often be blended or renewed more readily than cured polyurethane. Common problems include:
- White rings from heat
- Alcohol-softened or dissolved areas
- Water spots and cloudy patches
- Scratches and worn paths
- Uneven sheen from previous touch-ups
- Damage extending into stain or bare wood
The appropriate repair depends on the depth, color, contamination, and surrounding film. Some marks may respond to local treatment; others require a wider area to be removed and refinished. Do not promise an invisible repair before testing how the existing finish responds.
On an existing shellac floor, recoating with the same compatible finish or maintaining an established shellac-and-wax system may be less risky than introducing polyurethane over an uncertain substrate. Trade guidance describes shellac and wax as relatively easy to renew but less durable than polyurethane, while noting that wax can water-spot and become slippery (Wood Floor Business on shellac, wax, and alternative finishes).
Wax also introduces its own maintenance cycle. It may require cleaning, buffing, and renewal, and residual wax can complicate a future switch to a different film finish.
Maintaining polyurethane
Polyurethane generally provides stronger initial protection, but localized repairs can remain visible. Problems may include:
- Surface scratches
- Worn traffic lanes
- Dull or polished patches with a different sheen
- Peeling associated with poor adhesion
- Dust or debris trapped in the film
- Softness or imprinting before adequate cure
- Broader wear that exposes the underlying wood or stain
These are different failures and do not share one repair method. Before recoating, determine whether the existing film is sound and whether the proposed maintenance product is approved to bond to it.
Think about the next refinishing cycle before selecting the first finish. Shellac may require more frequent attention but can support smaller blended interventions. Polyurethane may resist demanding use longer yet eventually require broader abrasion or refinishing to avoid visible patch boundaries. Neither maintenance model is universally better.
Before purchasing, confirm:
- Project use: Floor, table, cabinet, antique, or decorative object
- Existing finish: Bare wood, shellac, waxed shellac, polyurethane, or unknown
- Desired color: Pale and clear, or warm and amber
- Exposure hazards: Abrasion, water, alcohol, cleaners, and heat
- Repair expectations: Local renewal or longer initial protection
- Approved compatibility: Every stain, sealer, and topcoat in the schedule
- Application conditions: Temperature, humidity, dust control, and ventilation
- Safety needs: PPE, ignition control, cleanup, and disposal
- Available time: Recoating, light use, furniture replacement, and full cure
Frequently asked questions
Is shellac or polyurethane better for a dining or kitchen table?
Polyurethane is generally better for a dining or kitchen table because these surfaces routinely encounter water, alcohol, cleaners, sliding dishes, and hot serving items. Shellac is particularly vulnerable to alcohol and can develop white marks from heat.
Choose a polyurethane approved for the intended interior use, then select water-based or oil-based according to color, odor, workflow, and documented performance. Continue using coasters and trivets; polyurethane is protective, not damage-proof.
Shellac remains reasonable for a lightly used decorative table when its warmth and easier repair matter more than spill and heat resistance.
Is shellac durable enough for a hardwood floor?
It can be serviceable on a historic or low-traffic floor whose owner accepts its limitations and maintenance needs. It is not the practical default for a busy modern household.
For most floors exposed to shoes, grit, pets, spills, and moving furniture, use a floor-rated polyurethane or another approved waterborne floor finish. Existing shellac floors require a different analysis because preserving the established finish and making blended repairs may justify retaining shellac.
If wax is present, do not treat the floor as bare wood. Maintain the compatible system or obtain product-specific preparation guidance before changing finish chemistry.
Can I apply polyurethane over shellac?
Sometimes. The conservative approach is to use verified dewaxed shellac only when the exact polyurethane manufacturer approves it as an undercoat. Prepare and recoat according to the current instructions for both products.
Wax-containing shellac creates an adhesion concern, and old floors or furniture may carry additional surface residues. A small test can expose obvious problems but cannot guarantee long-term adhesion across the entire project.
If the existing finish is unknown, investigate before adding another layer. Complete removal or a documented conversion process may be safer than attempting to bond polyurethane to an uncertain surface.
Which finish changes the wood’s color the least?
Water-based polyurethane generally changes the wood’s color the least. It is usually the best starting point when preserving pale maple, ash, birch, or a cool-toned stain matters.
Shellac commonly adds warmth or amber color, with the result varying by grade and formulation. Oil-based polyurethane also adds amber color and may deepen or yellow over time. The two finishes should not be expected to create the same tone.
Test the complete finish on actual project scrap because wood species, sanding, stain, film thickness, sheen, and lighting can all affect the result.
How many coats do shellac and polyurethane need, and how long do they take to cure?
There is no reliable universal coat count or cure schedule. The correct answer depends on the exact product, shellac concentration or polyurethane chemistry, intended use, application thickness, wood, temperature, humidity, and airflow.
Read four separate times from the current instructions: recoat time, light-use time, furniture or normal-service time, and full cure. Do not interpret “dry to the touch” as fully cured.
Use the selected product’s specified system rather than copying a schedule from another finish. If the test panel remains soft, wrinkles, peels, bubbles persistently, or shows weak adhesion, stop before finishing the full project.
The final decision
Choose a compatible polyurethane intended for the job when finishing a busy floor, kitchen table, bar, frequently handled cabinet, or another demanding surface.
Choose shellac when warm appearance, rapid recoating, historic continuity, or easier localized repair outweigh maximum resistance—and when the object will not routinely face alcohol, heat, moisture, or heavy abrasion.
If shellac and polyurethane will be combined, or if an old shellac or waxed surface will be recoated, verify the exact products, follow their current instructions, and prove the complete system on a test area before committing to the full project.