
When a Shellac Barrier Coat Helps—and When to Skip It
Clean, uncomplicated bare wood often needs no extra coat. Under a later finish, verified dewaxed shellac is a starting point, not a compatibility guarantee.
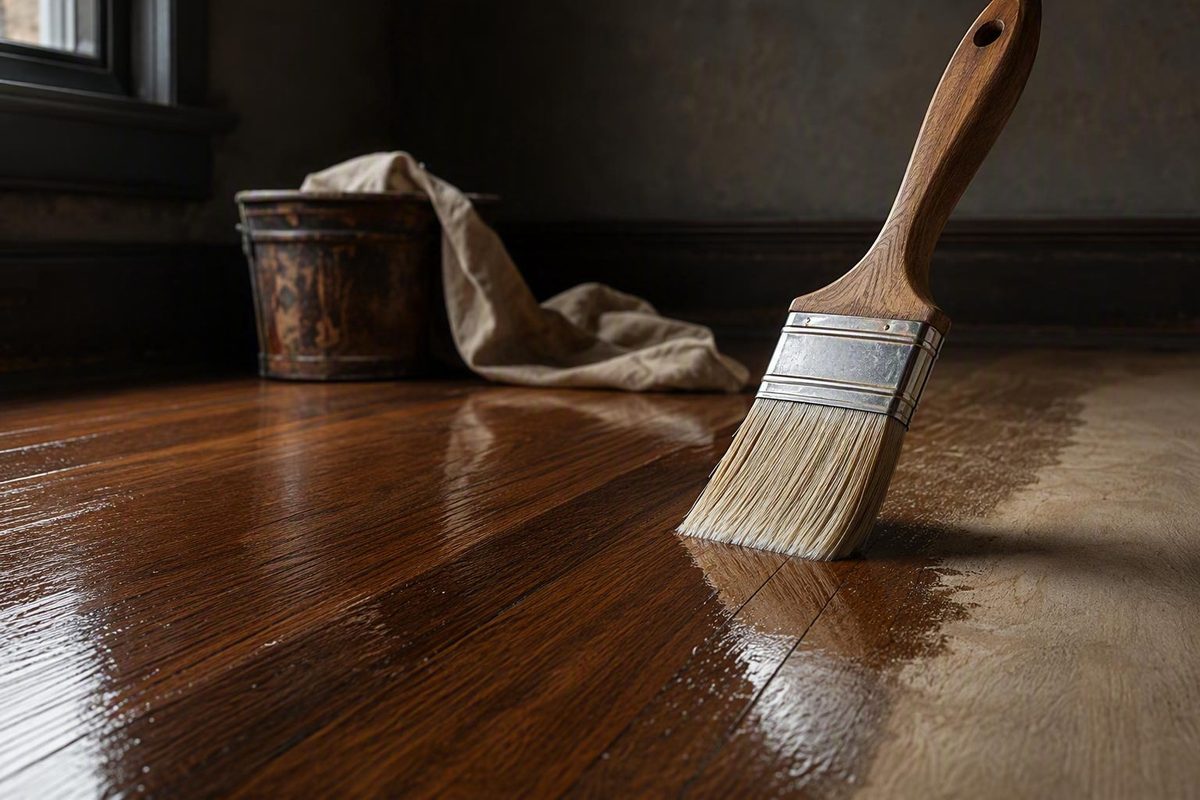
Shellac sealer can be useful when it has a defined, product-supported job: isolating certain resin, contamination, odor, or color problems; adding warmth; supporting restoration work; or forming part of a traditional shellac-and-wax schedule. Whether it will solve a particular problem depends on the formulation, substrate, preparation, and coatings used above and below it.
What shellac is not is a mandatory first coat for every piece of bare wood. If the wood is clean and uncomplicated and the intended finish permits direct application, that finish can often provide the first sealing coat. Unnecessary shellac adds labor and creates another coating interface that must be compatible.
Use these rules as a starting point:
- Skip shellac when it solves no identified barrier or color problem.
- Treat wax status as a compatibility issue, not a product-name assumption.
- Prefer a verified dewaxed product when another film-forming coating will go over it.
- Do not apply shellac over unremoved wax.
- Follow the current label and technical documentation for the exact products.
- Test the complete sequence, not shellac in isolation.
- Treat hardwood flooring as a separate, higher-wear finishing system.
What shellac sealer is—and what it is not
Traditional shellac is resin dissolved in alcohol. As a sealer, it forms a thin interior coating that limits absorption or separates the substrate from a later coating. As a complete finish, it is built into the exposed film that supplies the final color, sheen, and protection.
Those roles have different requirements:
- A shellac seal coat is a preparatory layer used for a defined barrier, color, or surface-control purpose.
- A shellac finish remains exposed and must suit the expected moisture, heat, alcohol, cleaning, handling, and wear.
- A shellac sanding sealer is intended to prepare a surface for sanding or later finishing, but the name does not establish whether it is waxed or dewaxed.
- A conventional sanding sealer may use lacquer, varnish, polyurethane, or another resin instead of shellac.
Shellac concentration is conventionally expressed as a pound cut, meaning the pounds of dry shellac resin dissolved in one gallon of alcohol. A higher pound cut contains more resin; a lower pound cut is thinner. This explains why products carrying the same general name can flow and build differently, but it does not supply a universal thinning formula. The starting concentration and permitted solvent still have to be verified for the specific product. Bob Flexner discusses both pound cut and the difference between routine sealing and problem-solving barrier use in his Woodshop News article on shellac as a sealer.
The term shellac sanding sealer does not automatically mean dewaxed shellac. For example, Briwax describes its product as a four-pound-cut shellac sanding sealer and expressly says that it is not dewaxed. The company positions it for pore sealing, French-polish preparation, and use beneath its own waxes. Its directions permit brush or cloth application and identify denatured alcohol for dilution and brush cleanup. Those facts apply to that product alone; they are not universal shellac directions. See the Briwax product description and linked SDS.
Nor is every conventional sanding sealer shellac under another name. Sanding sealers can use different resin systems, and some formulations may contain sanding aids intended to help the cured coating powder under an abrasive. A commercial overview discusses resin bases and zinc stearate, but it does not establish the composition of every product sold as sanding sealer. Composition, sanding behavior, and approved topcoats must be checked product by product.
Traditional shellac must also be distinguished from a synthetic shellac primer. A synthetic primer may be marketed for overlapping purposes such as stain or odor isolation, but the name does not establish that its chemistry, solvent, drying schedule, or cleanup procedure matches alcohol-soluble shellac.
Marketplace searches make these distinctions harder. Results for “shellac sealer” can intermingle traditional shellac, dewaxed shellac, synthetic shellac primer, oil-and-wax finishes, and unrelated sealers. Ratings, sales counts, sponsored placement, and marketplace badges are shopping signals—not technical evidence that a product fits a finishing schedule. The mixed listings visible in an Amazon search for shellac sealer illustrate why a listing title cannot replace current documentation.
Before buying, answer these questions from the container, label, technical data sheet, or manufacturer:
- Is the product traditional shellac, dewaxed shellac, synthetic primer, or another sealer chemistry?
- Does it contain natural shellac wax?
- Which bare woods, stains, paints, or existing finishes are approved beneath it?
- Which paints or clear topcoats are approved above it?
- Is it intended to remain exposed, be sanded, or receive another finish?
- What preparation, drying, sanding, thinning, and cleanup instructions apply?
- Is a current safety data sheet available?
The words shellac, sealer, and sanding sealer do not answer those questions by themselves.
Decide whether the project actually needs a separate sealer
Start with the problem, not the product.
For clean new wood without resin, contamination, bleed-through, odor, a special color requirement, or a manufacturer-specified barrier coat, the intended finish can often serve as the first sealing coat. Adding shellac in that situation may produce no practical advantage.
A useful decision sequence is:
-
Is the wood clean, bare, dry, and uncomplicated? Check whether the intended finish permits direct application. If it does, a separate sealer may be unnecessary.
-
Is there a specific material or condition to isolate? Knots, resin, suspected silicone or polish contamination, certain odors, oily extractives, stain movement, or residues from an earlier finish may justify investigating a barrier coat.
-
Is the purpose visual? Shellac may be chosen to add warmth, deepen figure, alter color, support restoration, or prepare for French polishing.
-
Will another coating go over it? Wax status and the instructions for both products then become central.
-
Is the substrate or coating combination uncertain? Stop and prepare a representative sample of the complete system.
Flexner’s problem-first view is that shellac is often unnecessary beneath another finish on straightforward new wood but can be valuable in refinishing situations involving silicone contamination, odors, residual wax, pine-knot resin, or oils in some woods. These are potential uses, not a promise that every shellac formulation will isolate every contaminant.
Retailers also market certain shellacs for tannin, water-mark, stain, and odor blocking. Such claims are product- and system-dependent. One furniture-paint retailer, for example, describes clear shellac as a preliminary coat for certain tannins, water marks, stains, and odors in a Chalk Paint and wax schedule, while warning against applying it directly over wax. That specific workflow appears on the retailer’s clear-shellac product page, but it should not be generalized to every paint or substrate.
If the problem is described only as “bleed-through,” identify its source before selecting a product:
- Resin from a knot
- Tannin or discoloration in the wood
- An old water mark
- Smoke or pet odor in the substrate
- Furniture-polish or silicone contamination
- Dye moving when the next liquid coat is applied
- Incomplete paint coverage
- Wax left from an earlier finish
Different causes can require different preparation.
Shellac may also be selected for appearance rather than correction. Nearly clear, amber, orange, and darker grades can change warmth and depth. A restorer may choose shellac because it suits the existing finish or desired period appearance. French polishing uses shellac as part of the finish itself, while a manufacturer-supported shellac-and-wax system may use it as a base beneath wax.
The practical decision rule is simple:
Skip the extra coat when it solves no defined problem. Consider shellac when a barrier or color function is needed and the complete system is documented or has passed a representative test.
Waxed versus dewaxed shellac: the compatibility decision
Natural wax remaining in some shellac products can create adhesion concerns beneath a later film-forming coating. Dewaxed shellac substantially reduces that wax-related concern and is therefore the more cautious starting point when paint, polyurethane, lacquer, varnish, or another clear finish will be applied over it.
That does not make dewaxed shellac universally compatible.
Compatibility still depends on:
- The substrate and its preparation
- The stain or dye beneath the shellac
- The shellac formulation and condition
- Required drying or curing
- Sanding and recoat instructions
- The topcoat manufacturer’s approved substrates
- Application temperature, humidity, and film thickness
An archived trade-forum discussion illustrates the limits of broad compatibility claims. Participants distinguished wax-containing shellac from dewaxed sealer and reported successful initial samples, but suppliers associated with the proposed cabinet system had advised against the shellac layer. The discussion is anecdotal and dated, yet it demonstrates why a satisfactory-looking sample cannot cancel explicit instructions for the products being used. See Woodweb’s archived shellac compatibility discussion.
Use this bounded matrix rather than a universal compatibility list:
| Project condition | Cautious starting point |
|---|---|
| Clean bare wood with no barrier or color problem | Apply the intended finish directly if its instructions permit |
| Clear topcoat over a shellac barrier | Use a verified dewaxed product only when the documented system permits it |
| Paint over shellac | Confirm wax status, approved substrates, required cure, and any sanding instructions |
| Wax over shellac | Use a manufacturer-supported shellac-and-wax schedule |
| Shellac as the complete finish | Select the type and color for the desired appearance and expected exposure |
| Unknown existing finish | Identify the surface where possible and test the entire sequence |
| Hardwood floor | Require documentation for the complete floor system |
Stain and dye introduce another risk. Because shellac is alcohol-soluble, application can disturb an alcohol-soluble dye or an alcohol-based stain that has not reached the required recoat condition.
Before putting shellac under another film-forming finish, verify four points for both products:
- Wax status: Is the shellac waxed or dewaxed?
- Approved substrates: Can each coating be used over the wood, stain, paint, or existing finish present?
- Approved subsequent coats: Does the documented sequence allow the next layer?
- Conditions: What drying, curing, sanding, cleaning, temperature, and humidity requirements apply?
If the available instructions conflict, do not infer approval from a broad phrase such as “works under all finishes.” Obtain clarification for the exact products or choose a documented alternative.
Match the shellac product to the job
The best shellac sealer is not the product with the highest rating or broadest marketing language. It is the one whose wax status, color, application format, and documented role match the project.
| Product category | Typical role to investigate | Main questions |
|---|---|---|
| Wax-containing traditional shellac | Exposed finish, French polishing, or a supported wax schedule | Will it remain exposed? Is the next layer wax? |
| Dewaxed shellac sealer | Barrier or color coat beneath an approved topcoat | Are the substrate and topcoat documented? |
| Shellac sanding sealer | Surface preparation before sanding or finishing | Is it waxed or dewaxed? Which finishes may follow? |
| Synthetic shellac primer | Product-specific stain or odor isolation | What chemistry, solvent, drying schedule, and topcoats are specified? |
| Non-shellac sanding sealer | Sandable base in a compatible finish system | What resin and sanding aids does it contain? |
Barrier coat beneath another finish
Start with a dewaxed shellac documented for the substrate and intended topcoat. Determine whether it is actually intended to isolate the identified resin, contamination, color, or stain condition rather than being marketed only as a general sanding sealer.
A specialty retailer lists a clear, wax-free sealer for interior wood, cabinetry, and hardwood floors and promotes it for use beneath clear finishes. Those are broad seller claims, not independent compatibility evidence. The useful feature of the dewaxed shellac listing is that it identifies wax status and links to technical documentation that can be evaluated against the proposed topcoat.
Shellac as the complete interior finish
When shellac will remain exposed, choose it as a finish rather than merely as a sealer. Consider:
- Desired color and warmth
- Gloss or rubbed appearance
- Expected exposure to water, alcohol, heat, cleaning, and abrasion
- Repair and maintenance expectations
- Whether the piece is furniture, trim, cabinetry, or a decorative object
- Whether the selected product is intended to remain as the final coating
A preparatory seal coat can be thin and visually subordinate. An exposed shellac finish has to function as the wear surface. Directions for one role should not automatically be transferred to the other.
Isolation coat for painted furniture
On painted furniture, the problem is often discoloration or odor migration rather than protection of bare wood. The shellac or primer must be documented for both the existing substrate and the intended paint.
Remove old wax before coating. If the problem is localized, test whether spot sealing changes the paint’s color or sheen. Coating an entire logical section, such as a tabletop or drawer front, may produce a more uniform result than treating only a small mark.
Do not assume every clear shellac is suitable beneath every furniture paint. Likewise, do not transfer application, thinning, or cleanup directions between traditional shellac and synthetic shellac primer.
French-polish preparation or a base beneath wax
Traditional schedules may intentionally use wax-containing shellac. Briwax’s non-dewaxed sanding sealer is one example: the manufacturer positions it for sealing pores, building a base before French polishing, and use beneath its own waxes.
That establishes a role within that maker’s finishing approach. It does not establish suitability beneath polyurethane, lacquer, or an unrelated waterborne coating.
Choosing a color
Shellac grades range from nearly clear through amber, orange, and darker tones. More color can increase apparent warmth and depth, but it can also alter pale wood, shift a stain match, or emphasize differences among boards.
“Clear” should not be read as “visually invisible.” Test the selected product on the actual species and over the actual stain. For repair work, compare the sample in daylight and under the room’s normal lighting.
Brush-on, padded, or aerosol
Choose the format according to the work and the label:
- Brush-on shellac can provide controlled coverage on furniture, cabinetry, trim, and panels.
- Cloth or pad application can suit traditional techniques or products that expressly permit it.
- Aerosol shellac may be convenient for small objects, irregular details, or touch-ups.
- Spray equipment should be used only with a product intended for that method and under its specified safety and application controls.
Performance depends on formulation, preparation, technique, and deposited film.
Before purchase, obtain the current label, technical data sheet, and safety data sheet when available. If a retailer omits drying time, coverage, sanding instructions, approved topcoats, or application limits, do not fill the gaps with directions from another product.
A cautious shellac-sealer application workflow
There is no responsible universal shellac schedule. Available directions differ on shaking versus stirring, coat count, sanding, drying intervals, and dilution. The current instructions for the exact product control.
1. Confirm the complete system
Write down every layer in order:
- Existing wood or finish
- Cleaner or wax-removal process
- Filler, stain, or dye
- Shellac product
- Sanding step, if required
- Paint or clear topcoat
- Wax, if included
Check each transition. Approval for bare wood does not establish approval over an unknown old finish. Approval over “sealed wood” does not necessarily include every shellac formulation.
2. Prepare the substrate
The surface should be clean, dry, and free of dust and loose material. Complete required repairs, filling, finish removal, and sanding before sealing. Remove sanding dust from pores, joints, corners, and molded details.
Do not use shellac to hold down a failing coating. Flaking, soft, contaminated, or poorly bonded material must be addressed first.
3. Remove existing wax
Do not apply shellac directly over wax. Dewaxed describes the shellac in the container; it does not describe or correct the surface beneath it.
Use a wax-removal process approved for the substrate and proposed coating system. Work in controlled sections and verify the result on a test area. Avoid improvising with an aggressive solvent that could damage veneer, stain, paint, or an older finish.
4. Inspect and mix as directed
Read the current container before mixing. One product may instruct users to shake it, while another source may recommend stirring or rolling. Follow the directions for the exact product rather than adopting a general rule.
Inspect the material for debris, gelled material, unusual separation, or another condition inconsistent with the label. If its age or storage history is uncertain, make a cure test before coating the project.
5. Apply a thin, controlled coat
Use only an approved brush, cloth, pad, aerosol, or spray method. Maintain a manageable wet edge and avoid repeatedly working an area that has started to set.
Thin coats are commonly favored because shellac applied too heavily can be more prone to ridges, lap marks, blushing, orange peel, or abrasive clogging. Thin does not mean patchy: aim for controlled, continuous coverage consistent with the product instructions.
Use reflected light to find missed areas, heavy edges, runs, or uneven overlap before the coating advances too far in its drying process.
6. Wait for the specified condition
Do not rely on a generic claim that shellac “dries in minutes.” A surface that feels dry may not be ready to sand or topcoat.
Proceed only when the film has reached the condition specified for sanding or recoating. Stop if it remains soft or tacky, has an unusual persistent odor, or balls heavily under the specified abrasive.
7. Sand only when required
Some systems call for light sanding to remove raised grain or minor nibs. Others permit direct recoating under stated conditions. Do not sand automatically.
When sanding is required:
- Use the specified abrasive and grit.
- Apply light, even pressure.
- Take particular care at edges, profiles, and high spots.
- Avoid cutting through a thin barrier coat.
- Do not polish the film contrary to the next coating’s preparation requirements.
A barrier coat that has been sanded through is no longer continuous. Follow the product instructions for repairing a breakthrough.
8. Remove dust thoroughly
Remove sanding residue without introducing oil, silicone, wax, lint, or incompatible cleaner residue. Pay attention to cabinet corners, carvings, moldings, pores, and floor-board gaps.
Use only dust-removal materials permitted by the next coating’s instructions.
9. Thin and clean up only as directed
Some traditional shellac products identify denatured alcohol for dilution or cleanup. That does not make it the correct solvent for every product containing the word shellac. Synthetic primers and other formulations may specify different procedures.
Do not derive a dilution ratio from pound cut alone. Verify whether thinning is allowed, which solvent is approved, and what limits apply. There is likewise no universal coat count, coverage rate, sanding grit, or recoat time for all shellac products.
Test the complete finish schedule before committing
A spot of shellac on unrelated scrap does not test the proposed system. A useful sample includes every layer in the planned order.
Build a representative sample
Use an offcut from the same wood when possible. Otherwise, choose an inconspicuous project area that can be repaired. Match:
- Wood species and grain orientation
- Existing finish or bare-wood preparation
- Sanding sequence
- Filler
- Stain or dye
- Shellac product and application method
- Planned sanding
- Paint or clear topcoat
- Wax, if applicable
Freshly sanded scrap of another species may not reveal how an old, stained, or contaminated surface will behave.
Include a comparison area
When deciding whether shellac is needed, divide the sample:
- Apply the intended finish directly to one section.
- Apply shellac and the intended finish to another.
- Leave a narrow reference strip unfinished if useful for evaluating color.
This comparison can reveal whether shellac changes warmth, grain contrast, stain intensity, clarity, or sheen—and whether it addresses the original problem.
Apply every layer in order
Do not test shellac and topcoat separately. Reproduce the complete sequence, elapsed times, sanding steps, and application methods. Include repaired areas, knots, multiple stain colors, or suspected contamination if those conditions exist on the project.
Record:
- Full product names
- Shellac wax status
- Lot or manufacture information when available
- Any permitted dilution
- Application tools
- Coat sequence
- Temperature and humidity
- Drying and recoat intervals
- Sanding abrasive and method
That record makes a successful result repeatable.
Inspect more than adhesion
Look for:
- Unwanted ambering or color shift
- Blotching or reduced stain intensity
- Stain lifting onto the applicator
- Dye redistribution or streaking
- Continued bleed-through
- Lap marks, ridges, bubbles, or orange peel
- Softness, wrinkling, or persistent tackiness
- Sheen differences between sealed and unsealed areas
- Sanding breakthroughs
- Abrasive loading that suggests the film is not ready
Wait for the documented cure period before evaluating adhesion, and use only checks allowed by the coating manufacturer. A fingernail scratch may reveal an obviously soft film, but it does not prove long-term adhesion, abrasion resistance, or floor durability.
A sample reduces uncertainty. It does not establish universal compatibility or overrule an explicit instruction against the proposed combination.
Shellac sealer on hardwood floors
Floors are a separate finishing category. A coating that performs acceptably on cabinetry or a picture frame may not withstand foot traffic, grit, chair movement, spills, cleaning, and repeated maintenance.
Shellac can be considered in three distinct floor roles:
- A barrier or color coat beneath an approved floor finish
- A base beneath a compatible wax system
- The exposed floor finish
Each role has different compatibility and durability requirements.
Barrier or color coat beneath another floor finish
Some sellers and finishers describe dewaxed shellac as suitable for adding warmth, establishing color, or isolating a condition beneath another floor finish. Others consider it unnecessary beneath polyurethane because the selected floor finish can seal bare wood directly.
The available floor evidence is conflicting and often anecdotal. In one older discussion about a new red-pine floor, participants disagreed about whether shellac offered a useful sealing step. The owner ultimately omitted shellac and reported a satisfactory polyurethane result, but one project cannot establish a general rule. The disagreement appears in the Sawmill Creek shellac-on-floors discussion.
Do not put shellac beneath polyurethane merely because the shellac is dewaxed. Confirm that:
- The shellac documentation includes the intended floor role.
- The floor finish permits the prepared shellac-coated substrate.
- Stain, filler, and intermediate layers are compatible.
- Required film thickness, sanding, and recoat conditions are achievable.
- A complete representative sample shows no color movement, softening, wrinkling, or visible failure.
Retailer coverage estimates, old forum schedules, and individual project reports are not floor-system approvals.
Shellac beneath wax
A shellac-and-wax floor schedule may suit a compatible traditional finish or a historic appearance. One flooring guide describes shellac or sanding sealer as a possible base beneath wax, particularly when limiting wood darkening is desired. The same guide presents shellac mainly in the context of antique floors and notes maintenance and spill-related disadvantages; see its wood-floor finish comparison.
This is not automatically a low-maintenance alternative to a modern floor finish. Wax requires ongoing care and can complicate later recoating. A future film-forming finish may require complete wax removal.
Shellac as the exposed floor finish
As an exposed finish, shellac has practical limitations around water, alcohol, heat, and heavy wear. It may still be relevant to historic or antique floors already finished with shellac, particularly where appearance and repairability matter more than maximizing resistance to modern household use.
Do not identify an old floor as shellac from age, color, or sheen alone. Valuable or historically significant floors warrant experienced assessment before stripping or recoating.
A floor system also needs a maintenance plan. Consider water and alcohol spills, pets, entryway grit, furniture movement, cleaning products, rugs, and future repairs. Barrier performance and wear performance are different: a coating may isolate a problem effectively without being the right exposed traffic surface.
Safety, freshness, and troubleshooting before the full coat
Safety requirements vary with the complete formulation and application method. Read the current label and safety data sheet before opening or applying the product, and follow their directions rather than relying on generic shellac advice.
General sanding-sealer guidance recommends ventilation and appropriate gloves, eye protection, and respiratory protection where required, but product-specific documentation must determine what is necessary for the material and method being used. A commercial sanding-sealer overview provides only general background and is not a substitute for the selected product’s label or SDS.
Do not assume that a product called shellac is automatically non-toxic, food-safe, appropriate for children’s furniture, or suitable for spray application without respiratory protection. Those conclusions require formulation- and use-specific documentation.
Check freshness before coating the project
Dissolved shellac can deteriorate with age, particularly after warm storage. General shelf-life estimates vary, so elapsed calendar time alone is not a dependable pass/fail test. Formulation, packaging, storage, and whether the material was factory-canned or mixed from flakes all matter.
Flexner notes that aged dissolved shellac can dry more slowly and remain softer, particularly after heat exposure. He also identifies blushing, ridging, orange peel, and abrasive clogging as practical problems associated with shellac application.
Before full application, brush or pad a small amount onto a clean representative sample. Stop if the film:
- Dries much more slowly than the current instructions indicate
- Remains soft or tacky
- Smears instead of sanding as expected
- Retains an unusual persistent odor
- Wrinkles or reacts with the layer below
- Develops unexplained haze, ridges, or separation
Do not cover a questionable film in the hope that another coating will correct it.
Diagnose the symptom before attempting a repair
Poor adhesion may involve surface wax, silicone or oil contamination, incompatible coatings, insufficient drying, sanding residue, or a failing existing finish.
Color movement may indicate that the alcohol is dissolving or redistributing dye or incompletely cured stain.
Ridges and lap marks may reflect excessive film thickness, loss of a wet edge, repeated brushing as the coating sets, or an unsuitable application technique.
Orange peel may involve spray setup, viscosity, film thickness, technique, or environmental conditions.
Blushing or haze may involve moisture or application conditions. Consult the product documentation rather than applying a generic solvent remedy.
Clogged abrasives can indicate that the coating is not ready to sand, the film is too heavy, the shellac has deteriorated, or the abrasive is unsuitable.
Persistent tackiness is a stop-work condition. Do not assume another coat will solve it.
Pause the project if any of these conditions remains unresolved:
- The existing finish is unknown.
- Wax removal has not been verified.
- The shellac’s wax status is unclear.
- Current technical or safety documentation is unavailable.
- The representative sample failed.
- Stain or dye moves during shellac application.
- The test film remains soft, tacky, or unusually odorous.
- The intended topcoat does not permit the prepared substrate.
- A proposed floor system lacks documented compatibility.
- An old or poorly stored product cannot pass a cure test.
Frequently asked questions
Do I need shellac sealer before polyurethane?
Usually not on clean, uncomplicated bare wood when the polyurethane instructions permit direct application. The polyurethane can often provide the first sealing coat.
Consider shellac only when it has a defined purpose, such as isolating a documented resin, contamination, odor, or color problem. If shellac will go beneath polyurethane, a verified dewaxed product is the cautious starting point, but wax status alone does not establish compatibility. Check the substrate, drying, sanding, and recoating requirements for both products.
Is sanding sealer the same as dewaxed shellac?
Not necessarily.
Some products marketed as sanding sealer are dewaxed shellac. Others are wax-containing shellac, and others use lacquer, varnish, polyurethane, or different resin systems. Some conventional sanding sealers may also contain additives intended to make sanding easier.
Read the composition, wax status, and approved-use information. “Sands easily” does not establish topcoat compatibility or durability.
Can shellac sealer be applied over stain or wax?
Shellac can be applied over some properly dried or cured stains when the product documentation permits it. A representative sample remains important because alcohol can lift or redistribute alcohol-soluble dye or stain that has not reached the required recoat condition.
Do not apply shellac directly over unremoved wax. Dewaxed shellac does not make a wax-contaminated surface safe; it only describes the wax status of the shellac itself.
How can I tell whether premixed shellac is too old to use?
Check the container for manufacture, batch, or expiration information and consider its storage history. Warm storage can accelerate deterioration, while generalized shelf-life estimates may not apply to the specific formulation.
The practical check is a representative test film. Apply it as directed and observe whether it dries and hardens within the stated conditions. Unusually slow drying, persistent softness or tackiness, smearing during the expected sanding stage, or failure to harden are reasons not to use it on the project.
Can shellac sealer be used on hardwood floors?
It can have a role in some documented floor systems: as a barrier or color coat, as part of a compatible shellac-and-wax schedule, or as a traditional exposed finish. These are different systems with different performance expectations.
Do not place shellac beneath polyurethane solely because it is dewaxed. Confirm the complete schedule in the current shellac and floor-finish documentation and test it on representative flooring. If shellac will remain exposed, account for its limitations around water, alcohol, heat, wear, and maintenance.
The bottom line
Identify the specific problem shellac is meant to solve. Skip it when no barrier or color function is needed. When another coating will follow, treat verified dewaxed shellac as a cautious starting point—not a guarantee of compatibility. Remove existing wax, check the current label and technical documentation, and test every layer on a representative sample.
For hardwood floors, require a documented system rather than extending furniture guidance to a high-wear surface. The safest conclusion is not that shellac always works, but that the right shellac can solve a defined finishing problem when the complete system is selected, prepared, and tested carefully.