
What Post-Storm Water Under Your House Is Telling You
Amount alone does not determine the response: a shallow contaminated puddle demands more caution than a larger amount of apparently clean water.
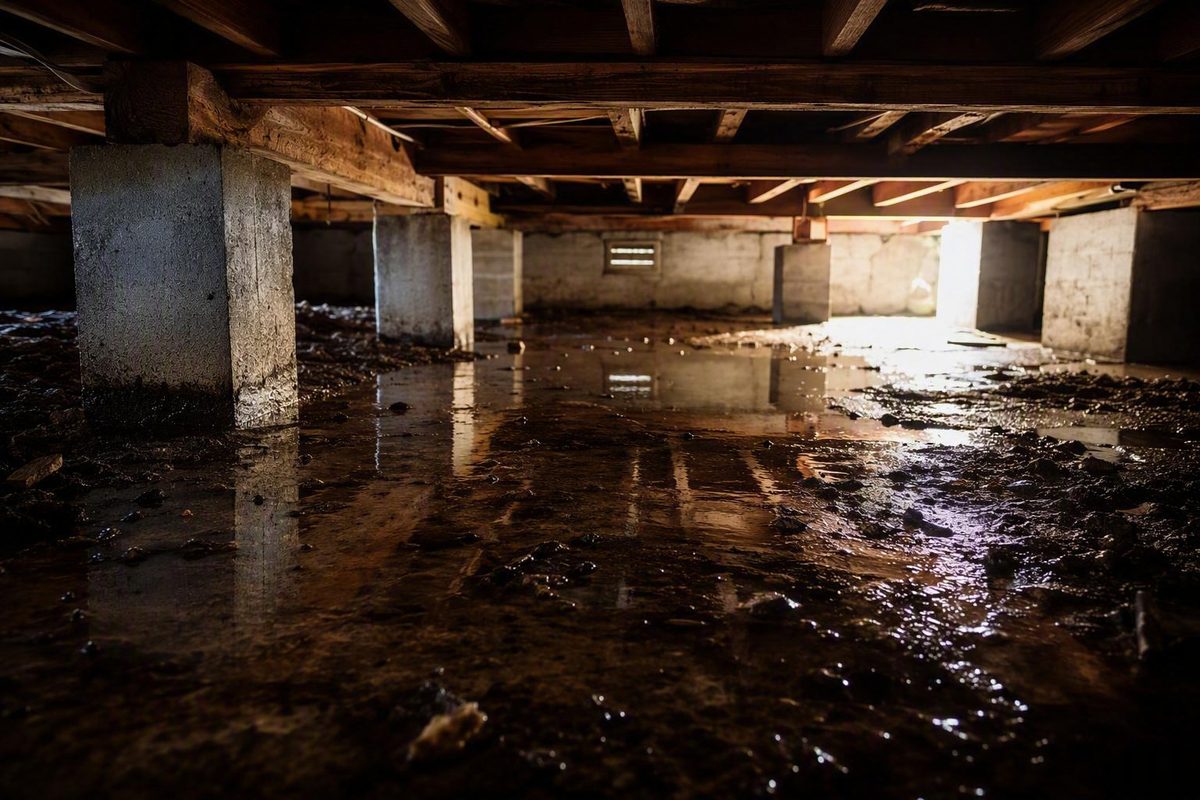
The direct answer: damp is different from standing water
A little short-lived soil dampness can occur after exceptional rain. Visible puddles, pooling, widespread standing water, or recurring wetness are different: they indicate that water is entering faster than the crawl space can manage it. That is a water-management issue worth investigating, even if the water later disappears.
The practical question is not simply, “Is water in a crawl space after heavy rain normal?” It is: What got wet, how broadly, by what route, and does it happen again?
Use these distinctions:
- Slightly damp soil: The surface looks darker or feels damp, but no water has collected. After an exceptional storm, this may be brief.
- Condensation on pipes or ducts: Droplets form on cool surfaces, often without a matching entry point at the foundation. This suggests an airborne-moisture problem rather than necessarily proving rainwater intrusion.
- Isolated puddles: Water has collected in one or more low spots. Even a small puddle identifies an entry route, leak, or drainage low point that merits investigation.
- Widespread standing water: Water extends across multiple areas, surrounds supports or equipment, or cannot be removed safely with ordinary access. Treat this as an extraction and source-control problem, not merely elevated humidity.
- Wet insulation: Fiberglass batts may darken, sag, collapse, or fall away. Other insulation may retain moisture or conceal wet framing.
- Saturated structural wood: Joists, beams, posts, sill areas, or subflooring are visibly wet or stained. Softness, deformation, splitting, or loss of support is more concerning than surface wetness alone.
An unusually intense or prolonged storm can overwhelm gutters, surface drainage, or soil absorption that seems adequate in ordinary rain. Water may enter through vents, gaps, cracks, or other weak points and then recede as surface water drains. That does not make the event harmless; it reveals a pathway or capacity problem that may recur in another severe storm. This overload pattern is described in commercial guidance on heavy-rain crawl-space intrusion.
Do not use one rigid water depth, humidity reading, crack width, or elapsed time to declare the space safe. A shallow contaminated puddle demands more caution than a larger amount of apparently clean water, while a small recurring wet spot may be more diagnostically important than one broad event during exceptional rainfall.
Cleanup articles frequently mention a 24–48-hour drying period. Treat that figure as a reason to begin safe extraction and drying promptly—not as permission to leave pooled water in place for two days. The underlying contractor guidance also says water should be removed before dehumidifiers or air movers are relied upon (Palm Build).
| What you find | Appropriate response |
|---|---|
| Brief soil dampness after exceptional rain, with no pooling or wet materials | Observe, photograph, and recheck during the next rain |
| Any isolated puddle or visible pooling | Investigate the source and remove the water when safe |
| Water across several areas, around supports, or beyond safe reach | Arrange prompt extraction and source evaluation |
| Suspected sewage, questionable stormwater, or possible electrical contact | Stay out and contact the appropriate professional |
| Wet or fallen insulation, staining, corrosion, musty odor, or visible fungal growth | Dry the area and obtain further evaluation |
| Soft wood, widening cracks, sagging floors, washed-out soil, or visible movement | Escalate to structural or foundation evaluation |
The useful middle ground is neither panic nor dismissal. Brief dampness can be observed. Pooling should be investigated. Recurrence, contamination, damaged materials, or structural symptoms justify faster professional involvement.
Safety before inspection or cleanup
Before entering, assume that a flooded crawl space may contain hazards you cannot see from the access opening.
Do not enter if water may be touching wiring, outlets, junction boxes, pumps, HVAC equipment, extension cords, or other electrical components. Commercial restoration guidance advises treating water near electrical components as potentially energized until a qualified person confirms otherwise (Palm Build’s crawl-space safety guidance).
Also stay out when:
- Sewage or a failed drain may be involved.
- Stormwater is muddy, oily, chemically contaminated, or otherwise questionable.
- There is a strong sewage odor.
- Soil has washed away around posts, piers, or footings.
- The access opening, hatch, ladder, or route is unstable.
- The space is too restricted to turn around or retreat safely.
- Animals, damaged ducts, sharp metal, or fallen materials block access.
- You cannot confidently assess the electrical or contamination conditions.
These are stop conditions, not problems to investigate by crawling farther inside. Commercial restoration guidance likewise recommends avoiding entry where sewage may be present and obtaining professional help for extensive water, contamination, or visibly damaged framing (SERVPRO).
From a safe location, document what you can before disturbing the water:
- Photograph the access area and visible water.
- Record when the rain began and ended.
- Note when the water was first observed.
- Estimate whether the water is confined to one low spot or extends across several areas.
- Record the highest visible water line on a fixed reference.
- Note color, sediment, floating debris, and odors.
- Identify nearby wiring, pumps, HVAC components, ducts, and plumbing.
- Photograph wet insulation, staining, or possible entry points without moving materials.
- Record whether a sump pump or drain appeared to be operating.
A shallow, isolated, apparently uncontaminated puddle may be suitable for cautious removal with a wet/dry vacuum only when the access route is stable and electrical exposure has been ruled out. If you cannot establish those conditions, stop rather than improvise.
Choose professional extraction when water:
- Covers multiple areas or surrounds posts, ducts, wiring, or equipment.
- Is too far from the opening to reach without crawling through it.
- Continues to enter while removal is attempted.
- Contains sediment, sewage, oil, chemicals, or unknown contaminants.
- Has destabilized soil or concealed the condition of supports.
- Exceeds what you can remove without repeatedly carrying powered equipment through a wet space.
The affected area, contamination, electrical conditions, access, inflow rate, discharge route, and the homeowner’s ability all matter.
Trace the source by timing and location
The best first clue is when the water appears. Timing narrows the possibilities, but it does not prove the cause. A house can have runoff intrusion, condensation, and a plumbing leak at the same time.
Use this compact decision path:
-
Is there an electrical, contamination, access, or soil-stability hazard? If yes, stay out and call the appropriate professional.
-
Did water appear during the heaviest rain? Inspect gutters, downspouts, surface flow, low vents, cracks, joints, and openings.
-
Did it appear immediately after rain? Compare the interior wet area with exterior ponding, discharge points, grade, and penetrations directly opposite it.
-
Did it appear hours after prolonged rain or continue rising after rain stopped? Consider saturated soil or rising groundwater, especially if water emerges at several low joints or repeatedly collects at the same low point.
-
Does it return in dry weather? Investigate plumbing, HVAC condensate, lingering groundwater, and condensation.
-
Where is it concentrated? A wall or vent suggests an exterior route; a pipe or air handler suggests a building-system source; droplets distributed along cool metal suggest condensation.
If water appears during the rain
Look from outside for:
- An overflowing gutter above the wet area
- A downspout releasing beside the foundation
- Surface water moving toward the house
- Ponding against the foundation
- Water reaching a low vent
- Wind-driven rain entering an opening
- Flow through a visible crack, joint, access door, or penetration
Water concentrated near a wall, vent, or downspout often points toward roof runoff, surface drainage, or a direct opening. Foundation gaps that remain dry in ordinary weather may admit water during an unusually intense storm.
If water appears immediately after rain
This timing can still indicate roof runoff or surface ponding.
Compare the interior wet area with:
- The exterior grade directly opposite it
- Nearby gutter corners and downspouts
- Puddles or erosion beside the wall
- Vents, service penetrations, and access doors
- Walkways, patios, or planting beds that drain toward the house
If water appears hours after prolonged rain
Delayed seepage can be consistent with saturated soil or rising groundwater. Clues include:
- Water emerging at a wall-floor or footing joint
- Seepage through several low openings
- Repeated collection at the same low point
- Wetness that increases after rainfall stops
- Similar patterns after long storms but not short showers
Heavy rain can saturate soil and allow water to move through cracks, joints, or porous materials, although rainfall timing alone cannot establish groundwater pressure as the cause. TerraFirma’s commercial overview describes these possible rain-related seepage routes.
If water appears during dry weather
Shift attention away from immediate storm runoff. Investigate:
- Supply and drain pipes
- Hose bibs and fixtures above the area
- Water-heater and appliance lines
- HVAC condensate drains
- Air handlers and drain pans
- Groundwater that remains elevated after a storm
- Condensation on cold pipes or ducts
A localized wet patch directly below a pipe does not prove a plumbing leak, but it is a strong reason to inspect that system. Water near an air handler or condensate line similarly warrants HVAC evaluation.
If there are droplets but no obvious inflow
Droplets distributed along cool ducts, pipes, or metal surfaces may be condensation rather than bulk rainwater. Look for beading across an extended surface, rust or drip marks beneath it, and no corresponding wet opening in the foundation.
Persistent condensation still requires attention because it can repeatedly dampen adjacent materials. It should not, however, be treated automatically as proof that rainwater crossed the foundation.
When safe, observe the exterior during active rain. Watch gutter seams, corners, downspout outlets, slopes, drain inlets, vents, and low areas. The route may be obvious while water is moving but invisible the following day.
Think in terms of combined pathways. An overflowing gutter may saturate inward-sloping soil, which then sends water through a low vent. Repairing only the vent opening would leave the concentrated runoff uncorrected.
Inspect outside first: gutters, grading, ponding, vents, and openings
Before accepting an expensive waterproofing package, inspect the exterior in a disciplined order. Start where rain is collected and discharged, then follow its route across the property.
1. Gutters
Check for:
- Leaves, granules, nests, or other blockages
- Overflow marks on siding or soil
- Leaking seams and corners
- Gutters pulling away from the roof edge
- Sections that appear to hold water
- Roof valleys concentrating more water than a gutter section can handle
A gutter can look functional in dry weather yet overflow during intense rain. Observe it from a safe ground-level location rather than climbing a ladder in wet or windy conditions.
2. Downspouts
Look for disconnected elbows, crushed sections, leaks, and outlets that release into depressions. Follow buried extensions where practical and determine whether they appear blocked, broken, or routed back toward the house.
Do not rely on one universal extension distance. Effective routing depends on slope, soil, roof area, nearby properties, available drainage outlets, climate, and local requirements. The objective is to discharge water where it continues away without causing erosion or returning to the foundation.
3. Erosion and puddling at discharge points
Bare channels, washed mulch, exposed roots, and sediment trails show where concentrated runoff has traveled. Water standing beside the foundation means the surrounding soil is being kept wet where openings and joints may be vulnerable.
4. Grading and perimeter depressions
Walk the whole perimeter and look across the ground surface rather than judging only the first few inches beside the wall. Note:
- Soil that visibly pitches toward the house
- Sunken planting beds
- Depressions caused by settlement
- Landscape edging that traps water
- Walkways or patios that drain inward
- Dense or compacted areas where water ponds
- New landscaping that changed the drainage route
Correcting a low spot may be more useful than sealing an interior stain that merely marks where water emerged.
5. Foundation vents
Check whether soil, mulch, paving, or landscaping sits close to or above the bottom of a vent. A low vent may admit pooled or wind-driven water. Depending on the property, correcting nearby soil height, restoring drainage, or using an appropriately configured vent well may address that route.
Do not assume every wet crawl space is leaking through vents. The interior water location, exterior staining, surrounding grade, and storm timing should support that conclusion before work begins.
6. Cracks, joints, doors, and penetrations
Inspect visible foundation cracks, masonry joints, utility penetrations, access doors, and transitions between additions. Photograph suspected entry points with a ruler or another fixed reference so future changes can be compared.
More concerning observations include recent growth, displacement from one side to the other, repeated water flow, multiple related cracks, or movement accompanied by binding doors or uneven floors.
7. Existing drains and sump equipment
Determine whether a perimeter drain, floor drain, sump basin, or pump already exists. During or after a storm, note:
- Whether the basin received water
- Whether the pump started
- Whether water continued rising
- Where the pump discharged
- Whether the discharge line appeared blocked or frozen
- Whether discharged water flowed back toward the foundation
- Whether power was available during the storm
- Whether alarms or external indicators showed a fault
Do not reach into or test flooded electrical equipment. If a pump has stopped while water is actively rising, keep clear of electrical components and arrange service.
Finally, compare exterior evidence with the interior map. A puddle below a low vent, erosion beneath an overflowing gutter, and water appearing during peak rain form a plausible pathway. Water emerging hours later across several low joints may point toward a different source.
Simple corrections should generally come before a major encapsulation or proprietary waterproofing proposal when runoff is demonstrably responsible. Exterior work cannot necessarily solve a high water table, subsurface flow beneath the foundation, or a property with no workable gravity-discharge route.
Remove water, dry materials, and inspect the floor system
Use this sequence:
- Document the event.
- Remove liquid water when safe.
- Dry affected materials.
- Correct or control the entry route.
- Inspect for residual damage.
Do not place a dehumidifier beside standing water and consider the job complete. Extraction comes first. A wet/dry vacuum may suit a small, safely accessible puddle; broader, inaccessible, continuing, or questionable water may require pumping or professional extraction.
Water must be discharged where it will not:
- Flow back toward the foundation
- Erode supporting soil
- Enter a neighboring property
- Create a hazard at a walkway or driveway
- Overload an unsuitable indoor drain
After liquid water is gone, choose drying methods according to crawl-space design and outdoor conditions. Air movement can help evaporate moisture from surfaces, but it does not replace extraction.
Avoid a universal instruction to open vents or blow outdoor air through the space. Dry outside air may help some vented crawl spaces. Hot, humid, foggy, or rainy air may slow drying or add moisture. A sealed or conditioned crawl space also behaves differently from a vented dirt-floor space.
As drying proceeds, inspect insulation:
- Is it wet to the touch?
- Has it sagged, compressed, or detached?
- Is it holding sediment or debris?
- Are fasteners rusted?
- Is the subfloor above it stained?
- Does it block the view of wiring or framing?
If insulation is widespread, fallen, contaminated, or difficult to reach safely, obtain professional help.
Inspect accessible parts of the floor system with good lighting:
- Joists
- Beams or girders
- Posts and piers
- Sill areas
- Rim areas
- Subflooring
- Metal connectors and fasteners
Look for discoloration, softness, crumbling material, splitting, corrosion, deformation, visible fungal growth, musty odors, or pest activity. These are warning signs, not stand-alone diagnoses.
From inside the home, note whether floors feel newly soft, bouncy, uneven, or sagged. Watch for doors that recently began binding or openings that appear out of square. HFI Flooring’s sagging-floor diagnostic overview describes several possible causes, but its presence does not establish that moisture caused a particular floor problem. Structural lifting, jacking, reinforcement, or support changes should not be attempted solely from an online guide when movement, damaged framing, utilities, or uncertain load paths are involved.
Correct the water source before making a lasting framing repair. Reinforcing a joist or adding a support while water continues to enter leaves the underlying cause in place. Conversely, source correction alone does not restore wood that has softened, deformed, or lost capacity. Water management and structural condition must be evaluated separately.
Match the repair to the water pathway
No single product fixes every wet crawl space. Choose each measure according to what it addresses—and what it cannot address.
| Measure | What it addresses | What it does not address |
|---|---|---|
| Gutter repair and downspout routing | Concentrated roof runoff beside the foundation | High groundwater, plumbing leaks, or condensation |
| Grading and surface drainage | Water flowing or ponding toward the house | Every subsurface-flow condition or high water table |
| Corrected soil height or vent wells | Water entering low foundation vents in applicable homes | Seepage through unrelated joints or water rising from below |
| Local crack or opening repair | A verified, stable entry point | Broad drainage pressure, other openings, or ongoing movement |
| Ground vapor barrier | Moisture evaporating from exposed soil | Liquid water entering from outside or pooling on top |
| Dehumidifier | Airborne moisture after bulk water is controlled | Standing water, active leaks, or failed drainage |
| Interior drain and sump pump | Water repeatedly collecting at low points or entering from below | Roof runoff still being discharged beside the foundation |
| Encapsulation | Ground-vapor control and air sealing within a broader plan | Every bulk-water source unless drainage and entry routes are also addressed |
Gutters, downspouts, and grading
These measures are appropriate when the storm timeline and exterior evidence show roof runoff or surface water moving toward the foundation. They are logical early corrections because they reduce the amount of water reaching the wall.
They may not control groundwater beneath the crawl space. A yard can drain acceptably at the surface while seasonal groundwater rises below it.
Vent wells and soil-height correction
Where evidence shows water entering a low foundation vent, lowering adjacent soil, eliminating ponding, or installing a suitable vent well may help.
Crack and opening repair
Sealing a verified opening can be useful, particularly around penetrations or isolated stable cracks.
Cracks that are widening, displaced, repeated across an area, or accompanied by movement should be evaluated before cosmetic sealing.
Ground vapor barriers
A ground barrier reduces moisture moving as vapor from exposed soil into crawl-space air. It is not a drain and does not stop rainwater from crossing a wall or opening. Water may simply collect on top of the liner; commercial waterproofing guidance similarly notes that a vapor barrier does not remove water deposited on it.
Barrier details depend on whether the crawl space is vented, sealed, or conditioned, as well as site and local requirements.
Dehumidifiers
A dehumidifier manages airborne moisture after standing water is extracted and active intrusion is corrected or controlled. It may support drying and ongoing moisture management, but it does not repair a downspout, close a plumbing leak, lower groundwater, or efficiently remove a puddle.
Interior drainage and sump pumps
An interior drain and sump pump may be appropriate when water repeatedly collects, enters along multiple low points, or cannot be controlled through surface corrections alone. This may be relevant where groundwater is the verified pathway or gravity drainage is not practical.
A system proposal should explain:
- Where water will be collected
- Where it will discharge
- Whether discharge can return toward the house
- How the pump and basin will be accessed
- How maintenance will be performed
- How failure will be detected
- Whether an alarm or backup arrangement is suitable
- What happens during a power outage
Those site-specific questions matter more than selecting equipment from a generic capacity chart.
Encapsulation
Encapsulation can be one component of a broader moisture-control plan. It may include a ground liner, sealed seams and penetrations, wall treatment, air sealing, drainage, and planned humidity control. It should not be presented as the automatic first step or a universal cure.
If a downspout empties into a foundation depression, correct that route. If a pipe leaks, repair it. If groundwater repeatedly rises beneath the crawl space, collection and pumping may be necessary before or as part of encapsulation.
For a large proposal, ask the provider to demonstrate the suspected entry route, identify the evidence supporting the design, explain what the system cannot solve, and describe maintenance and failure modes. If the explanation jumps from “water exists” to “full system required” without considering gutters, grading, vents, plumbing, drains, or pump performance, seek an independent second opinion.
When the problem needs professional evaluation
Some findings should end a DIY inspection immediately.
Seek prompt help for:
- Water that may contact electrical wiring, outlets, pumps, or HVAC equipment
- Suspected sewage or contaminated stormwater
- Water extending beyond safe reach or across multiple areas
- An access route that prevents a quick retreat
- Unstable soil, washed-out supports, or fallen materials
- A failed pump while water is actively rising
“Deep or widespread” should be understood operationally rather than as one universal measurement. Water is beyond routine DIY cleanup when it blocks safe access, surrounds electrical or mechanical equipment, obscures the condition of supports, covers several areas, continues flowing in, or cannot be removed without entering it.
The right first call depends on the suspected hazard:
- Electrician: Water may have reached wiring, outlets, junction boxes, pumps, or powered HVAC equipment.
- Plumber: Water is concentrated near supply lines, drains, fixtures, appliances, or a hose bib.
- HVAC technician: Moisture is associated with an air handler, drain pan, condensate pump, or condensate line.
- Water-extraction or restoration professional: Water is extensive, inaccessible, contaminated, or difficult to remove safely.
- Drainage, crawl-space, or foundation professional: Stormwater or groundwater repeatedly enters and the route requires site evaluation.
- Structural engineer: There is movement, a widening or displaced crack, washed-out support soil, widespread framing deterioration, or an uncertain load path.
Moisture and material warning signs that justify further evaluation include:
- Repeated flooding
- Persistent musty odor
- Visible fungal growth
- Wet, collapsed, or fallen insulation
- Corroded ducts, fasteners, or equipment
- Soft, crumbling, or visibly deteriorated framing
- Damage extending beyond one isolated area
Structural warning signs require a different level of attention:
- A foundation crack that is growing or displaced
- Sagging or uneven floors
- Doors newly racked or binding
- Visible movement at beams, posts, or piers
- Deterioration spanning multiple joists
- Damage extending into the sill
- Soil washed away from supports
Be cautious when a provider recommends a major drainage or encapsulation system without demonstrating the source or considering simpler exterior corrections. Separate diagnosis from sales where practical and obtain another opinion when the scope is large or explanations conflict.
HFI Flooring publishes informational flooring and subfloor guidance; that does not establish that it performs inspections, waterproofing, engineering, or contracted repairs. Its website content is expressly characterized as informational in the HFI Flooring terms.
Build a record before the next storm
A dry-weather inspection may show stains but not the route that produced them. A repeatable storm log turns a vague complaint into useful diagnostic evidence.
For each event, record:
- Date and rainfall timing
- Approximate intensity and duration
- When water first appeared
- Whether it appeared during rain, immediately afterward, or hours later
- Highest marked water level
- Affected area
- Suspected entry location
- Photographs from the same viewpoints
- Water color, sediment, and odors
- Which materials became wet
- Whether the sump or drains operated
- When liquid water was removed
- How long visible surfaces took to dry
Marking the highest water line on a fixed object can help if doing so is safe and does not affect equipment. A photograph with a ruler or another reference is more useful than describing the amount as “a lot.”
Note whether water returns during dry weather. That observation can redirect the investigation toward plumbing, HVAC condensate, continuing groundwater, or condensation rather than roof runoff.
During or immediately after rain—without entering a hazardous space—photograph:
- Gutter overflow
- Downspout discharge
- Erosion channels
- Perimeter puddling
- Low foundation vents
- Visible cracks and penetrations
- Drain inlets
- Sump-basin level or safe external indicators of operation
After corrective work, compare the same locations during a reasonably comparable storm: similar duration, intensity, soil saturation, and wind direction where relevant. An exact match is unlikely, but a brief shower is not a meaningful test of work intended to address prolonged heavy rain.
Keep each contractor’s findings and proposal separate. Ask every provider:
- What is the water source?
- What evidence supports that conclusion?
- What does the proposed measure solve?
- What can it not solve?
- Were gutters, grading, vents, plumbing, drains, and pump operation checked?
- What maintenance does the system require?
- What happens if power or a component fails?
- How will success be verified?
Do not wait for a larger flood if recurrence is increasing or if insulation, wood condition, crack appearance, or floor level is changing.
Frequently asked questions
How long can water sit in a crawl space after heavy rain?
Do not use an allowable waiting period. Begin safe extraction and drying as soon as practical. The frequently cited 24–48-hour period should be treated as an urgency signal, not permission to leave pooled water untouched; commercial cleanup guidance associates that period with the need to dry damp materials promptly.
How quickly work can begin depends on electrical safety, contamination, access, water extent, and whether water is still entering. Even if the water drains away on its own, document the event and trace its route.
Will a vapor barrier stop rainwater from entering my crawl space?
Not by itself. A ground vapor barrier reduces moisture evaporating from exposed soil. It does not repair overflowing gutters, inward grading, low vents, foundation openings, groundwater entry, or plumbing leaks.
If rainwater enters, it may pool on top of the barrier. Control the bulk-water pathway first, then use an appropriately detailed barrier as part of the broader moisture-control plan.
Can a dehumidifier fix standing water under the house?
No. A dehumidifier removes moisture from the air; it is not a substitute for extracting liquid water or correcting active intrusion.
Remove standing water when safe, stop or manage the source, dry affected materials, and then use dehumidification if the crawl-space design and remaining moisture conditions call for it.
Why is the crawl space wet only after unusually heavy rain?
Extreme rain can saturate soil, overwhelm drainage capacity, make gutters overflow, create surface ponding, and expose openings that remain dry during ordinary weather. Water may enter through vents, cracks, joints, penetrations, or other low points.
That pattern does not prove groundwater. Water appearing during peak rain near a downspout suggests runoff, while delayed seepage at several low joints may be more consistent with saturated soil or rising groundwater. A rare storm may exceed the site’s normal drainage capacity, but the event still reveals where improvement or monitoring is needed.
Can crawl-space water cause sagging or uneven floors?
Persistent or repeated wetting can occur alongside deterioration of insulation, subflooring, joists, beams, posts, or supports. Sagging or uneven floors are warning signs that justify further evaluation, but crawl-space water alone does not prove that moisture caused the floor problem.
Floors may also sag because of inadequate spans, altered joists, failed posts, poor footings, settlement, or other structural conditions. Correct the water source, then have soft wood, movement, widening cracks, or damage across multiple framing members assessed before attempting to jack or reinforce the floor.
The bottom line
Post-storm dampness is not the same as standing water. Treat visible pooling as evidence to investigate—not as a reason to panic or immediately purchase the largest system proposed.
Make the area safe, document and remove water when appropriate, trace the pathway, and correct gutters or surface drainage first when the evidence points there. Add vapor control, drainage, pumping, or encapsulation only when each measure matches the verified cause. Escalate promptly for possible electrical contact, contamination, unsafe access, recurrence, damaged materials, widening cracks, washed-out supports, or sagging floors.