
How to Bring a Crawl Space Inside the Home’s Building Envelope
Water and damage come first. Required flood openings can rule out a fully sealed design, so enclosure and humidity control must fit the site.
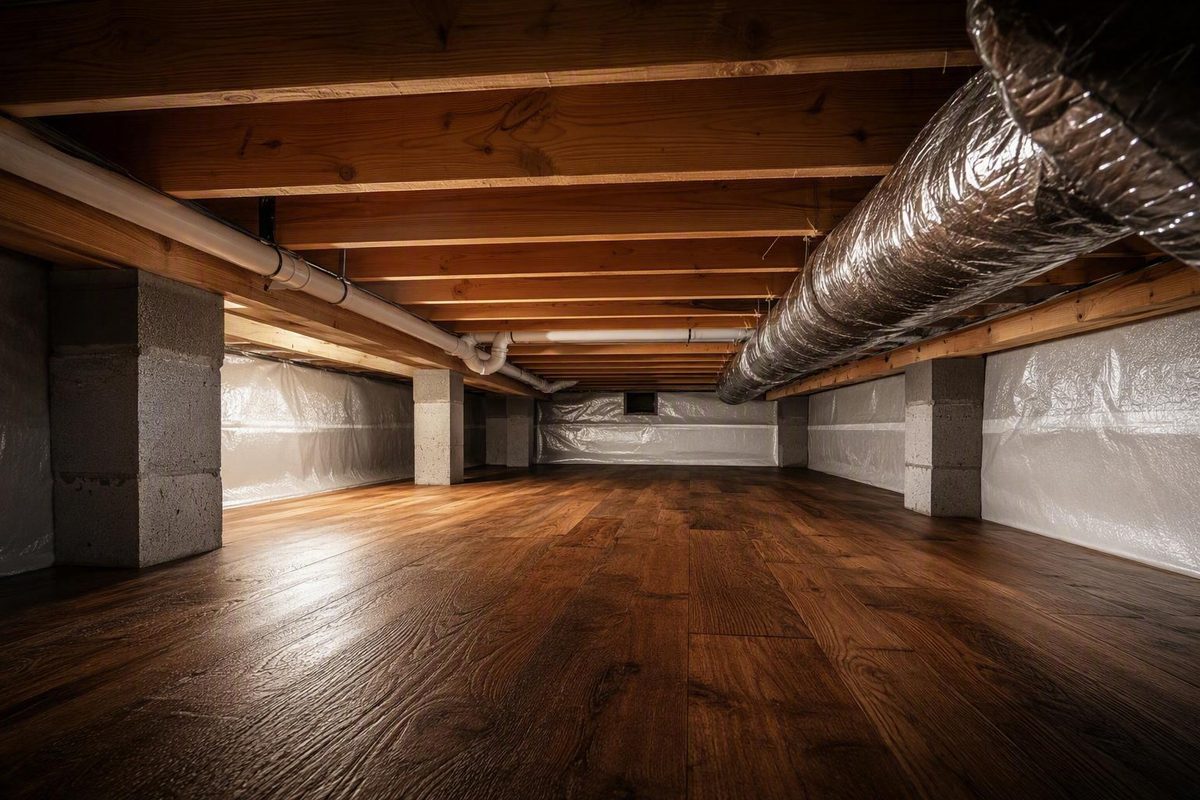
A conditioned crawl space is best understood as a small basement—not as a vented underfloor cavity with its openings plugged. The conversion changes where the home controls water, air, heat, and water vapor. It also creates continuing responsibilities for drainage, humidity control, mechanical equipment, inspection, and maintenance.
The order of work matters:
- Stop bulk water and repair damage.
- Create continuous ground, wall, rim, penetration, and access-door boundaries.
- Insulate the foundation perimeter.
- Select a deliberate drying or conditioning method.
- Verify code, flood, radon, fire, and combustion-safety constraints.
- Commission the completed system with measurements.
Closing vents or laying plastic without completing the rest of that sequence can conceal problems rather than solve them.
What makes a crawl space conditioned?
A conditioned crawl space is generally sealed from outdoor air, insulated at its foundation perimeter, and deliberately managed for temperature or humidity as part of the building enclosure. It need not remain at exactly the same temperature as the rooms above, but it sits inside the home’s air and thermal boundaries rather than outside them.
The “mini-basement” analogy is useful. In a conventional vented crawl space, the insulated floor above is intended to separate the house from the outdoor-like space below. In a conditioned design, the boundary moves outward and downward to include:
- Foundation walls
- Rim or band joists
- Sill areas
- The ground membrane
- Piers and columns
- Utility penetrations
- Exterior access doors
- Former vent openings
The boundary must be continuous. A sealed wall accomplishes little if humid air enters through a warped access door, an open plumbing penetration, or an unfinished rim area. Likewise, air sealing cannot compensate for stormwater flowing across the soil.
Terminology varies among technical reports, trade publications, contractors, and building departments. The labels should not be treated as universally interchangeable.
| Term | What it primarily describes | What it does not establish by itself |
|---|---|---|
| Vented | Foundation openings connect the crawl space to outdoor air | Whether the ground is covered or the space remains dry |
| Unvented or closed | Permanent outdoor ventilation openings are absent or closed | Whether air sealing, insulation, or mechanical drying is complete |
| Sealed | Leakage through vents, doors, penetrations, and perimeter joints has been intentionally reduced | Whether ground moisture is fully controlled |
| Encapsulated | The ground—and often the walls—is isolated with sealed membranes and substantial air sealing | Whether HVAC air, dehumidification, or another drying method is provided |
| Conditioned | Temperature or humidity is deliberately managed within an enclosed, perimeter-insulated assembly | Which mechanical method or local code provision applies |
An encapsulated crawl space may also be conditioned, but encapsulation and conditioning are not necessarily identical. Some sources use “conditioned” only for a space receiving HVAC air, while others include dedicated dehumidification or controlled exhaust. Local codes may use narrower definitions.
For planning, separate two questions:
- How will the crawl space be enclosed?
- How will its temperature and humidity be controlled?
That distinction prevents a common mistake: treating a ground membrane as the whole system. Plastic over soil can reduce ground-vapor transmission, but it does not stop roof runoff, groundwater, outdoor-air leakage, or plumbing leaks. Closing vents also does not insulate the walls, seal the rim, provide drainage, or remove moisture stored in wood and masonry.
A complete system therefore needs:
- Control of runoff, groundwater, flooding, and plumbing leaks
- A continuous, sealed ground vapor retarder
- Air sealing at walls, rims, accesses, vents, and penetrations
- Foundation-wall and rim-area insulation
- A deliberate and maintainable humidity-control method
Joseph Lstiburek’s 2004 technical report describes the assembly as a mini-basement with perimeter insulation, a sealed ground cover, water management, drainage where needed, and a drying mechanism. Its older code discussion is not current local law, but the enclosure model remains useful for understanding the system as a whole. See the Building Science Corporation report.
When conditioning helps—and when the site changes the answer
Vent openings do not inherently dry a crawl space. Whether ventilation adds or removes moisture depends on the moisture content of the incoming air and the temperature of the surfaces it reaches.
The critical concept is dew point. When humid outdoor air enters and its dew point is higher than the temperature of ducts, pipes, masonry, joists, or the subfloor, those surfaces can become damp or develop condensation. Summer ventilation can therefore add moisture even though air appears to move freely through the space.
Winter creates a different problem. Cold outdoor air can cool the floor assembly and any pipes, ducts, or equipment below it. This does not mean every vented crawl space fails, but it explains why a detail intended to remove moisture in one season can create cold floors or vulnerable services in another.
Conditioning deserves serious consideration in humid and mixed climates because it limits uncontrolled outdoor-air entry and provides deliberate humidity management. It is not universally superior. A carefully isolated vented crawl space may remain viable in a dry climate, while flood-prone properties may require openings that make conventional complete sealing inappropriate. Climate, flood exposure, and construction details all affect the choice. Fine Homebuilding’s comparison discusses both vented and conditioned approaches.
Use this preliminary decision path:
-
Is there standing water, groundwater entry, or a flooding history? Resolve drainage and flood-design questions before discussing encapsulation. A ground membrane is not a substitute for controlling bulk water.
-
Is outdoor air regularly humid while crawl-space surfaces remain cool? Ventilation may add moisture. A sealed, perimeter-insulated assembly with deliberate drying may be appropriate.
-
Is the climate predominantly dry? Compare a properly isolated vented assembly with a conditioned one. Do not assume active dehumidification is necessary without evaluating seasonal conditions.
-
Are flood openings required? Obtain a determination from the local building or floodplain authority before closing anything. Flood-pressure openings serve a different function from ordinary ventilation grilles and can change or preclude a fully sealed design.
-
Is radon known or suspected? Test and coordinate the ground membrane with any existing or proposed soil-gas control system.
-
Is natural-draft combustion equipment in the crawl space? Enclosure and exhaust changes can affect combustion-air and pressure conditions. Arrange qualified evaluation and post-work testing.
-
Can the owner maintain the system? Dehumidifiers, fans, filters, condensate pumps, sumps, alarms, and sensors require inspection and service.
-
Can the existing HVAC system accommodate the space? Do not add a supply branch merely because ductwork is nearby. Capacity, airflow distribution, return or relief paths, and effects on occupied rooms must be checked.
Flood exposure can override a preferred enclosure strategy. Required flood openings may need to remain operational, perhaps with a locally approved detail that limits routine infiltration without impairing flood performance. Never cover or disable them casually.
Set realistic expectations as well. Conditioning may reduce exposure to ground vapor and humid outdoor air, but it does not guarantee lower energy bills, better health, complete mold prevention, pest elimination, or lower lifecycle cost. Results depend on climate, drainage, enclosure quality, mechanical design, previous damage, operation, and maintenance.
Diagnose water, damage, and floor symptoms before sealing
Begin outside. Water found beneath a house often starts at the roof or landscape.
Inspect:
- Roof valleys and other areas that concentrate runoff
- Gutters for leaks, overflow, missing sections, or inadequate capacity
- Downspout discharge locations
- Exterior grade and low areas beside the foundation
- Foundation or perimeter drains and their outlets
- Hillside runoff and irrigation
- Groundwater seepage and seasonal high-water conditions
- Supply, waste, appliance, and condensate leaks
- The property’s flooding history
- Whether the crawl-space floor is below exterior grade
When safe, inspect during or shortly after substantial rain. A dry-weather visit can miss seepage paths, gutter overflow, sump failures, and seasonal ponding.
A ground membrane limits vapor transmission; it is not an indoor pond liner. Persistent water can collect above or below the membrane, saturate masonry, wet framing, and hide the severity of the problem. Interior air sealing cannot overcome hydrostatic pressure, failed drainage, or active plumbing leaks.
After identifying water sources, examine:
- Joists and the underside of the subfloor
- Beams, girders, posts, piers, and bearings
- Sill plates and rim areas
- Wood around plumbing penetrations
- Existing insulation and fasteners
- Masonry cracks, displacement, and efflorescence
- Metal connectors and equipment for corrosion
- Staining, fungal growth, dampness, or soft wood
- Termite tubes, nests, droppings, and other pest evidence
Probing questionable wood can reveal softness, but appearance alone does not determine remaining structural capacity. Widespread decay, failed posts, damaged sills, compromised bearings, or foundation movement should be evaluated before insulation and membranes restrict access.
Remove wet, contaminated, fallen, or damaged materials as appropriate and correct the active cause. Repair structurally deficient components under a suitable design. Conditioning does not restore decayed wood fibers, correct inadequate footings, straighten sagging beams, or repair damaged flooring.
Floor symptoms are clues, not diagnoses. Cupped boards, seasonal gaps, movement, musty odors, soft subflooring, bounce, or sagging justify checking crawl-space humidity and wood moisture. For a closer structural workflow, see this guide to diagnosing a sagging floor over a crawl space.
Record where and when symptoms appear. Compare affected areas with plumbing routes, drainage conditions, HVAC operation, and crawl-space readings. Repeatable measurements are more useful than touch or odor alone.
Stop work and obtain appropriate help if you find:
- Standing water, active flooding, or recurrent groundwater entry
- Widespread rot or soft structural framing
- Foundation cracking accompanied by movement
- Failed posts, beams, piers, or bearing points
- Major termite or other pest damage
- Natural-draft combustion equipment with uncertain venting or air supply
- Sewage, suspected hazardous contamination, or unexplained chemical odors
- Electrical equipment exposed to water
- Drainage work beyond straightforward runoff correction
Structural repairs, flood compliance, significant excavation, hazardous-material remediation, radon mitigation, and combustion safety are separate specialties. They should not be treated as incidental parts of a membrane installation.
Build the enclosure in the correct order
A durable conversion follows a dependency sequence. Later work should not hide or obstruct earlier work:
- Correct bulk-water and drainage problems.
- Remediate pests, contamination, and damaged materials.
- Install and seal the ground vapor retarder.
- Close vents and exterior leaks where permitted.
- Air-seal the rim, sill, access points, and penetrations.
- Insulate foundation walls and rim areas.
- Install the selected humidity-control system.
- Commission and document the result.
Control water before covering the ground
Redirect roof runoff, correct adverse grading, and repair plumbing and condensate leaks first. A below-grade crawl space or a site with groundwater pressure may require perimeter drainage, a sump, dampproofing, waterproofing, or a combination.
Drains, sumps, and condensate outlets need accessible and reliable discharge routes. Confirm where water goes, whether the line can freeze or clog, and how pump failure will become visible. A hidden pump should not be the only protection between the house and renewed flooding.
Install a continuous ground membrane
Cover all exposed soil and maintain continuity around walls, footings, piers, columns, pipes, wires, ducts, and other obstacles. Seal seams with compatible tape or another specified method rather than relying on loose overlaps weighted with stones or scrap lumber.
As an attributed baseline, the DOE-funded Building America checklist specifies polyethylene at least 6 mil thick over the entire ground, seams lapped 6 to 12 inches and taped, and the membrane extended at least 6 inches up foundation walls and concrete footings to create a continuous seal. The checklist provides the complete conversion detail.
Those dimensions are checklist specifications—not universal local rules or proof that 6-mil material is the best durability choice for every project. A thicker or reinforced liner may better tolerate sharp aggregate, storage, regular service traffic, or repeated work by trades. Substrate preparation, compatible tapes and sealants, secure attachment, and repairability matter alongside thickness.
Cut and seal carefully around piers and columns instead of leaving loose flaps. At utilities, preserve enough flexibility for movement and service without abandoning the air and vapor seal. Wall attachments must remain secure while respecting local drainage, termite-inspection, and material requirements.
Close vents and seal perimeter leaks
Vent closures should be permanent, weather-resistant, and insulated where the approved design requires it. Do not close required flood openings.
Treat the exterior access door as part of the enclosure. It should latch firmly, use durable gaskets, and have an insulated, weather-resistant panel and frame where required. An otherwise careful conversion can still leak substantially through a warped hatch.
Seal rim joists, sill transitions, service penetrations, and identified cracks or joints. Pay particular attention where dissimilar materials meet because movement can break brittle seals. Maintain required fire-blocking and fire-sealing details around penetrations.
Move insulation to the perimeter
Once the crawl space enters the home’s enclosure, insulation generally moves from beneath the floor to the foundation walls and rim or band areas. This aligns the thermal boundary with the new air and ground-moisture boundaries.
Remove existing floor insulation if it is wet, damaged, pest-contaminated, or conceals framing that requires inspection. Leaving sound insulation between joists is not automatically harmful in every assembly, but it can restrict inspection and drying. Follow one coherent, approved enclosure design rather than combining incompatible details unintentionally.
Rigid foam and spray foam are common options, but neither is a universal specification. Select products, R-values, thicknesses, attachment methods, sealants, inspection gaps, and protective coverings under the adopted code and manufacturer instructions. Consider masonry moisture, flood exposure, service access, and future repairs.
Account for retrofit limitations
New construction can coordinate drainage, membranes, utilities, access, insulation, and pest details before the floor system is complete. Existing crawl spaces rarely offer that freedom.
Common constraints include:
- Low or unsafe working clearance
- Pipes and ducts tight against walls
- Inaccessible ledges and beam pockets
- Irregular stone or brick foundations
- Closely spaced piers
- Corroded equipment
- Decayed attachment surfaces
- Old or abandoned utilities
- Additions with disconnected crawl-space zones
If a transition cannot be reached, identify the limitation rather than declaring the enclosure continuous. The solution may require selective removal, utility relocation, separately managed zones, or a decision that full conversion is not currently practical.
Choose a humidity-control method that fits the house
A sealed crawl space still receives moisture from materials, minor leakage, seasonal ground conditions, and occasional service events. It therefore needs a deliberate drying or conditioning method.
| Strategy | Principal advantage | Main design questions | Ongoing burdens |
|---|---|---|---|
| HVAC supply with planned return or pressure relief | Uses the home’s existing heating and cooling operation | Is capacity adequate? How will air return or escape? Will occupied rooms lose airflow? | Seasonal operation, balancing, filters, HVAC service |
| Dedicated dehumidifier | Responds to humidity independently of thermostat calls | Is it sized and distributed correctly? Is drainage reliable? | Electricity, filters, cleaning, repairs, condensate management |
| Controlled exhaust with intentional makeup air | Establishes planned airflow through the crawl space | Where does makeup air originate? What pressure changes result? | Fan operation, pathway maintenance, pressure verification |
| Hybrid arrangement | Combines seasonal conditioning with independent drying | Are controls coordinated? Is the added complexity justified? | More equipment, drains, controls, and service tasks |
HVAC supply and return or relief
An HVAC-based design introduces conditioned air through a planned supply. That air needs a defined return, transfer, or pressure-relief route.
Before adding a branch, verify:
- Heating and cooling capacity
- Added conditioned volume
- Duct sizing and leakage
- Distribution across the crawl space
- Return, transfer, or relief pathways
- Thermostat schedules and seasonal shutdown
- Effects on airflow in occupied rooms
- Whole-house pressure and combustion conditions
HVAC supply alone may not control humidity during mild weather because the thermostat may not call for heating or cooling. An oversized cooling system can also satisfy temperature demand before removing enough moisture. Seasonal homes and households that turn systems off during pleasant weather need particular scrutiny.
The Building America conversion checklist specifies crawl-space supply and return airflow of 1 cubic foot per minute for every 50 square feet of crawl-space floor area. That is one checklist detail—not a universal sizing rule for every mechanical strategy, code edition, or jurisdiction. Local mechanical design and approval should govern its use.
Dedicated dehumidification
A dedicated dehumidifier responds to humidity rather than to the living-space thermostat. That independence can be valuable during rainy mild weather or whenever central HVAC operation is limited.
The unit must still match the enclosure and moisture load. Air should circulate through the entire space rather than drying only the area around the machine. Separate crawl-space zones and dense utility layouts may require ducted distribution or additional transfer paths.
Plan condensate disposal before installation. Gravity drainage is simpler when a reliable permitted route exists. A pump can overcome elevation but introduces another component that can clog, lose power, or fail. If a pump is necessary, provide a visible or audible failure indication.
Maintenance includes cleaning or replacing filters, inspecting coils, checking controls, clearing drains, and preserving service access. Electricity use and eventual replacement belong in the lifecycle budget.
Controlled exhaust
An exhaust system removes crawl-space air and requires an intentional source of makeup air. The source, airflow, and resulting pressure relationships must be designed rather than left to random leakage through soil, masonry, chimneys, or the access door.
The fan cannot repair plumbing leaks, remove groundwater pressure, or compensate for roof runoff. It may manage a limited vapor load after bulk-water problems have been solved; it is not a drainage system.
Hybrid control
A hybrid may combine modest HVAC conditioning with dedicated dehumidification for periods when the thermostat does not call. Other arrangements may coordinate circulation, exhaust, or separate zones.
A hybrid is not automatically the best choice. It adds controls and equipment that can conflict if not designed together. Use it when the house’s operating pattern and measured conditions justify the complexity.
Set and measure an operating target
Approximately 45% to 55% relative humidity, with conditions generally kept below 60%, is a commonly cited project target—not a universal code requirement. The range is reported by a building-material manufacturer and should be treated as an operational reference rather than an independent legal or health threshold. See the source’s humidity guidance and caveats.
Relative humidity changes with temperature. The appropriate control setting also depends on sensor accuracy, climate, wood conditions, condensation risk, and the approved design.
Do not judge performance from one handheld reading or the absence of visible droplets. Place a reliable hygrometer or data logger away from direct supply air and dehumidifier discharge. Use multiple sensors where the crawl space has separated zones, and log humid, mild, and cold periods.
Verify codes, flood rules, radon, combustion safety, and foam protection
Before work begins, identify the currently adopted local building, residential, energy, mechanical, electrical, plumbing, flood, fire, radon, and termite provisions. Confirm permits, inspection stages, manufacturer instructions, and utility requirements.
Model-code summaries, older technical reports, and third-party code websites can identify topics to discuss, but they do not replace the authority having jurisdiction. Editions, amendments, definitions, and exceptions vary.
North Carolina illustrates the point. A displayed 2012 state definition describes a conditioned crawl space as a foundation without wall vents that encloses intentionally heated or cooled space, with insulation at the exterior walls. The same third-party page displays related provisions from newer North Carolina editions, but those excerpts are jurisdiction-specific and some are incomplete. They should not be generalized nationally. Review the displayed North Carolina provisions on UpCodes.
Resolve flood requirements first
Determine the flood zone and whether flood openings are required before closing vents. Foundation ventilation and flood-pressure equalization are different functions even when the openings look similar.
Mandatory flood openings can change or rule out a conventional fully sealed design. A locally accepted detail may reduce ordinary infiltration while preserving flood performance, but approval must come from the building or floodplain authority.
Test for radon
Do not assume sealing alone resolves radon. Where testing or local requirements call for action, have a qualified radon professional coordinate mitigation with the crawl-space enclosure and mechanical strategy.
Address combustion equipment and ventilation
Natural-draft furnaces, boilers, water heaters, and similar appliances require particular care because sealing or exhaust operation can alter combustion-air and pressure conditions.
The Building America guidance calls for post-conversion combustion-safety testing when natural-draft combustion equipment is in the crawl space, along with whole-house ventilation review and radon testing as applicable. Its checklist places these checks within commissioning rather than treating enclosure completion as the end of the job.
Have qualified personnel evaluate affected equipment and perform the applicable tests after conversion.
Protect foam correctly
Foam insulation may require an ignition barrier or thermal barrier depending on the product, listing, crawl-space access and use, storage conditions, adopted code, and jurisdiction. Do not assume spray foam or rigid foam may always remain exposed. Professional guidance also notes that protection can vary according to how the crawl space is used. Confluence Architecture discusses these use-dependent foam-barrier considerations.
Termite inspection access and foam fire protection are separate concerns. Confirm both before covering masonry or framing.
Work commonly requiring qualified local help includes:
- HVAC load assessment, duct modification, and balancing
- Electrical circuits and equipment connections
- Structural framing and foundation repairs
- Natural-draft combustion appliances
- Radon testing and mitigation
- Flood-zone compliance
- Significant drainage or sump design
- Code interpretation and permit documentation
Commission the system instead of assuming it works
Installation completion is not proof of performance. Commissioning determines whether the enclosure is continuous, the mechanical strategy operates correctly, drainage reaches its destination, and the changed pressure relationships are acceptable.
Begin with the membrane. Confirm that it:
- Covers all exposed ground
- Has sealed and taped seams
- Remains free of punctures and stretched tears
- Extends and seals to walls or footings as designed
- Fits tightly around piers, columns, and utilities
- Has secure wall attachments
- Does not block drains or conceal active water
Inspect former vents, access doors, sill plates, rim joists, masonry transitions, and exterior penetrations. Close the access door and check its latch and gasket. Examine remote corners rather than judging the work only from the entrance.
Next, verify the mechanical strategy. Measure or otherwise confirm intended supply, return, transfer, relief, or exhaust airflow. Check that the access door does not become difficult to operate, the liner does not billow unexpectedly, and occupied rooms are not noticeably deprived of airflow.
Operate each installed component through a full cycle:
- Dehumidifier
- Circulation or exhaust fan
- Sump pump
- Condensate pump
- Float switches and alarms
- HVAC dampers and controls
- Radon fan or monitoring device, if present
Trace condensate and drainage to the final discharge point. Look for leaks and low spots. Confirm that gravity drains maintain slope and that pumps have power, service access, and a detectable failure signal.
Record baseline temperature and relative humidity, but do not declare success from one snapshot. Establish a logging schedule covering humid, mild, and cold periods. Compare zones if the space is compartmentalized.
Return after meaningful rainfall. Check above and below accessible membrane edges, along walls, around plumbing, and near drains. A system examined only during dry weather has not been tested against one of its primary loads.
Where applicable, complete radon testing, combustion-safety testing, and whole-house ventilation review. The retrofit changes the air boundary and may change relationships among the soil, crawl space, occupied rooms, and outdoors.
Create a handover record containing:
- Photographs taken before concealed areas were covered
- Membrane manufacturer, thickness, seam, and attachment details
- Insulation products, locations, and R-values
- Foam-protection details
- Equipment manufacturer and model numbers
- Filter sizes and service intervals
- Airflow or balancing records
- Control settings
- Drain, sump, and condensate routes
- Baseline humidity readings
- Applicable radon and combustion-test results
- Permits, approvals, and inspection records
This documentation helps future owners and contractors avoid puncturing membranes, blocking airflow paths, or disconnecting equipment whose purpose is no longer obvious.
Maintain and troubleshoot the crawl space over time
A conditioned crawl space is a managed part of the house, not a sealed chamber that can be forgotten. Sensors drift, tapes release, pumps fail, filters clog, doors warp, pests damage liners, and later trades cut through completed boundaries.
Review humidity readings routinely and inspect the space seasonally. Check:
- Ground membrane, seams, and wall attachments
- Piers and utility penetrations
- Former vents and exterior access doors
- Rim and sill seals
- Drains, sump basins, alarms, and backup provisions
- Dehumidifier filters and coils
- Fans, grilles, ducts, and transfer paths
- Condensate lines and discharge points
- Plumbing and HVAC equipment
- Framing, fasteners, and visible metal
Warning signs include sustained humidity above the chosen limit, condensation, musty odors, staining, corrosion, standing water, membrane damage, wet or fallen insulation, pump alarms, soft wood, and renewed floor movement.
Troubleshoot in a fixed order:
- Check bulk water and plumbing. Look for runoff, groundwater, backups, supply or waste leaks, and condensate failures.
- Check enclosure continuity. Inspect the membrane, door, vents, wall terminations, penetrations, and rim.
- Check mechanical operation. Confirm power, controls, filters, coils, fans, pumps, and drainage.
- Check airflow paths. Verify that supplies, returns, relief openings, or makeup-air routes remain open.
- Review seasonal operation. Compare humidity increases with HVAC shutdown, thermostat changes, rain, or humid outdoor conditions.
If humidity rises whenever the central HVAC system is off, an HVAC-only approach may not be delivering year-round control. That does not automatically mean a dehumidifier is required; first check water sources, leakage, controls, and airflow.
Diagnose odors rather than automatically lowering the humidity setting. Possible sources include damp materials, drain or plumbing gases, pests, microbial contamination, stored chemicals, and defective or improperly installed foam. An archived Green Building Advisor discussion provides a useful case-specific example: drying had previously reduced an odor, but participants still considered moisture, flood effects, and spray-foam problems as different possible causes requiring different remedies. Read the archived crawl-space odor discussion.
Escalate the investigation when you find:
- Persistent readings near or above the selected humidity limit
- Recurrent water after rain
- Repeated drainage or pump failure
- Soft framing or lost bearing
- Foundation or floor movement
- Widespread staining or suspected contamination
- Unexplained chemical odors
- Combustion spillage or venting concerns
- Radon results requiring action
- Electrical equipment exposed to water
Budget the work as separate scopes rather than relying on a universal price per square foot. A complete project may include drainage, grading, remediation, pest work, structural repair, membrane installation, air sealing, insulation, HVAC changes, dehumidification, electrical work, sumps, condensate management, permits, testing, and commissioning. Lifecycle costs include electricity, filters, pumps, sensors, liner repairs, and eventual equipment replacement.
Frequently asked questions
Is an encapsulated crawl space the same as a conditioned crawl space?
Not necessarily. Encapsulation generally describes control of ground moisture and outdoor-air leakage through a sealed membrane and perimeter air sealing. Conditioning adds deliberate temperature or humidity management.
A crawl space can be encapsulated yet lack an adequate drying method. Conversely, adding HVAC air to a space with exposed soil, open vents, or uncontrolled water does not create a complete conditioned system.
Does a conditioned crawl space need a dehumidifier?
Not in every design. Humidity may be managed through HVAC supply with an appropriate return or relief path, dedicated dehumidification, controlled exhaust with intentional makeup air, or a coordinated hybrid.
A dehumidifier can be useful when central HVAC operation is intermittent or ineffective during mild weather. It also requires electricity, filter service, equipment maintenance, and reliable condensate disposal.
Should insulation be under the floor or on the foundation walls?
When the crawl space is inside the conditioned enclosure, insulation generally belongs on the foundation walls and at the rim or band joists. This aligns the thermal boundary with the ground membrane and perimeter air boundary.
Insulation beneath the floor is characteristic of a crawl space kept outside the home’s thermal enclosure. Retrofit materials and R-values still depend on climate, masonry, termites, flood exposure, foam-protection rules, and locally adopted requirements.
What relative humidity should a conditioned crawl space maintain?
Approximately 45% to 55% relative humidity, with conditions generally kept below 60%, is a common operating target rather than a universal code requirement. Temperature, sensor accuracy, climate, material moisture, and the mechanical design may justify a different setting.
Use seasonal logging instead of relying on one reading. Sustained increases, condensation, or moisture-related material changes warrant investigation even when an isolated measurement looks acceptable.
Can a crawl space be conditioned if flood vents are required?
Possibly, but required flood openings can prevent a conventional fully sealed design or demand a locally approved alternative. They serve flood-pressure and compliance functions, not merely routine ventilation.
Confirm the flood zone, required openings, approved products, and permissible enclosure details with the local building or floodplain authority before conversion. If compliant sealing is impossible, another crawl-space strategy may be necessary.
The reliable path to a conditioned crawl space
The durable sequence is straightforward even when the project is not: diagnose water and damage first; create a continuous ground, wall, rim, penetration, and access enclosure; select a mechanical strategy suited to the house; verify local safety and code constraints; and commission the result with measurements.
Treat flooring and subfloor symptoms as reasons to investigate, not proof of a single cause. Bring in qualified local professionals when water, structure, HVAC capacity, flood rules, radon, combustion equipment, electrical hazards, or unexplained odors complicate the work.