
Choose the Right Repair for a Chipped Hardwood Floor
Match your hardwood chip to the right repair: finish touch-up, hard wax, a saved wood fragment, or board replacement, with steps that protect nearby finish.
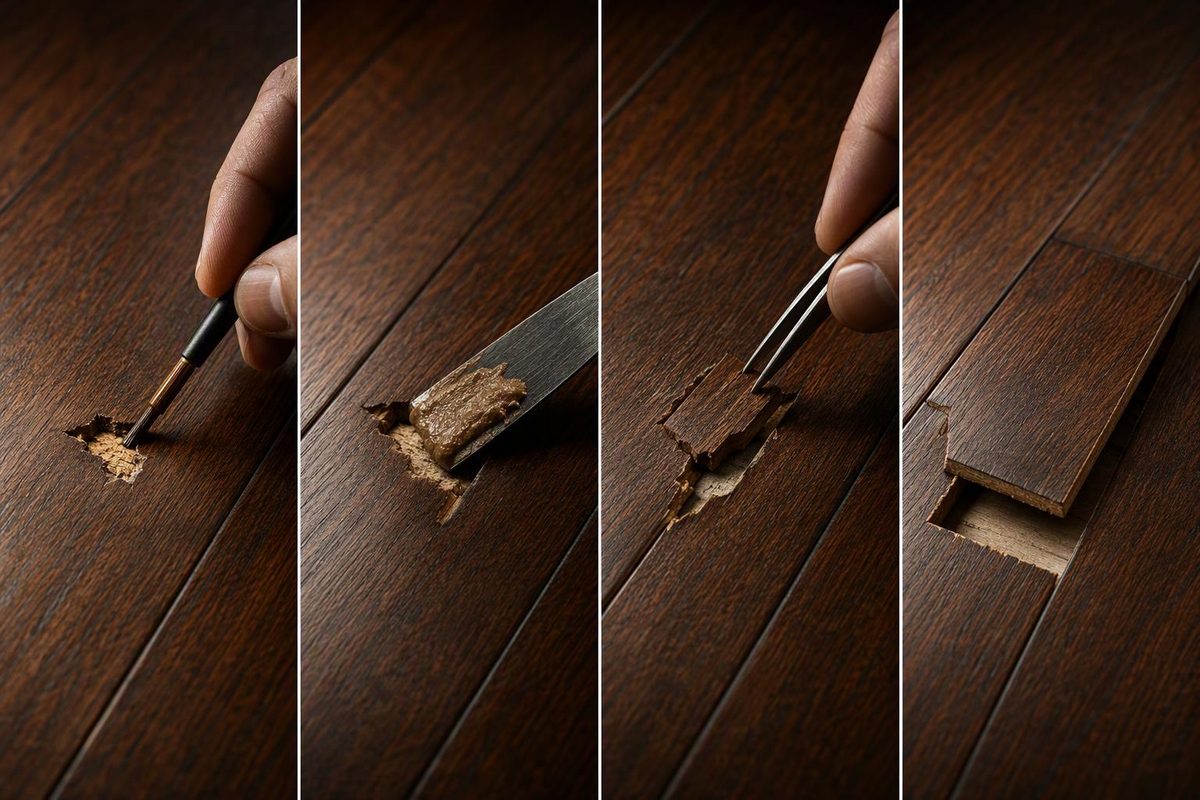
For a small chip in a sound hardwood board, use a floor-approved hard-wax repair or compatible filler. If the broken wood fragment fits cleanly, reattaching it may preserve the grain better. If only the coating is chipped, use a compatible finish touch-up—not filler. A split board, damaged joint, lifting engineered-wood surface, or wet or moving floor needs assessment before cosmetic repair.
The deciding distinction is what came off: finish, wood, or part of the board’s joint. Clear finish will not replace missing wood, and filler will not stabilize a moving board.
Select the floor’s condition, damage, and fragment fit to find your repair route.
Chip Repair Selector
A flush fit also needs sound mating wood.
Suggested next step
Consider Floor-Approved Hard Wax
For a small missing chip in a sound board, use a floor-approved hard-wax kit or compatible filler. Match the repair system to your finish; do not bridge the board seam.
Confirm the floor type and finish before applying a product.
Sources: NWFA repair guidelines; Kährs floor-repair instructions; This Old House’s chip-repair demonstration. Product compatibility must be checked separately.
Inspect the Chip Before Choosing a Product
Keep feet and pets away from sharp splinters. Save any detached wood, vacuum loose debris without pulling at attached fibers, and inspect the damage under light from the side.
Record the chip’s length, width, and approximate depth. Check whether it is in the board’s face or beveled edge, whether a crack continues beyond it, and whether the board moves during normal walking. Identify solid versus engineered flooring and the finish from product records or a spare board if possible. There is no universal chip-size cutoff in the cited guidance that determines whether to fill or replace.
| What You Find | Appropriate Next Step |
|---|---|
| Only the coating is chipped; the wood remains level | Use the flooring manufacturer’s compatible finish touch-up system. |
| A small amount of wood is missing, with sound material around it | Consider floor-approved hard wax or compatible filler. |
| The original wood fragment fits without force | Consider gluing it back to preserve the grain. |
| A long split, damaged joint, lifting veneer, or substantial missing section | Have a flooring professional assess patching or board replacement. |
The NWFA repair guidelines distinguish surface scratches from damage that tears wood fibers, and describe localized repairs using fillers, color, grain detail, and a final sheen match.
Stop before cosmetic repair if the floor is wet, distorted, or moving. Those observations do not prove hidden structural damage, but they mean the chip may not be the whole problem. For water-damaged flooring, NWFA calls for understanding moisture in the flooring, substrate, and surrounding air before selecting repairs. Start with water-damage diagnosis or locating floor movement, as appropriate.
Fill a Small Missing Chip With Floor-Approved Hard Wax
Choose a repair kit explicitly intended for wood floors and compatible with your floor’s finish—not simply a furniture crayon. Mohawk describes its Hard Fill sticks as hard-wax blends for minor-to-medium wood and laminate defects, with little or no sanding required. For deeper damage to its lacquered floors, Kährs specifies its repair kit’s hard wax or wood filler, followed by sealing. Its oiled floors have separate touch-up instructions; the lacquered-floor instructions do not establish the method for every finish.
Gather the kit’s wax shades, specified melting tool, leveling scraper, and a clean cloth. Follow its safety and ventilation instructions. Practice on a spare board before touching the floor.
- Prepare the cavity. Remove loose debris and use only a manufacturer-approved cleaner where needed. Let the area dry. Do not dig out sound wood just to make a larger, neater hole.
- Test the color. Compare cooled wax against the board in room light. Mix shades if needed; match the wood around the chip rather than the darkest grain line.
- Fill slightly proud. Use the kit’s melting tool to work wax into the missing area, leaving a little excess for leveling. Keep the heated tool off the surrounding finish.
- Cool, then level. Let the wax cool as directed, then remove excess with the kit’s scraper. Avoid sanding a broad patch of intact factory finish.
- Restore the profile. On a beveled edge, recreate the bevel instead of leaving a flat ridge. Keep the repair confined to the damaged board; do not bridge the seam to its neighbor.
- Blend and protect. Add restrained grain detail if the kit allows it. Apply only the sealer or touch-up coating specified for that repair system and floor finish.
This fill–cool–scrape sequence, including recreating bevels and surface texture, is demonstrated in RW Supply’s chipped-edge repair guide.
After the required cooling or curing time, check with a cloth—not bare fingers—for snagging edges. Look from a low angle for a raised repair or conspicuous shine. Aim for a smooth, unobtrusive patch; an invisible match is not assured.
Reattach a Saved Fragment if It Fits Flush
Dry-fit the piece without adhesive. If it seats flush, has sound mating surfaces, and belongs to an otherwise stable board, reattachment may be preferable to filling. Do not force a crushed or incomplete piece into place.
Apply suitable wood glue to the exposed mating wood, hold the fragment flat using a method that will not damage the finish, and follow the adhesive’s cleanup and curing directions.
This Old House’s Tom Silva demonstration shows reattaching a saved fragment with wood glue and using a fitted wood patch when the fragment is unavailable. Once the glue has cured, address any exposed wood or damaged coating with the flooring manufacturer’s compatible finish touch-up system.
Choose a Wood Patch or Replacement When Filler Is Unsuitable
Sandable wood filler is an alternative when the repair will be stained and finished with a compatible system. It is less convenient on an intact prefinished floor if leveling it requires sanding surrounding coating. Choose by repair type using the hardwood floor filler guide.
For a larger localized defect in suitable solid flooring, a skilled repairer may fit a Dutchman: a matching wood patch set into a shallow recess. On engineered flooring, do not cut a recess or sand down the surface without confirming the wear-layer thickness and manufacturer’s limits.
If the board cannot be reliably touched up or patched, plan replacement before cutting. NWFA says to select and prepare the replacement first, checking species, dimensions, edge profile, color, and sheen. The replacement-board matching guide explains the sourcing decision.
Avoid treating a chip like a dent. A dent compresses wood; a chip removes it. Steam cannot replace the missing fragment, and sanding the surrounding floor down to the chip’s depth can turn a small repair into a much larger refinishing job.