
Choose the Right Fix for Scratches, Warped Boards, Squeaks, and Water Damage
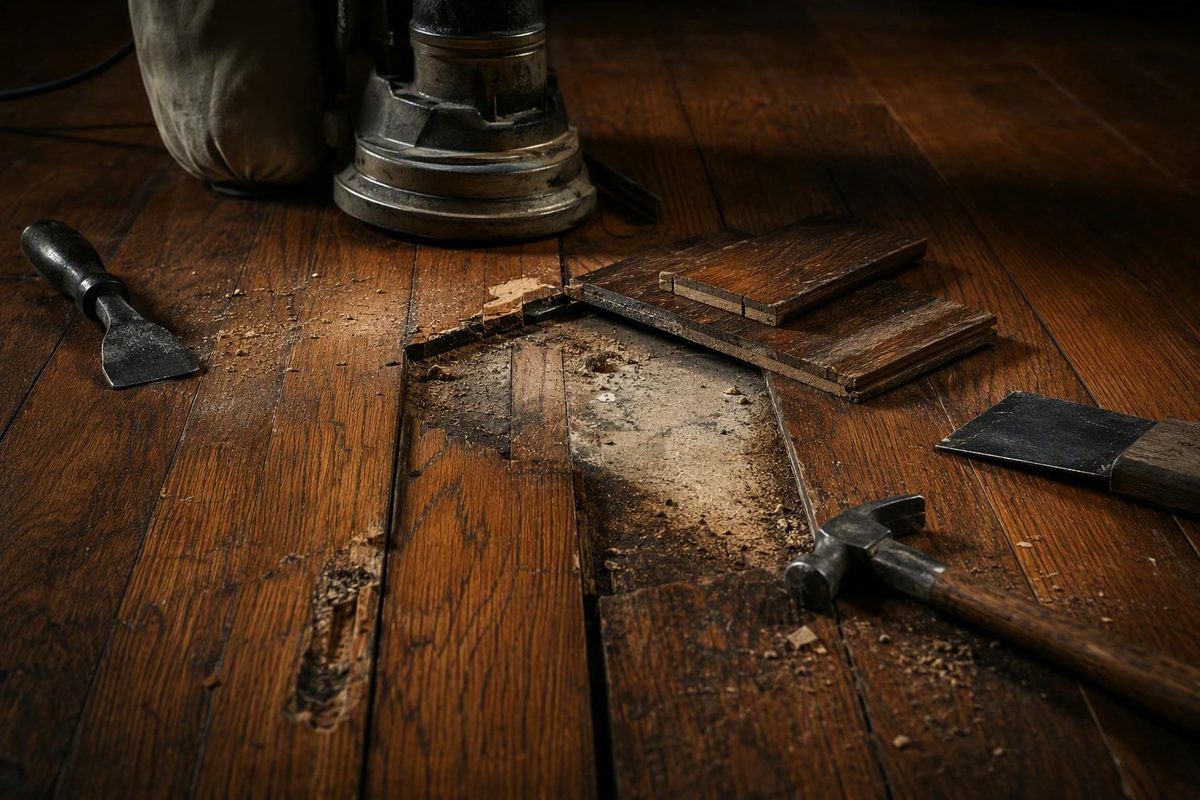
A durable hardwood-floor repair begins before you buy filler or switch on a sander. First identify the flooring construction, installation method, depth of damage, and underlying cause. A finish scratch may need only a compatible touch-up, while a loose, wet, delaminated, or badly deformed board may need replacement—and possibly subfloor work.
Use the least invasive repair that addresses the actual problem. Do not hide an active leak, recurring movement, pest damage, or weak substrate beneath a cosmetic patch. Likewise, do not sand an engineered floor until you have verified that its real-wood surface can safely accommodate the work.
This guide focuses on diagnosis, repair selection, minor surface treatment, and a high-level overview of individual-board replacement. It is not a complete safety procedure for power-tool use, contaminated-water cleanup, structural repair, or every proprietary flooring system. When product construction, concealed services, contamination, or substrate stability is uncertain, stop and obtain installation-specific guidance.
Diagnose the floor before choosing a repair
Inspect the floor as a layered system rather than treating every mark as a surface defect. Work through these layers in order:
- Finish: Look for scuffs, dullness, peeling, worn-through coating, and scratches that do not penetrate the color layer.
- Wood surface and board shape: Check for exposed wood, dents, gouges, stains, splits, raised edges, crowns, cups, bows, and twisting.
- Movement and fastening: Step around the defect while listening and watching for squeaks, flexing, loose edges, or boards rubbing together.
- Subfloor: Where safe access already exists, look for staining, softness, unevenness, damaged panels, loose fastening, or movement between the subfloor and framing.
- Moisture or structural cause: Look for plumbing leaks, appliance failures, wet exterior areas, recurring humidity changes, crawl-space moisture, sagging, framing movement, or pest activity.
The purpose is to determine whether the defect is in the coating, in the wood, or in the floor assembly beneath it. That distinction controls the repair.
Classify the damage by depth and scope
Most hardwood-floor problems fit one of four categories:
- Finish-only damage: Fine scratches, scuffs, loss of sheen, light wear, or superficial cloudiness confined to the coating.
- Localized wood-level damage: An exposed-wood scratch, compressed dent, shallow stain, small stable gouge, or minor chip.
- Board-level failure: A split, rotten, severely warped, buckled, delaminated, or unstable board.
- Floor-system damage: Widespread moisture exposure, a soft subfloor, persistent movement, structural sagging, contamination, or damage affecting numerous boards and their substrate.
Shallow scratches and some dents or stains may be treated at the surface. Deep gouges, rot, engineered-board delamination, severe deformation, and boards that move under load are stronger candidates for individual-board replacement.
Widespread damage may require broader removal, but no reliable percentage of affected floor area automatically determines whether to repair or replace. Access, matching material, moisture conditions, installation type, remaining wood thickness, and subfloor condition all matter.
Symptom-to-action matrix
| Symptom | What it may indicate | First inspection | Likely repair direction |
|---|---|---|---|
| Fine scratch or scuff | Coating damage | Check whether bare wood is visible | Clean and test a compatible touch-up product |
| Deep scratch or gouge | Wood fibers removed or crushed | Check depth, movement, and floor construction | Fill and spot-finish if small and stable; refinish or replace if deep |
| Dent | Compressed wood fibers | Inspect for broken finish or splintering | Local repair may work; severe damage may require board replacement |
| Stain or discoloration | Surface spill, finish reaction, urine, moisture, or oxidation | Check odor, depth, nearby seams, and moisture | Clean, spot-repair, refinish, or replace depending on penetration |
| Crack or split | Drying stress, impact, weakness, or movement | Press around the crack and check whether the board moves | Obtain product-specific repair advice; replace if moving or weak |
| Squeak | Friction or movement among boards, fasteners, subfloor, or framing | Have someone walk while the area is observed from above and, where accessible, below | Identify and correct the moving interface |
| Gap | Seasonal movement, shrinkage, installation spacing, or structural movement | Track whether the opening changes and whether boards move | Monitor or correct the cause; do not automatically fill |
| Cupping | Moisture imbalance across the board | Investigate leaks, indoor conditions, and moisture below | Stop the moisture source and reassess after stabilization |
| Warping or twisting | Moisture, restraint, or board damage | Inspect shape, fastening, and substrate | Correct the cause; replace if severe deformation remains |
| Buckling | Boards releasing from the substrate or pushing upward | Check for moisture, expansion restraint, or fastening failure | Stop the cause and obtain professional assessment |
| Rot or softness | Prolonged moisture and wood deterioration | Inspect the subfloor and surrounding assembly | Remove affected material and correct the moisture source |
| Pet scratching | Finish or wood damage from claws | Determine scratch depth | Touch up, spot-repair, recoat, or refinish |
| Pet staining or odor | Liquid penetration into finish, wood, seams, or subfloor | Check odor, staining depth, and concealed moisture | Surface treatment may be insufficient; board replacement may be needed |
| Water damage | Spill, leak, flood, or moisture migration | Inspect finish, boards, fastening, and subfloor | Stop the source, assess contamination, dry appropriately, and repair after stabilization |
Cupping, warping, gaps, and squeaks can arise from moisture or movement rather than simple cosmetic wear. Small holes, sawdust-like debris, and hollow-sounding boards can indicate wood-boring insects and warrant both pest and flooring evaluation rather than filler alone, according to this overview of common wood-floor damage signs.
Treat sagging, musty odors, recurring squeaks, loose boards, and repeated movement as prompts to inspect deeper. A topcoat may improve appearance, but it cannot tighten a failed fastening system, dry a wet subfloor, or strengthen compromised framing.
Trace a squeak before trying to silence it
A squeak is a symptom of movement or friction, not a diagnosis. The sound may come from finished boards rubbing together, a board moving against a fastener, the subfloor moving against framing, or more extensive movement in the supporting assembly.
Use a helper to walk slowly across the area while you observe where the sound starts. Watch for:
- A single board edge moving
- Several boards flexing together
- A seam opening under load
- Movement that appears only near a wall or transition
- A broader soft or sagging area
- Moisture staining or damage below the noisy section
If the underside is already safely accessible, movement between the subfloor and framing may be easier to identify there. General repair guidance describes shims or added support as possible responses to some below-floor movement, but the correct method depends on the actual interface, access, framing, and services in the area. Do not drive fasteners blindly through the finished floor or into an assembly you have not identified. For unexplained, widespread, wet, soft, or sagging areas, obtain flooring or structural assessment rather than treating the noise alone.
Identify the flooring and installation before sanding or cutting
Before removing finish or cutting a board, determine what the floor is made of and how it is attached.
Solid hardwood versus engineered wood
Find an exposed board edge at a floor vent, threshold, pipe opening, unfinished transition, or loose board. Solid hardwood appears to be one piece of wood through its thickness. Engineered flooring shows multiple bonded layers beneath an upper wood layer. An exposed edge is more informative than the face because both products may display real wood at the surface.
The distinction matters because sanding removes both finish and wood. On engineered flooring, sanding too deeply can pass through the upper wood layer and expose the core. A contractor answering a hardwood-repair question describes both the exposed-edge check and the risk of sanding through engineered flooring; product documentation should still control the final decision (third-party expert Q&A).
Do not assume all engineered hardwood can be refinished, and do not assume none of it can. The answer depends on the remaining wear layer, prior sanding, surface features, damage depth, and manufacturer instructions. If those conditions cannot be verified, do not sand; use a non-sanding method approved for the product or consult a flooring professional.
Solid hardwood generally has more wood above its joint profile than an engineered wear layer, but that material is not unlimited. Previous sanding may have reduced the wood above tongues, grooves, and fasteners. Exposed joints or nail heads are warning signs. Generic claims that a floor can always be refinished a fixed number of times should not replace an assessment of what remains.
Identify the installation system
A board-removal method suitable for one floor can damage another. Common systems include:
- Nailed or stapled tongue-and-groove: Boards are mechanically fastened through the tongue or face into a wood substrate.
- Glue-down: Adhesive bonds boards to the subfloor, so removal can damage the substrate or neighboring material.
- Floating: Boards connect to one another rather than being individually fastened to the subfloor.
- Click-lock: Profiled edges lock together and require product-specific repair or disassembly instructions.
- Batten-mounted or specialty systems: Boards attach to sleepers, clips, or proprietary supports and require system-specific procedures.
Radiant heating adds another complication. Junckers’ single-board repair guidance warns that the correct procedure depends on the installation and that work around underfloor heating requires additional care (manufacturer repair guidance). If the installation system, heating layout, or services beneath the work cannot be established, cutting should be treated as a stop point rather than an invitation to guess.
Look for features sanding may erase
Factory-prefinished floors may have beveled or micro-beveled edges, wire-brushed or hand-scraped texture, layered color, or a proprietary coating. Spot sanding can flatten texture, soften a bevel, or produce a smooth patch surrounded by textured boards. Even where enough wood remains, the original appearance may be difficult or impossible to reproduce locally.
Pause and obtain installation-specific guidance when any of the following is uncertain:
- Solid versus engineered construction
- Remaining solid-wood thickness or engineered wear layer
- Existing finish type and compatibility
- Nail-down, glue-down, floating, click-lock, or proprietary installation
- Presence or location of radiant heating
- Presence of concealed pipes, wiring, or other services
- Factory texture, bevel, or coating requirements
These are stop conditions, not problems to solve through trial cutting, exploratory sanding, or improvised chemical tests.
Choose among touch-up, filler, recoating, refinishing, and replacement
The repair should become more invasive only as the damage becomes deeper, broader, or less stable.
A practical decision ladder
- Clean and touch up: Appropriate for a shallow finish scratch or minor color loss with no exposed, loose, or crushed wood.
- Fill and spot-finish: Consider for a small, stable wood-level defect that accepts a compatible repair material.
- Recoat: Add a compatible topcoat when the existing floor and finish are sound but show superficial coating wear.
- Refinish: Remove the old finish and a controlled amount of wood where broader scratches, worn coating, or uneven color affect a floor that can safely be sanded.
- Replace individual boards: Choose this for deep damage, rot, delamination, severe deformation, or instability confined to identifiable boards.
- Consider broader replacement: Appropriate where structural or moisture damage is extensive, the subfloor is unsound, the engineered wear layer has failed broadly, or matching and repair are impractical.
Recoating** means preparing the existing finish and applying a compatible new topcoat without sanding the floor fully to raw wood. Refinishing** removes the existing coating and some wood before stain or finish is applied. Recoating is therefore a maintenance treatment, not a way to erase deep scratches, dents, or defects below the coating (comparison of recoating and refinishing).
Do not treat repair materials as interchangeable
A stain marker adds color but does not rebuild missing wood. Wax may disguise a fine scratch or fill a tiny surface void, but it is not a structural adhesive. Filler can level a stable depression but may crack or release where a joint continues moving. Adhesives join compatible surfaces under defined application conditions. Products intended for crack stabilization have a different purpose and should not be casually substituted for filler or glue.
There is no universal product rule because floors, factory coatings, fillers, adhesives, stains, and topcoats differ. Follow the flooring and repair-product instructions. If the existing coating cannot be identified, ask the flooring manufacturer or a finishing professional rather than relying on an improvised household chemistry test.
Test cleaner, filler, stain, adhesive, and topcoat on scrap material or in an inconspicuous location. Judge the test only after it has dried or cured as directed. Wet stain, fresh filler, and uncured topcoat can look substantially different from the final result.
Be cautious with cracks and gaps
A stationary chip is different from a moving crack. A seasonal gap is different from missing wood. Packing a moving joint with rigid filler may leave another crack or a conspicuous line when the boards move again.
Before filling, ask:
- Does the gap change with the season?
- Does it close as indoor conditions change?
- Do adjacent boards move when stepped on?
- Is the opening associated with sagging or subfloor movement?
- Is it an intended perimeter or transition gap?
- Does the flooring manufacturer permit filling?
- Is the board split, or are two separate boards merely spaced apart?
If movement is unresolved, correct or monitor the cause before applying a cosmetic patch.
Compare the repair levels
The ratings below are relative planning guidance, assuming an otherwise stable floor and no concealed moisture or substrate repair.
| Option | Best suited to | Main work involved | Disruption | Main appearance risk | Professional assessment |
|---|---|---|---|---|---|
| Touch-up | Fine finish scratch or small color loss | Cleaning, testing, sparing application | Low | Wrong color or sheen | Usually unnecessary if compatibility is known |
| Filler and spot finish | Small, stable wood-level defect | Filling, limited abrasion, color, topcoat | Low to moderate | Halo, texture difference, filler line | Useful when finish or movement is uncertain |
| Recoat | Sound floor with superficial coating wear | Surface preparation and compatible topcoat | Moderate | Adhesion failure or trapped defects | Often wise for unknown coatings |
| Refinish | Broad wear on a safely sandable floor | Room preparation, sanding, staining or finishing | High | Over-sanding, uneven color, lost bevels | Recommended where thickness is uncertain |
| Board replacement | Deep, rotten, delaminated, or unstable board | Cutting or disassembly, substrate inspection, fitting, finishing | Moderate to high | Poor fit or visible mismatch | Recommended for unfamiliar installations |
| Broader replacement | Extensive system-level failure | Removal, substrate work, new installation | High | Transition and matching problems | Normally required |
Cost and schedule depend on room access, attachment method, coating system, product-specified drying, matching material, furniture and trim handling, disposal, and subfloor work. Neither refinishing nor replacement is universally cheaper or faster.
Repair minor scratches, dents, and small gouges
The goal of a local repair is to reduce the defect without enlarging it or creating a more obvious patch.
Shallow finish scratch
- Remove loose grit with a clean cloth or a floor-safe cleaning method.
- Clean gently with a product approved for the floor and existing finish.
- Let the area dry.
- Test a matching stain marker, wax crayon, or floor-specific scratch product in a hidden location.
- Apply the smallest practical amount to the scratch.
- Remove excess and buff only as the product directs.
- View the repair from different angles and under the room’s usual lighting.
Do not flood the scratch with cleaner or colorant. Dark repair material collecting beside a pale scratch can make the damage more noticeable.
Deeper but localized defect
For a stable scratch or small gouge that reaches the wood, a cautious sequence is:
- Clean the defect and remove loose fibers without widening it.
- Confirm that the floor can tolerate the planned abrasion.
- Apply an appropriate filler only if the defect and product instructions support filling.
- Let the filler dry or cure as directed.
- Sand lightly with the grain, keeping abrasion within the intended boundary.
- Remove dust by a method permitted by the selected finish system.
- Add color only if required and successfully test-matched.
- Apply a compatible protective finish according to its instructions.
A contributor identified by the Q&A platform as a civil engineer and Florida-certified general contractor recommends 180–220 grit for light sanding of deeper scratches. That is a source-specific starting recommendation, not a universal specification for every species, filler, factory coating, or flooring construction (scratch-repair response).
A dent requires separate judgment. If the coating remains intact and the wood fibers are compressed, sanding may remove surrounding wood without eliminating the depression. If the dent is splintered, deep, cracked, or unstable, board replacement may provide a more durable result than repeated filling.
Control the repair boundary
Spot sanding can create a halo because it changes the surrounding sheen, texture, and light reflection. It can also round board edges or erase factory distressing. Where appearance matters, treating the entire board—or a larger continuous visual area—may blend more naturally than sanding a small circle around the defect.
Do not sand until the floor construction and remaining material are known. If the finish is unknown, obtain manufacturer or professional guidance. An incompatible topcoat can fail to bond or leave a permanent difference in color or sheen.
Even a technically sound repair may remain visible. Species, grain direction, oxidation, sunlight exposure, stain history, factory texture, sheen, and surrounding wear all influence the match. The realistic objective is a stable, protected, acceptably blended repair—not a guaranteed invisible result.
Replace one damaged tongue-and-groove board
A single board can sometimes be replaced without removing the entire floor. The following is a planning overview for an accessible, nailed-down tongue-and-groove board—not a universal cutting procedure. Floating, click-lock, glue-down, batten-mounted, patterned, and radiant-heated installations require product- and system-specific instructions.
If you cannot confidently identify the installation, control the cutting tool, or establish that the work area is clear of concealed services, hire a flooring professional.
Tools and materials
Depending on the installation and finish, the job may involve:
- Matched replacement board
- Circular saw or oscillating multi-tool
- Drill and suitable bits where required
- Sharp chisel
- Pry bar or flat bar
- Hammer or mallet
- Tape measure, square, straightedge, and pencil
- Surface protection and a stable guide
- Manufacturer-approved adhesive
- Suitable fasteners and nail set, where required
- Filler for permitted cosmetic holes
- Sanding materials
- Matching stain and finish
- Eye protection, gloves, and dust protection appropriate to the work
- Dust collection or containment equipment
This Old House lists a circular saw, drill, chisel, pry bar, eye protection, dust mask, matched flooring, adhesive, fasteners, filler, stain, and finish for its board-patching method (wood-floor patching guide). Tool manuals, flooring instructions, and product labels must govern the actual work.
Prepare before cutting
Verify the replacement board’s actual width, thickness, tongue-and-groove profile, texture, and edge treatment. Use an exposed edge where available rather than relying only on nominal product dimensions.
Before cutting, the work area must also be cleared of uncertainty about pipes, wiring, heating components, or other concealed services. The evidence supplied here does not establish a universal homeowner method for locating every concealed hazard; inability to verify the area is therefore a stop condition.
Clear furniture, isolate the immediate work area, protect neighboring boards, and confirm that the damaged board is not concealing active moisture or substrate damage.
Remove the board in sections
A common removal concept is:
- Mark the exact damaged board.
- Place cutting lines inside its seams so neighboring edges remain protected.
- Add end holes or crosscuts where appropriate to divide the board into manageable sections.
- Remove the center section first.
- Work toward the edges using controlled chisel and pry-bar work.
- Collapse the remaining pieces inward rather than levering against neighboring finished faces.
- Preserve the exposed tongue of the adjacent board and avoid damaging the subfloor.
Removing the center first creates space to release the remaining pieces. This is a general sequence, not a substitute for the tool manufacturer’s instructions or the flooring system’s repair procedure.
Inspect and prepare the opening
After removal, clear debris, detached fibers, old adhesive, and protruding or loose fasteners. Inspect the opening for:
- Dampness or staining
- Softness or rot
- Damaged or delaminated subfloor panels
- Unevenness
- Loose fastening
- Odor or contamination
- Pest evidence
- Damage caused during removal
Do not cover a wet, soft, uneven, or unstable substrate. Repair or assess the underlying problem before installing a replacement.
Fit the replacement
Match the following as closely as practical:
- Species
- Width and thickness
- Tongue-and-groove profile
- Grain and board character
- Surface texture and bevel
- Color
- Finish and sheen
- Approximate age or oxidation
Original leftover stock is usually the first material to inspect. If none remains, a donor board from a closet or another concealed area may match better than new material; new stock can then be placed in the less-visible location. An exact match is not guaranteed.
Cut the replacement to length and dry-fit it before applying adhesive. Some tongue-and-groove repairs remove the lower lip of the replacement board’s groove so the tongue can engage on one side while the modified groove drops over the exposed tongue on the other. Whether that modification is suitable depends on the floor and installation.
Secure the board according to the flooring, adhesive, and fastening instructions. Do not assume that one adhesive type, fastener pattern, spacing, expansion allowance, weighting period, or cure time applies to every floor.
Finish and inspect
If on-site finishing is required, protect neighboring boards and keep abrasion within the intended boundary. Use a fully dried scrap test to select stain and topcoat. Apply each product according to its current instructions.
Before returning the area to normal use, verify:
- The board does not rock, flex, or squeak
- Its face is level with adjacent boards
- End and side joints are clean and appropriately fitted
- No adhesive or filler remains on neighboring finish
- Color, sheen, texture, and bevel are acceptable
- Adhesive and coating have completed their product-specified cure
- Furniture and normal traffic will not be returned before the products permit it
Handle water damage, cupping, buckling, and rot in the right order
Water changes the repair sequence. Do not begin with sanding, filler, or replacement stain. Begin by stopping further wetting and determining whether the situation is appropriate for ordinary drying and flooring work.
Immediate response
- Stop the water source when that can be done without entering an unsafe area.
- Keep people away from unstable flooring and any area whose hazards have not been assessed.
- Determine whether the water may involve sewage, chemicals, or other contamination.
- If contamination or mold is suspected, stop ordinary DIY cleanup and seek appropriate remediation guidance before operating air movers or disturbing materials.
- For an uncontaminated incident that is safe to approach, remove standing water with an appropriate extraction method.
- Document visible damage before removing flooring.
- Begin controlled drying only after the area has been screened for conditions requiring specialist handling.
- Investigate moisture beneath the visible surface.
Water-damage warning signs include discoloration, blistered or peeling finish, cupping, warping, buckling, loose boards, movement, squeaks, engineered-board delamination, and water emerging through seams. A floor that looks or feels dry on top may still be wet on board undersides or in the subfloor. RW Supply + Design recommends assessing the finish, board body, fastening system, and subfloor rather than judging the surface alone; it also identifies sewage or chemical contamination as a factor favoring removal rather than ordinary surface repair (water-damaged flooring guide).
Inspect below the finish
Water can affect four connected elements:
- Finish: Blistering, peeling, whitening, staining, or loss of adhesion
- Board structure: Swelling, cupping, splitting, warping, buckling, or delamination
- Fastening system: Corroded fasteners, softened adhesive, loose boards, or movement
- Subfloor: Absorbed moisture, swelling, softness, panel damage, unevenness, or structural deterioration
Wood subfloors may need exposure, drying, repair, or replacement. Water beneath tightly installed boards may dry much more slowly than the visible surface because board undersides and edges generally lack the top face’s protective coating.
Use moisture readings in context
A moisture meter can help compare affected and unaffected areas and track change over time. It does not provide one universal pass-or-fail number. Interpret readings according to:
- Wood species
- Local and indoor climate
- Expected equilibrium conditions
- Subfloor type
- Installation system
- Meter type and settings
- Flooring and adhesive manufacturer requirements
- Readings from known dry comparison areas
If you do not know how to take or interpret the readings, bring in a flooring or moisture professional. A single isolated number without context can lead to premature sanding or installation.
Do not sand cupped boards immediately
Cupping reflects a moisture imbalance. Sanding raised edges before the source is corrected and the assembly stabilizes may flatten a temporary shape. If the boards continue changing during drying, the floor can later become crowned or uneven.
Stop the leak, establish an appropriate drying plan, monitor the assembly, and follow manufacturer or professional guidance about when to evaluate the final board shape. Some boards may improve as conditions stabilize, but complete recovery is not guaranteed.
Replacement becomes more likely when boards remain loose or severely deformed, engineered layers delaminate, wood has rotted, fasteners no longer hold, or the subfloor is structurally unsound. Manufacturer-authored repair guidance similarly recommends correcting moisture or subfloor problems before replacing warped or buckled boards and directs substantial water damage or mold concerns toward professional help (Bruce hardwood repair guide).
Mold, sewage or chemical contamination, extensive saturation, and soft or unstable subfloors are not ordinary cosmetic DIY repairs. They require appropriate remediation, moisture, flooring, and—where the supporting assembly may be involved—structural expertise.
Blend the repair with an older floor
A good color match begins with physical compatibility. Stain cannot disguise the wrong width, profile, texture, or bevel.
Match the board before matching the color
Prioritize:
- Species
- Width
- Thickness
- Tongue-and-groove or locking profile
- Grain and cut
- Surface texture
- Edge bevel
- Color and stain
- Finish chemistry and sheen
- Apparent age and wear
Use original leftover boards when available. Otherwise, inspect closets or other concealed areas for a possible donor board. Moving an aged board into the visible repair and placing new material in the hidden location may produce a better match.
Build and finish a sample
Prepare scrap from the replacement material and reproduce the complete proposed finishing sequence:
- Surface preparation
- Conditioner or sealer, if the system requires it
- Stain or color treatment
- All planned finish coats
- Product-specified drying and cure
Do not judge wet stain or fresh topcoat as the final color. Compare the fully dried sample from several viewing angles under the room’s actual lighting.
Oxidation, sunlight exposure, past cleaning products, previous coatings, surrounding wear, and factory texture can prevent an exact match. New wood may also change color after installation, so the closest match on the first day may not remain the closest match later.
Keep the repair controlled
Limit abrasion to the intended area. Protect neighboring boards and avoid feathering so widely that a one-board repair becomes a multi-board finish problem. On a beveled floor, preserve the edge shape wherever possible.
If a localized repair remains conspicuous, consider refinishing the entire replacement board or a larger visual unit. Whole-room refinishing may be an option when broad blending is more important than preserving the existing finish, but only if the floor can safely be sanded. Factory texture, layered color, and beveled edges may still be altered.
Know the DIY stop signs and plan a safer job
DIY is most reasonable when the damage is small, stable, well understood, and compatible products are available. Stop when uncertainty creates a risk of damaging the floor system or building.
Call a flooring professional when
- You cannot identify solid versus engineered construction.
- Engineered wear-layer thickness is unknown or appears insufficient.
- Solid flooring shows exposed joints, fasteners, or evidence of repeated sanding.
- The floor is antique, historically significant, patterned, or difficult to match.
- Damage covers a large or visually continuous area.
- The installation is glue-down, floating, click-lock, batten-mounted, or otherwise unfamiliar.
- Factory texture, bevel, color process, or coating cannot be reproduced.
- Several boards are unstable, split, rotten, buckled, or delaminated.
- The repair requires cutting beyond your tool-control skills.
- Radiant heating or other concealed services cannot be ruled out.
Bring in moisture or remediation help when
- Wetness persists or repeatedly returns.
- Water is trapped beneath boards.
- Mold is visible or suspected.
- The water may contain sewage, chemicals, or other contamination.
- A large leak or flood has saturated the assembly.
- Odor remains after surface drying.
- The subfloor cannot be inspected or dried without removing flooring.
Visible surface dryness does not establish that boards or the subfloor are dry, and water beneath boards can dry more slowly than the exposed face (water-damage assessment guidance).
Seek structural assessment when
A soft or unstable subfloor, widespread movement, significant sagging, damaged framing, or distortion extending beyond isolated boards can indicate a deeper problem. Do not use new flooring to bridge a weak substrate.
Consult pest and flooring specialists when
Small holes, sawdust-like debris, galleries, hollow-sounding boards, or repeated unexplained surface failures accompany the damage. Filling visible holes does not address an active infestation or determine how much wood has been compromised.
Safety checklist
The available flooring sources do not constitute a complete safe-work procedure. Before sanding, coating, or cutting:
- Read the flooring instructions, tool manuals, product labels, and safety data supplied with the actual products.
- Use the eye, skin, and dust protection specified for the work and materials.
- Isolate the immediate work zone and control dust as the equipment and products require.
- Provide the ventilation required by the selected cleaner, adhesive, stain, or finish.
- Verify flooring thickness before setting cutting depth.
- Stop if concealed heating or utilities cannot be ruled out.
- Use stable guides and avoid unsupported cutting near neighboring boards.
- Do not guess at the identity or compatibility of an old coating.
- Keep the area out of service until the selected adhesive and coating permit traffic.
The patching procedure described by This Old House specifically calls for eye protection and a dust mask and warns that saw depth must match the board thickness to avoid cutting below it; those points should supplement, not replace, the instructions for the actual tool and floor system (patching guidance).
Follow the selected adhesive and coating instructions for ventilation, application, recoat windows, foot traffic, furniture return, rug placement, and full cure. No generic timetable applies to every product.
What to ask for in a contractor quote
Request a written scope that addresses:
- Diagnosis and likely cause
- Floor construction and installation method
- Moisture testing and interpretation
- Boards or areas included in the repair
- Subfloor investigation and repair
- Replacement-board matching plan
- Stain, sheen, texture, and bevel expectations
- Furniture, appliances, doors, trim, and transitions
- Dust containment and ventilation
- Removal, hauling, and disposal
- Adhesive and coating system
- Drying and cure restrictions
- Access limitations
- Work specifically excluded
- Change-order process if concealed damage appears
A repair quote is easier to compare when each contractor is pricing the same diagnosis and scope—not merely using the same broad phrase, such as “patch” or “refinish.”
The cause-first checklist is simple:
- Identify the flooring and installation.
- Classify the damage by depth and stability.
- Stop moisture, movement, pests, or structural deterioration.
- Choose the least invasive compatible repair.
- Test color, texture, and finish before committing.
- Escalate when the board, subfloor, or supporting assembly is unstable.
A modest cosmetic patch can be entirely sensible. Covering an unresolved leak, weak subfloor, moving joint, or insufficient engineered wear layer can turn a small defect into a much larger failure.
Frequently Asked Questions
Can I repair one hardwood floorboard without replacing the whole floor?
Often, yes. An isolated tongue-and-groove board may be removed in sections, followed by subfloor inspection and installation of a matched replacement. The method is best suited to an accessible nailed-down floor. Glue-down, floating, click-lock, batten-mounted, and radiant-heated systems require installation-specific procedures.
Before cutting, identify the installation and board thickness, control the tool depth, and stop if pipes, wiring, or heating components cannot be ruled out. Match the replacement’s species, dimensions, profile, texture, bevel, color, and sheen as closely as possible. Exact blending cannot be guaranteed.
Can engineered hardwood be sanded and refinished?
Sometimes, but only when its remaining real-wood wear layer is adequate for the intended sanding and the manufacturer permits the process. Prior sanding, deep damage, factory texture, bevels, and the amount of material that must be removed all affect the decision.
Inspect an exposed edge and locate the product documentation. If the wear layer cannot be verified, do not sand. Use an approved non-sanding repair or ask a flooring professional to assess it. The same principle applies to solid hardwood: remaining material is more meaningful than a generic claim about the number of possible refinishing cycles.
Should I use wood filler on scratches, cracks, or gaps?
Use filler only where the defect is small, stable, and compatible with the product’s stated purpose. It may help level a localized gouge, cosmetic fastener hole, or nonmoving void before color and finish are applied.
Do not assume filler is appropriate for a moving split, structural crack, seasonal gap, expansion space, or unstable board. Determine why the opening exists first. A marker adds color, wax disguises minor surface defects, filler replaces a small volume, and adhesive joins suitable surfaces; these materials are not interchangeable.
Will cupped hardwood flatten after it dries?
It may improve after the moisture source is corrected and the floor assembly stabilizes, but complete recovery is not guaranteed. The outcome depends on the severity and duration of wetting, board construction, fastening, subfloor condition, and whether the wood has been permanently deformed.
Do not sand raised edges immediately after visible water is removed. The top can feel dry while the underside and subfloor remain wet. Monitor moisture in context and have persistent or severe cupping evaluated before deciding to sand or replace boards.
When is hardwood-floor damage too serious for DIY repair?
Stop DIY work when damage involves persistent moisture, suspected mold, sewage or chemicals, rot, engineered-board delamination, widespread buckling, a soft subfloor, structural sagging, active pests, or extensive board movement. Professional help is also prudent for antique floors, intricate patterns, unknown wear-layer thickness, radiant heating, concealed-service uncertainty, and unfamiliar glue-down or floating systems.
A cosmetic defect is a reasonable DIY candidate only when its cause is understood, the board is stable, the substrate appears sound, and the selected repair materials are known to be compatible.