
How to Save a Wet Wood Floor Without Repairing It Too Soon
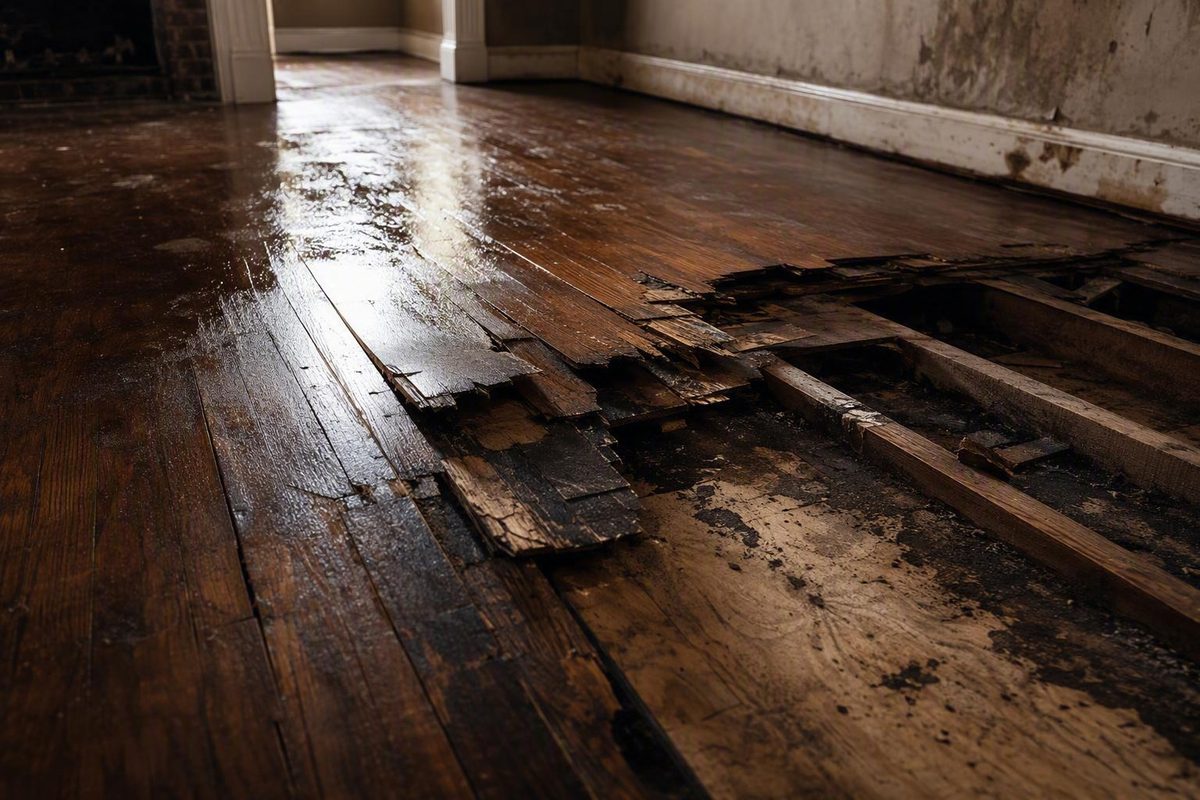
Water-damaged hardwood often looks ready for repair before it is. The surface may feel dry while moisture remains inside the boards, around fasteners or adhesive, beneath underlayment, or in the subfloor.
A lasting repair follows this order:
- Make the area safe and stop the water.
- Identify whether the water is clean or contaminated.
- Remove standing water and begin controlled drying.
- Inspect and measure the complete floor assembly.
- Let moisture levels and board shape stabilize.
- Choose the least invasive repair that addresses both the visible damage and the conditions below it.
A promptly cleaned spill may need only drying and monitoring. Stable cosmetic damage may be recoated or refinished. Buckling, delamination, contamination, fastening failure, or a deteriorated subfloor may require partial or broader replacement. The repair decision comes last.
First response: stop the loss and protect the area
Before touching the floor, decide whether approaching it is safe. Sewage, chemically contaminated water, visible mold, persistent musty odor, and soft or unstable flooring are also reasons to stop ordinary DIY cleanup and obtain appropriate professional help. These conditions are among the warning signs for which professional assessment is recommended in the Weles guide to wood-floor water damage.
If the area is safe, stop the source before attempting cosmetic work. Shut off the relevant fixture or water supply if you can do so without entering a hazardous area. For rain intrusion, roof or window leakage, drainage trouble, or moisture entering from below, use a safe temporary measure while arranging a durable correction.
Remove standing water with absorbent towels, a mop, or suitable extraction equipment. Move wet rugs, mats, cushions, cardboard, and furniture away from the affected floor because they retain moisture. Lift furniture rather than dragging it across softened finish or swollen boards.
Begin controlled airflow and dehumidification. Fans can move air across the affected area, while a dehumidifier removes moisture released into the room. Open windows only when outside air is drier than the indoor air; humid outdoor air can slow drying.
Do not aim a hairdryer, heat gun, space heater, or other concentrated heat source at the boards. Gradual drying is preferable because rapid heating can contribute to shrinkage and cracking; Phil’s Carpets specifically cautions against hairdryers and similar heat sources.
Document the event while mitigation is underway:
- Photograph the source and the full affected area.
- Record when the water was discovered and when the source was stopped.
- Note any rugs, trim, boards, or other materials removed.
- Save moisture readings by date and location.
- Keep receipts for extraction, equipment rental, inspections, and repairs.
- Photograph discarded materials when it is safe to do so.
Documentation can support an insurance claim, but the required notice and claim procedures depend on the policy. Contact the insurer promptly and ask what records it requires. Do not retain contaminated or unsafe material merely as evidence; photograph it when safe and follow professional instructions for handling or disposal.
Fast action can reduce further absorption, but response time alone does not determine whether the floor can be saved. The source, contamination, affected area, flooring construction, installation method, and subfloor condition all influence the outcome.
Triage the water source before deciding what can stay
Not all wet floors should be treated alike. Before deciding whether to dry, sand, or retain materials, identify where the water came from and what it may contain.
A localized spill or leak from a known clean source is different from water discharged by an appliance, backed-up drainage, sewage, chemical leakage, or outdoor flooding. Even apparently clear water may collect contaminants after passing through an appliance, building cavity, soil, insulation, or dirty surface.
Use this basic triage:
- Localized water from a known clean source: A small amount removed promptly may require controlled drying, moisture checks, and monitoring rather than demolition.
- Appliance discharge of uncertain quality: Do not assume the water is clean. Consider the appliance contents and the route the water traveled.
- Otherwise contaminated water: Pause ordinary floor repair until a qualified professional determines what can be cleaned and retained.
- Sewage, chemicals, or outdoor floodwater: Keep out of the affected area and contact a qualified restoration or remediation professional.
- Unknown source: Treat uncertainty as a reason to pause, not as permission to classify the event as harmless.
Contamination changes the repair decision because moisture removal does not necessarily remove residue. Flooring or subflooring can become dry yet remain unsuitable to retain. RW Supply + Design notes that sewage- or chemical-containing floodwater may leave residue after drying, so a dry surface is not by itself a safety test.
Do not improvise with bleach, vinegar, solvents, or household disinfectants. Any cleaning method must be suitable for the contaminant and compatible with the wood species, finish, adhesive, and manufacturer requirements.
Visible mold, persistent musty odor, or suspected growth below the boards also moves the project beyond routine cosmetic repair. Likewise, do not enter wet cavities or remove flooring near electrical systems until the relevant hazard has been evaluated.
If you cannot identify the source, contamination status, or affected boundary, stop repair work. A restoration professional can assess moisture spread and contamination, a plumber can investigate an active plumbing source, and a flooring specialist can evaluate the assembly after immediate hazards are controlled.
Read the symptoms at every layer of the floor
A hardwood floor is an assembly, not merely a finished surface. Inspect the finish, the body and shape of the boards, the fastening or adhesive system, any underlayment, and the subfloor. A dry-feeling surface does not establish that the lower layers are dry.
Start with the visible face. Look for:
- White or cloudy haze
- Peeling, blistering, or softened finish
- Light or dark water marks
- Dark staining around seams or fasteners
- Swollen fibers or rough grain
- Changes in sheen
- Raised end joints or side seams
White haze may be confined to the finish, while dark staining may reflect deeper penetration. Appearance alone cannot establish damage depth, however. Finish chemistry, wood species, contaminants, fasteners, and previous treatments can all affect color.
Next, read the board shape:
- Cupping: The long edges of a board are higher than its center.
- Crowning: The center is higher than the edges.
- Buckling: Boards have lifted or separated from the subfloor.
These terms describe shape, not a complete diagnosis. Cupping often accompanies a moisture imbalance through the board. Crowning can follow uneven drying or premature sanding. Buckling suggests more substantial movement or loss of attachment, but the fastening system and subfloor still require inspection.
Walk on the area only if it is safe and stable. Watch and listen for:
- Loose boards or movement underfoot
- New squeaks
- Soft or spongy areas
- Water emerging through seams
- Raised transitions or baseboards
- Widening gaps
- Persistent musty odor
- Loose fasteners or staining around fasteners
- Separation between the layers of engineered boards
- Swelling, crumbling, sagging, or loss of support below
Water or a squishing sound at seams strongly suggests moisture below the visible face. Engineered flooring may look acceptable on top while its veneer separates from the core.
| Symptom | What it may indicate | Sensible next step |
|---|---|---|
| White haze or cloudy finish | Damage may be limited to the finish | Dry and measure first; then test a compatible cleaning or recoating method |
| Stable light stain with flat, firm boards | Finish damage or shallow discoloration | Assess sandability and whether a spot repair will blend |
| Persistent cupping | Continuing moisture imbalance or residual deformation | Continue controlled drying and compare readings; reassess after stabilization |
| Crowning | Uneven moisture history or premature sanding | Check moisture through the assembly before further sanding |
| Raised seams or new squeaks | Swelling, movement, or fastening changes | Check moisture, attachment, and subfloor condition |
| Water at seams or soft areas | Trapped water or subfloor deterioration | Stop cosmetic work and arrange deeper inspection |
| Buckling or widespread movement | Severe expansion, attachment failure, or subfloor trouble | Obtain professional assessment; removal may be necessary |
| Engineered-board delamination | Veneer or internal layers separating from the core | Replacement is generally more realistic than refinishing |
| Rot or loss of support | Deterioration below the visible finish | Keep off the area and obtain flooring and structural assessment |
Inspect adjoining baseboards, walls, cabinets, door casings, transitions, and the ceiling or crawl space below where safely accessible. Water may travel beyond the visible stain and remain in concealed materials.
Dry the floor gradually—and verify what you cannot see
The goal is not merely to evaporate surface water. It is to return the complete floor assembly to a stable condition without introducing avoidable stress.
Water can travel through side seams, board ends, nail holes, scratches, transitions, perimeter gaps, baseboards, and unfinished undersides. Once it reaches underlayment or a subfloor, the finished face may dry much faster than the concealed layers. That is why a floor can feel normal while it is still changing shape.
Continue even airflow and dehumidification. Avoid concentrating all airflow or heat on a small section. Remove moisture-trapping contents and improve room circulation where practical. Do not open walls, cut flooring, or remove trim merely to inspect concealed spaces if utilities or other hazards may be present.
Moisture measurements are more useful than touch alone. Measure:
- Affected boards at multiple locations
- Boards around the apparent perimeter
- Unaffected flooring elsewhere in the same building
- The subfloor where safely accessible
- Replacement material before installation
Meter readings must be interpreted in context. A flooring or restoration professional can build a moisture map instead of relying on one convenient spot measurement.
Some commercial guides report general ranges, but they should not be treated as universal repair thresholds. RW Supply + Design reports a climate-dependent range of 5–10% for wood-floor moisture content and recommends comparison with an appropriate local level. Its own qualification is important: the number is not a pass-or-fail rule for every assembly.
Another commercial guide describes approximately 6–12%, depending on climate and wood type, as a typical range associated with repair readiness. That figure is likewise conditional rather than universal, as the Wooden Floors UK guidance itself acknowledges.
Climate, season, species, meter method, floor construction, substrate, and manufacturer instructions all matter. Unaffected flooring in the same building and the flooring manufacturer’s requirements are generally more relevant references than a generic internet percentage.
A floor is not ready merely because a reading has stopped falling. Stabilization is necessary, but the readings must also be appropriate for the flooring, substrate, local conditions, and intended repair. Before cosmetic work begins, confirm that:
- The source has been corrected.
- Affected readings are in an appropriate relationship to unaffected flooring.
- The subfloor is suitable for the intended flooring assembly.
- Readings remain stable rather than falling and then rebounding.
- Board shape and movement have stabilized.
- No unresolved odor, contamination, softness, or hidden leakage remains.
Do not promise that the floor will be ready on a particular day. A wiped-up spill, a concealed appliance leak, and a flooded assembly are fundamentally different events. The endpoint is a stable floor supported by appropriate measurements, not a calendar deadline.
When hidden moisture is suspected, professionals may use moisture mapping, commercial dehumidifiers, air movers, drying mats, targeted extraction, or inspection from below. This broader professional toolkit is described by Certified Water and Fire.
A wooden subfloor may sometimes be dried from below through a basement or crawl space. Other assemblies may restrict access or retain moisture differently. Do not drill, cut, or remove boards solely to inspect beneath them unless the installation and concealed services are understood.
Let the floor stabilize before sanding or sealing
Wood expands as it absorbs moisture and shrinks as it releases it. Stopping the leak begins recovery; it does not immediately return every board to its final shape.
Minor cupping can improve during controlled drying. That does not mean every cupped floor will flatten, but it does mean immediate sanding can turn a potentially reversible shape change into permanent damage.
Consider a cupped board whose underside remains wetter than its face. If the raised edges are sanded flat while the board is still moisture-imbalanced, extra material is removed from those edges. As the underside later dries and shrinks, the center may finish higher than the edges. The result is crowning.
Reassess only after both moisture readings and board shape have stabilized. There is no universal waiting period. A localized clean-water spill and a saturated floor over wet underlayment cannot share a reliable timetable.
Refinishing cannot correct:
- An active leak or moisture source
- A wet subfloor
- Contaminated material
- Mold
- Loose or moving boards
- Severe fastening or adhesive failure
- Structural softness
- Extensive buckling
- Internal delamination of engineered boards
Before sanding engineered hardwood, identify the product and verify the usable wear-layer thickness. Some engineered floors can tolerate limited sanding, while others cannot. If the veneer is too thin, sanding can expose or damage the core. A surface refinish also cannot rebond layers that have separated internally.
Solid hardwood generally offers more refinishing potential, but that potential is not unlimited. Previous sanding may have reduced the material above the tongue. Exposed fasteners, flexing areas, deep bevels, or an uncertain sanding history are reasons to have a flooring specialist assess the floor.
When the construction is unknown, look for product records, spare cartons, invoices, or manufacturer markings. If those are unavailable, professional inspection is safer than testing the floor with an aggressive sander.
Choose the least invasive repair that fits the damage
Once the source, contamination status, moisture, board stability, and subfloor condition are resolved, choose the smallest repair that addresses the actual failure.
Monitor after drying
Drying and monitoring may be sufficient when all of the following are true:
- The event involved a localized, known clean-water source.
- Standing water was removed.
- Moisture readings returned to an appropriate and stable relationship with unaffected areas.
- Boards remain firm and securely attached.
- No persistent odor is present.
- Deformation is absent or has resolved acceptably.
- The subfloor shows no damage.
Continue watching the area through normal seasonal changes. Delayed gaps, squeaks, stains, or movement justify another assessment.
Recoat the finish
Recoating may suit stable damage limited to the existing finish, provided the old and new coating systems are compatible. A recoat does not ordinarily remove deep staining or correct board shape.
Surface preparation and adhesion requirements vary, especially with factory finishes, waxes, maintenance residues, and previous coatings. Test the complete process in an inconspicuous area. Stop if the test produces poor adhesion, discoloration, or an unacceptable sheen difference.
Sand and refinish
Sanding and refinishing may address stable cosmetic staining, finish damage, or minor residual unevenness when the floor has enough usable wood. The flooring and subfloor must first be dry and stable, and the moisture source must be corrected.
Spot sanding can create a depression, color halo, or sheen difference. The technical repair area may therefore be smaller than the area that must be refinished for visual blending. Bruce’s manufacturer guidance also emphasizes correcting the underlying moisture or subfloor cause before repairing warped boards.
Replace isolated boards
Localized replacement may work when:
- Damage is confined to a few boards.
- Surrounding flooring is dry, stable, and securely attached.
- The subfloor is sound.
- Contamination and mold concerns have been resolved.
- Compatible material is available.
- The installation system permits a localized repair.
This approach can preserve most of the floor, but matching may be difficult. Existing wood changes color with age and light exposure, and an old finish will not wear like a new patch.
Remove or replace a larger area
Broader removal becomes more likely with:
- Widespread buckling
- Severe permanent deformation
- Rot or soft areas
- Persistent movement
- Fastening or adhesive failure
- Contamination
- Subfloor deterioration
- Extensive engineered-floor delamination
- Damage extending beyond the visible boundary
- Concealed layers that cannot be dried adequately
These conditions do not create an automatic rule that the entire room must be replaced. They do indicate that a surface-only repair is unlikely to be sufficient.
The final scope and cost depend on the affected area, floor construction, installation method, subfloor work, matching difficulty, furniture handling, disposal, drying requirements, trim and transition work, and the refinishing area needed to blend a patch. Compare itemized scopes rather than treating a board-replacement estimate and a drying-plus-subfloor proposal as equivalent.
Adapt the repair to the flooring and installation
The label “wood floor” covers several materials and assemblies. Identify the product before selecting a repair.
Solid hardwood
Solid hardwood is one piece of wood through its thickness and generally offers the greatest refinishing potential. That advantage is limited by the material remaining above the tongue, previous sanding, bevel depth, fasteners, and the extent of deformation or deterioration.
A stained but firm board may be refinished after stabilization. A split, rotten, severely deformed, or detached board may require replacement. In either case, the subfloor condition helps determine whether the repair will last.
Engineered hardwood
Engineered hardwood has a real-wood surface over a layered core. Its wear layer may permit full sanding, light abrasion only, or no sanding. Confirm the product specification rather than assuming all engineered flooring behaves alike.
Saturation can separate the veneer or internal layers from the core. Signs include hollow areas, lifted veneer, edge separation, and blister-like distortion. Refinishing changes the surface; it cannot restore a separated core.
Laminate
Once its fiber-based core has swollen or its edges have lifted permanently, affected planks are generally treated as replacement items. The source and substrate still must be dried and corrected before new planks are installed.
Parquet and factory-finished flooring
For either type, match more than the visible color. Identify the profile, thickness, species, pattern, attachment method, bevel, texture, and finish system. A generic removal or refinishing procedure can damage adjacent pieces or create an obvious patch.
Nail-down, glue-down, and floating systems
Installation method affects access and repair:
- Nail-down floors contain hidden fasteners and may be tied into neighboring rows.
- Glue-down floors depend on both the adhesive and substrate, either of which may be affected by water.
- Floating floors interlock across a larger area and may require disassembly from an edge rather than isolated removal.
Detailed demolition and fastening instructions cannot be generalized safely across these systems. Identify the assembly and follow the flooring and adhesive manufacturers’ instructions.
Subfloors
A visually acceptable hardwood repair depends on the layer beneath it. Wooden subfloors may sometimes be dried from above or below, but sections that remain soft, deteriorated, contaminated, unstable, or impossible to dry adequately may need repair or replacement.
If the floor has lost support, keep people off the affected area until the supporting assembly has been assessed. Guidance for hardwood water damage similarly treats a soft subfloor or extensive buckling as a reason for professional evaluation rather than cosmetic repair.
Replace isolated boards and blend the finish carefully
Replacing a few boards can be proportionate, but only after diagnosis and drying are complete.
Before beginning, confirm that:
- The source is fixed.
- Flooring and subfloor readings are stable and appropriate.
- Contamination, mold concerns, and deterioration have been resolved.
- The installation is identified as nail-down, glue-down, or floating.
- Concealed plumbing, wiring, or radiant systems have been considered.
- The replacement product is compatible with the assembly.
At a high level, isolated replacement involves removing damaged material without harming neighboring boards or concealed services, inspecting and preparing the exposed subfloor, fitting a compatible board, securing it by the appropriate installation method, leveling it where the flooring construction permits, and restoring the finish. Exact cutting, adhesive, and fastening methods must follow the floor system and manufacturer instructions.
Match the replacement on all relevant characteristics:
- Species
- Width, thickness, and length
- Tongue-and-groove or edge profile
- Grade and grain
- Cut and texture
- Bevel
- Age and natural color change
- Stain color
- Sheen
- Factory finish
- Installation method
Color alone is not enough. Two boards of the same species can differ in grain, grade, cut, texture, and stain response. A correctly fitting profile with a manageable color difference is usually more workable than a color match that does not fit the thickness, tongue, or bevel.
Measure both the replacement material and subfloor before installation. Follow product requirements for acclimation, adhesive, fasteners, expansion space, stain, finish, and curing. ADA Hardwood Flooring likewise recommends checking subfloor and replacement-board moisture and testing stain and finish in a hidden area.
Test sanding grit, stain, sealer, and topcoat on spare material or in an inconspicuous area. Avoid aggressive sanding, which can thin boards, alter bevels, expose engineered cores, or leave a visible depression. Confirm that each product is compatible with the existing coating and wood species.
Be realistic about blending. An aged floor may show years of sunlight exposure, oxidation, scratches, maintenance residue, and sheen wear. A structurally successful patch can remain conspicuous. A larger blending area—or whole-room refinishing—may be necessary when visual continuity is a priority.
Pause and have the material assessed before creating dust or disturbing concealed layers.
Know when to stop DIY work and prevent a repeat
Stop routine DIY work when you encounter:
- Sewage, outdoor floodwater, or chemical contamination
- Visible mold or persistent musty odor
- Water near electrical equipment or wiring
- Widespread buckling
- Soft, sagging, or unstable subflooring
- Extensive engineered-floor delamination
- Prolonged or unexplained concealed moisture
- Suspected loss of structural support
- Unidentified materials that may present a hazard if cut or sanded
Route the problem according to its cause:
- Plumber: Active plumbing leak, failed supply line, appliance connection, or drainage problem
- Restoration or remediation professional: Extensive water spread, concealed wet materials, contamination, or mold concerns
- Flooring specialist: Moisture assessment, construction identification, sandability, matching, and board replacement
- Electrician: Water near circuits, receptacles, wiring, appliances, or electrical equipment
- Structural professional: Loss of support, widespread deterioration, or damage extending into framing
- Insurer or adjuster: Notice requirements, documentation, mitigation questions, and claim procedure
Preventing recurrence starts with correcting the initiating condition. That may be a plumbing fitting, appliance hose, roof, window, door threshold, exterior drainage issue, indoor humidity problem, concrete moisture condition, crawl-space source, or failed floor-assembly detail. Do not close the floor or apply a new finish until that cause is resolved.
Useful preventive measures include:
- Clean spills promptly.
- Inspect appliance connections and plumbing.
- Use leak sensors in vulnerable locations.
- Use floor-compatible mats where splashes occur, but remove them when saturated.
- Monitor indoor humidity and follow the flooring manufacturer’s range.
- Maintain roofs, windows, doors, and exterior drainage.
- Use only assembly-appropriate moisture-control products.
- Investigate recurring cupping, gaps, or seasonal movement rather than repeatedly sanding or filling them.
Do not use generic vinegar, bleach, solvents, disinfectants, adhesives, stains, or finishes unless compatibility with the flooring and existing finish has been verified.
The practical rule is simple: restore appearance only after the source, contamination status, concealed moisture, board stability, and subfloor condition are resolved. If any of those remain uncertain, pause cosmetic work and obtain the appropriate assessment.
Frequently asked questions
Can cupped hardwood floors flatten after they dry?
Minor cupping can sometimes improve as the floor dries evenly and the moisture imbalance resolves. The result depends on exposure severity, board construction, attachment, subfloor moisture, and whether the wood has become permanently deformed.
Do not sand merely because the edges are high. If the underside remains wetter than the face, sanding those edges can leave the boards crowned after drying finishes. Continue controlled drying, compare affected and unaffected readings, and reassess after both moisture and board shape stabilize.
Persistent severe cupping, movement, softness, attachment failure, or subfloor deterioration calls for professional evaluation. Some boards may require replacement even if neighboring boards recover.
Can I sand water stains out of hardwood flooring?
Sometimes. Sanding may reduce a stable stain in the finish or shallow wood fibers, but it cannot correct active moisture, contamination, deterioration, a wet subfloor, loose boards, or engineered-floor delamination.
First establish that the complete assembly is dry and stable. Then confirm that the flooring has enough sandable material. Engineered wood may have a limited wear layer, while previously refinished solid hardwood may have little material remaining above the tongue.
Test the process in a hidden area. Sanding can alter texture and color, and the repaired section may accept stain differently from the surrounding aged floor. If a deep stain remains after the safe sanding depth is exhausted, board replacement may be more practical.
How long does a water-damaged hardwood floor take to dry?
There is no reliable universal duration. A small, promptly removed surface spill may dry much sooner than water trapped beneath boards, a prolonged appliance leak, or a flooded subfloor. Published timelines vary because the underlying events and assemblies differ.
Use moisture measurements in affected boards and the subfloor, compare them with unaffected flooring, and follow manufacturer requirements. Wait for both readings and board shape to stabilize. A dry-feeling surface or predetermined number of days is not enough.
If readings remain elevated, rise after drying equipment is stopped, or conflict with persistent odor or movement, investigate concealed moisture rather than beginning refinishing.
Can individual water-damaged boards be replaced?
Yes, when damage is localized, the surrounding flooring and subfloor are dry and sound, contamination concerns have been resolved, and compatible material is available. The installation method must also permit a localized repair.
A successful replacement matches dimensions, thickness, edge profile, species, grain, grade, bevel, stain, sheen, finish, and attachment—not merely color. Because floors change with age and light exposure, a new board may remain visible. A wider blending area or room refinishing may be needed.
Do not install replacement boards over an unresolved leak or damp subfloor. Measure the substrate and new material, then follow the flooring manufacturer’s acclimation and installation requirements.
Does homeowners insurance cover water-damaged hardwood floors?
Coverage depends on the policy, cause of loss, exclusions, endorsements, maintenance history, and insurer’s findings. Sudden accidental water discharge may be treated differently from gradual leakage, inadequate maintenance, or external flooding, and flood coverage may be separate. These distinctions are summarized in the AdvantaClean discussion of hardwood-floor water damage and insurance, but only the applicable policy and insurer can determine coverage for a particular loss.
Notify the insurer as the policy requires and ask about emergency mitigation and documentation. Photograph the source and damage, record the timeline and moisture readings, retain receipts, and document removed materials. Do not leave unsafe or contaminated material in place solely for claim purposes.