
Repair a Hardwood Floor Gouge Without Enlarging the Damage
Choose hard wax, sandable filler, or board replacement for a hardwood floor gouge, with practical repair steps and clear sanding stop points.
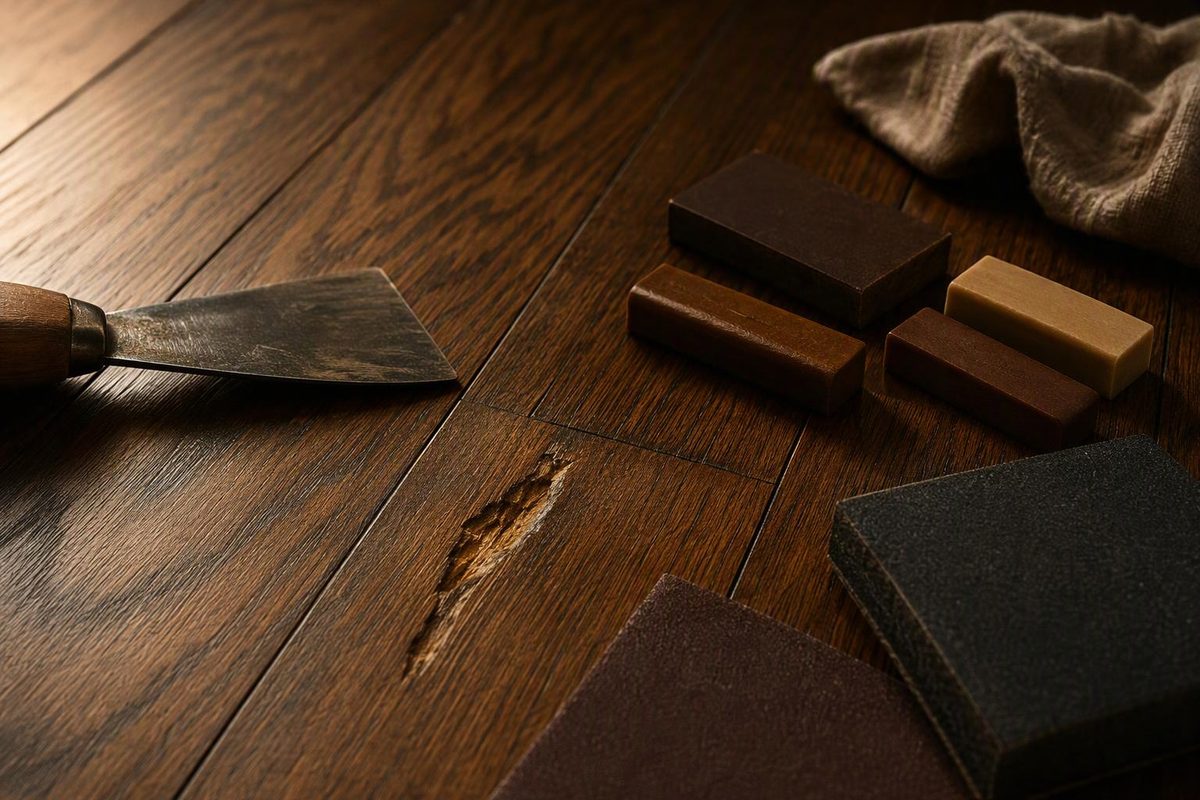
For a small gouge in a sound, finished hardwood board, a flooring-approved, color-matched hard-wax repair can avoid sanding the surrounding finish. Sandable filler is another route when bare wood will be sanded and refinished. A large missing section, broken board edge, or damaged engineered core calls for a board-replacement assessment—not simply more filler.
The goal is to replace the missing material and blend the repair without turning one gouge into a larger patch of stripped finish.
Check the damage before choosing filler
Clean away loose dirt, then inspect the mark with light shining across the floor. Record its length, width, and approximate depth without digging into it.
- A scratch is a narrow mark that may need only compatible color or finish touch-up.
- A dent is a depression with wood fibers still present. If nothing has been torn out, use the separate hardwood dent repair guide.
- A gouge has torn or missing wood. Coloring it alone leaves the cavity; steam cannot replace missing material.
Check whether the board is solid or engineered, and identify the finish from leftover packaging, installation records, or the manufacturer. Do not infer sanding capacity from total plank thickness. Engineered flooring has a separate wood wear layer, and very thin layers may permit recoating but not sanding, as Bruce explains in its refinishing guidance.
Stop before filling if the wood is soft, damp, lifting, or moving underfoot. A cosmetic patch does not resolve moisture damage or loose flooring, and surface appearance cannot establish the condition of the subfloor.
Repair a small gouge in a finished board
Choose a hard-wax kit explicitly intended for wood flooring and compatible with your finish. Do not assume a furniture crayon or sandable wood filler is suitable just because its color matches. Mohawk describes its Hard Fill Flooring Kit as suitable for minor-to-medium flooring defects.
Have the kit’s wax sticks, approved melting tool, leveling tool, compatible touch-up marker, cleaner, and clean cloths ready. Read the tool’s safety instructions and the product safety data before using heat or solvents. Practice the entire repair on a spare board if available.
1. Clean and prepare only the damaged area
Vacuum loose debris and use a cleaner approved for both the floor and repair system. Let the area dry.
Remove only loose splinters or raised fragments that prevent a flush repair; do not pry away firmly attached wood. If the kit calls for scuff sanding, keep it inside the damaged area. Mohawk’s directions recommend scuffing for adhesion while warning against removing unnecessary color and finish. See its Hard Fill technical instructions.
2. Match the board’s background color
Compare the wax with the sound wood immediately beside the gouge—not just the darkest grain line. Test the cooled wax color on your spare board. Mohawk allows Hard Fill shades to be mixed for a closer match.
Where the system specifies it, pre-color exposed wood with a compatible marker to prevent a pale outline around the fill. Follow the marker’s drying instructions before adding wax. Mohawk’s instructions cover color selection and pre-coloring.
3. Fill the cavity, slightly above the surface
Use the specified melting tool to flow wax into the gouge, filling the bottom rather than merely bridging the opening. Slightly overfill so there is material to level afterward. This follows Mohawk’s Hard Fill application directions.
Keep the hot tool controlled; do not rest it on intact flooring. If you cannot fill the cavity without scorching or enlarging the damaged area, stop and have a flooring repair professional handle it.
4. Let it cool, then level it
Once the wax has cooled and hardened, remove the excess with the kit’s leveling tool. Work carefully until the patch is flush, without scraping away the surrounding finish. Mohawk’s Hard Fill leveling tool is specifically designed to remove excess wax and level repairs.
Do not sand a broad circle around the patch to blend it. That changes a localized filling job into a finish repair.
5. Complete the kit’s finish treatment
Use only the repair system’s specified sealing or sheen-adjustment treatment, if required. Do not assume generic polyurethane will bond to wax or match a factory finish. Kährs, for example, gives different repair recommendations for lacquered and oiled floors.
Keep traffic off for the system’s stated readiness period. Inspect from standing height and under sideways light: aim for a flush, less noticeable repair, not a promise of invisibility.
When sandable filler makes more sense
Use sandable filler when the surrounding wood is already unfinished, or when a compatible sanding-and-refinishing repair is planned. For example, Minwax Stainable Wood Filler is intended for small gouges in unfinished wood. Its directions call for pressing filler firmly into place, slightly overfilling, drying completely, sanding flush, and removing sanding residue before staining or coating.
Test the filler, stain, and floor-rated finish together first. “Stainable” does not establish a color match. Follow the chosen filler’s size limits, layer thickness, and drying instructions rather than applying one timetable to every product. The filler-by-repair-type guide helps separate finished-floor touch-ups from refinishing repairs.
When to replace the board instead
Seek a replacement assessment if the gouge breaks the tongue or groove, exposes damaged engineered layers, leaves a broad missing section, or cannot be leveled safely. Deep gouges may require board replacement rather than a surface repair, as This Old House’s patching guide notes.
Before cutting anything, identify the flooring construction and attachment method and source a suitable replacement. Matching involves more than stain: board width, thickness, edge profile, species, and surface texture all matter. Start with matching hardwood boards for a repair before committing to removal.