
How to Repair a Hole in a Hardwood Floor: Filler, Plug, or Board Replacement
Choose filler, a wood plug, or board replacement based on hole depth, board condition, and the floor beneath it—with clear DIY stop points.
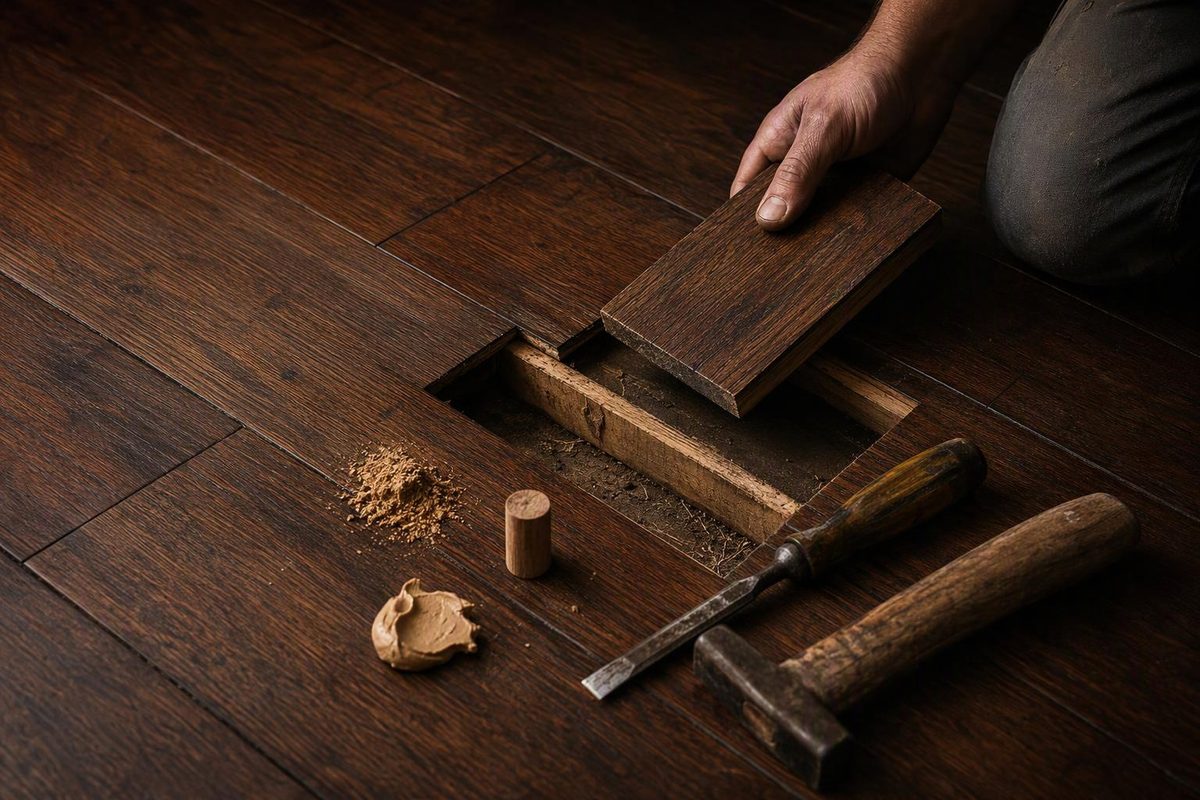
Fill small, stable surface defects; consider a matching wood plug for a contained hole in sound solid hardwood; replace a board when the damage leaves it split or weakened. If the opening also damages the subfloor—or the surrounding floor feels soft—repairing the visible hardwood is not enough.
Check the hole before choosing a repair
Vacuum loose debris, then measure the opening’s width, length, and depth without enlarging it. Check:
- The surrounding wood: Are the edges firm, or are they crumbling, split, or loose?
- The affected layers: Is this a shallow gouge, a hole through the floorboard, or an opening through the subfloor too?
- The flooring construction: Is it solid hardwood or engineered flooring with a thin wood wear layer? Is it nailed, glued, or floating?
- The cause: Was a fastener or pipe removed, or did the hole appear alongside moisture damage or deterioration?
Where accessible, inspect an exposed flooring edge at a register or threshold. Do not assume every hardwood floor is 3/4 inch thick.
Stop if you find soft wood, missing support beneath the boards, continuing moisture, or unexplained movement. A surface patch cannot establish that the layers below are sound. NWFA guidance notes that water-damaged subflooring can be more compromised than the visible hardwood; the moisture source and both layers need assessment before repair. See our wooden subfloor inspection guide if the damage continues below the boards. (NWFA installation guidelines, water-damage section)
Before drilling, cutting, or fastening, establish the flooring thickness and check for pipes, wiring, or radiant heating below. If you cannot establish safe clearance, leave the cutting to a flooring professional.
| What you find | Repair to consider |
|---|---|
| Tiny nail hole or small chip in an otherwise finished floor | Compatible color-matched touch-up filler |
| Small, stable gouge in bare wood that will be refinished | Sandable wood filler within its stated limits |
| Contained round hole in a sound solid-wood board | Matching face-grain wood plug |
| Split board, broken edge, damaged joint, or substantial missing wood | Board replacement |
| Damaged subfloor or soft, moving floor | Diagnose and repair the underlying layer first |
There is no universal diameter at which every filler becomes unsuitable. Product limits matter, but so do appearance, depth, and the condition of the remaining board.
For cutting and sanding, use eye protection, suitable respiratory protection, and dust collection; add hearing protection for power tools. Follow adhesive and finish labels for ventilation, ignition precautions, and waste disposal. A dust respirator does not protect against solvent vapors. (NWFA safety guidance)
1. Fill a small hole or gouge
If you want to preserve the surrounding finish
Choose a touch-up product approved for your flooring and finish—not simply any tub labeled “wood filler.” Test the color in an inconspicuous spot or on spare flooring.
For example, Bruce’s touch-up kit instructions call for cleaning the damaged area, rubbing the matching filler stick into a gouge, and removing excess with its scraper card or a cloth using the specified cleanup method. Keep the repair area small and follow the kit’s finish-specific directions. Do not sand away good finish merely to level a tiny filled hole. (Bruce touch-up kit instructions)
If the damaged area is bare wood and will be refinished
- Remove loose particles and make sure the cavity is clean and dry.
- Press a suitable sandable filler firmly into the defect with a small putty knife. Minimize smearing beyond the hole.
- Slightly overfill if the label requires it. For deep repairs, follow the specified layer thickness rather than packing in one thick mass.
- Allow complete drying, then sand the filler flush without hollowing the surrounding wood. Remove sanding residue.
- Test the stain and clear finish on a filled scrap before finishing the repair.
These details vary by product. Minwax Stainable Wood Filler, for instance, is intended for unfinished wood, excludes holes larger than 3/4 inch, and specifies 1/4-inch layers for deeper holes. Those are that product’s instructions, not a rule for all floor repairs. Its label also calls for testing stain on scrap containing filler. (Minwax application directions)
For the difference between touch-up putty and sandable filler, see wood filler by repair type.
2. Plug a contained hole in solid hardwood
A wood plug is worth considering for an old screw or removed-pipe hole when the surrounding board remains sound. Keep the plug within one board; if the opening crosses a joint or leaves little sound wood, consider board replacement instead. A hardwood plug is not a repair for damaged subflooring.
Use a face-grain plug of the same species, with grain direction and pattern as close as practical. Pete’s Hardwood Floors recommends face-grain plugs rather than slices of ordinary dowel: a dowel exposes end grain, which absorbs finish differently and can stand out. (Pete’s hole-repair guidance)
The basic sequence is:
- Select the plug first, then prepare a clean, round opening to suit it. Use a secured guide and controlled drilling depth; do not enlarge a hole freehand over unknown services.
- Dry-fit the plug and orient its grain along the board. It should fit snugly without needing force that could split the flooring.
- Apply suitable wood glue to the mating surfaces and seat the plug with a protective block, leaving it slightly proud for leveling rather than driving it below the surface.
- Remove excess glue as directed. After curing, trim and sand the plug flush, keeping abrasion confined to the repair.
- Apply a tested, compatible stain and finish.
An Old Town Home restoration documents this grain-alignment, gluing, and leveling approach on old pine floors ahead of refinishing. It is a useful example, not a guarantee that a plug will disappear in your floor. (Documented floor-plug repair)
Do not drill or sand engineered hardwood without knowing its wear-layer thickness and manufacturer’s repair instructions. Solid flooring also needs enough remaining wood above its joints and fasteners for any sanding.
3. Replace a damaged board
Have the replacement ready before cutting out the old board. Match species, grade, cut, width, thickness, joint profile, bevel, color, and sheen—not just the species name. For nailed and glued board replacements, NWFA recommends replacement-board moisture content within two percentage points of the existing flooring. Our board-matching guide covers sourcing difficulties. (NWFA replacement guidance)
For nailed or glued tongue-and-groove flooring, this is the basic replacement sequence; the flooring manufacturer’s instructions control the details:
- Protect adjoining boards.
- Set the saw to the verified board thickness. Make cuts inside the damaged board, stopping short of its ends and avoiding fasteners.
- Finish the cuts with an appropriate tool, lift out the center, then carefully remove the edge pieces and fasteners.
- Inspect the exposed subfloor. Stop for damage; otherwise clean debris and adhesive residue from the substrate and adjoining joints.
- Cut the replacement to length and modify its end tongue and lower groove lips as needed for insertion. Dry-fit it flush, preserving or recreating applicable bevels.
- Restore applicable moisture-control layers using a system compatible with the repair. For glue-down flooring, apply approved flooring adhesive to the substrate with the specified trowel. NWFA’s drop-in repair also uses adhesive on adjoining tongues to bond the modified joints; follow the approved procedure for your floor rather than relying on a loose drop-in fit.
- Finish unfinished replacement wood to match the surrounding floor.
NWFA provides separate procedures for floating floors: do not nail or glue a floating replacement board to the subfloor. Locking-joint alterations require manufacturer guidance. If the installation type is unclear, get a flooring professional to identify it before removal. (NWFA board-replacement procedures)
Plan the finish before the cut, too. Test the complete stain-and-finish combination on spare material and compare it after drying. If the repair still creates an obvious color or sheen boundary, discuss broader refinishing rather than sanding an ever-larger patch around the hole.