
Subfloor Waterproofing Starts With the Water Source
Protect a wood subfloor by tracing the water source, repairing damage, and matching the membrane or moisture-control detail to the finished floor.
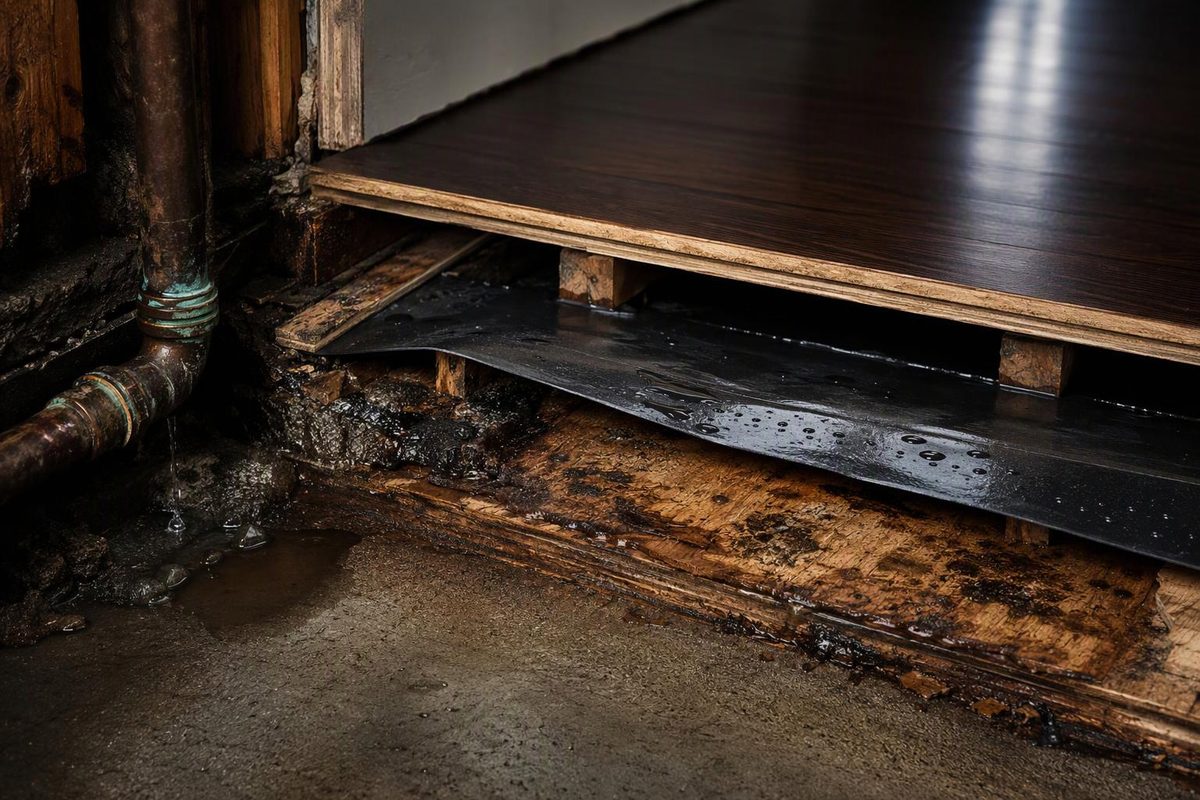
Subfloor waterproofing is not one coating that works beneath every floor. A bathroom spill, a leaking shower, damp crawl-space air and moisture rising through concrete require different details. Applying an impermeable product to the top of plywood without identifying the source can leave the leak in place or create an assembly that is incompatible with the finish flooring.
Start by deciding where the water is coming from and what the finished floor requires.
| Moisture source | Appropriate first response |
|---|---|
| Occasional splashes from a tub, sink or appliance | Repair and dry the subfloor; use a finish-compatible waterproof floor assembly if added protection is wanted |
| Shower or wet-room water | Build a continuous, drain-connected waterproofing system with sealed changes of plane and penetrations |
| Plumbing or exterior leak | Stop the leak before installing any membrane |
| Damp crawl space | Control ground moisture, air leakage and crawl-space humidity below the floor |
| Moisture through a concrete slab | Test the slab and use a mitigation or vapor-control system approved for the flooring |
Stop if the subfloor is already damaged
A membrane cannot restore plywood or OSB that has lost stiffness or thickness. Before covering the floor, probe stained areas around toilets, tubs, exterior doors and plumbing penetrations. Look below when access permits.
Stop and investigate further if you find:
- softness, flaking OSB or separated plywood veneers;
- swollen panel edges that prevent the floor from meeting flatness requirements;
- staining that remains damp after the leak is repaired;
- loose panels, unsupported patch edges or movement between sheets;
- damaged joists, widespread fungal growth or a recurring leak.
Remove materials as needed to expose the extent of the damage. A small, sound panel that became wet may be dried and reassessed; a panel that has lost structural integrity should be replaced. The repair must be supported and fastened before waterproofing begins. See how to replace a damaged subfloor section for the patch sequence.
For a tiled bathroom floor, waterproof the assembly
Plywood and OSB can be suitable structural subfloors, but they are not the waterproof layer. Tile and grout alone do not create a waterproof floor. A waterproof tile assembly normally puts a compatible sheet or liquid membrane below the tile and above a sound, properly prepared substrate.
A sheet uncoupling membrane is one option. Schluter identifies DITRA as an interior waterproofing and uncoupling membrane suitable over plywood or OSB, but merely abutting its sheets does not seal the joints. When a waterproof floor is required, the manufacturer calls for KERDI-BAND over membrane seams and floor-to-wall transitions, overlapping DITRA by at least 2 inches (Schluter DITRA product instructions).
A liquid-applied membrane can also work when the specified assembly permits it. Application thickness, coverage, corners, penetrations and cure time are performance details—not cosmetic preferences. For example, Custom Building Products requires at least two coats when RedGard is rolled or brushed for continuous waterproofing and calls for treatment at floor-to-wall intersections (RedGard technical data sheet). That data sheet limits direct application over rated plywood and OSB to interior, dry-area water-protection and crack-isolation uses. Do not assume a product approved over cement board is also approved directly over wood in a shower.
Cement backer board does not become waterproof merely because water will not destroy it. USG describes Durock cement board as water-durable but directs installers to add a separate membrane when waterproofing is desired (USG Durock installation guide).
Before selecting the layers, confirm joist spacing, subfloor rating and tile type. Structural requirements can change with the assembly; bathroom subfloor material and thickness covers those checks.
A shower floor needs a drain-connected system
Waterproofing the bathroom floor outside a tub or shower is not a substitute for a shower receptor. A shower or wet room needs one coordinated system extending through the floor, walls, corners, curb or threshold, drain connection and pipe penetrations.
Use the current instructions for the selected drain and membrane together. Do not improvise a hybrid detail from unrelated systems unless the manufacturers approve the combination. Maintain the specified slope to the drain, seal changes of plane as directed and protect the membrane from punctures. Complete any flood test required by the system instructions or local inspection authority before installing tile.
This is a sensible professional stop point when the drain must be relocated, framing must be altered, the floor cannot accommodate the required slope, or the membrane-to-drain connection is uncertain.
“Waterproof” vinyl does not waterproof the subfloor
Waterproof plank or tile describes the flooring material, not necessarily the completed room. Water can still reach the substrate at the perimeter, transitions, damaged seams, toilet flange or appliance connection. Armstrong makes this distinction directly: its waterproof rigid-core and luxury vinyl products do not prevent moisture or flooding from affecting the substrate below (Armstrong Flooring FAQ).
Do not roll a tile waterproofing membrane beneath vinyl, laminate or engineered wood unless the flooring, adhesive and membrane manufacturers approve that exact combination. An unapproved coating can affect bond, flatness, fastener performance or drying. For these floors, the normal sequence is to stop leaks, replace unsound material, dry the assembly, verify flatness and moisture, and then install only the underlayment or vapor control specified by the flooring manufacturer.
Moisture from below calls for source control
A top-side membrane will not correct a wet crawl space. EPA guidance prioritizes fixing leaks and seepage and covering exposed crawl-space soil to reduce ground moisture (EPA home moisture-control guidance). A conditioned crawl space also needs more than closed vents: a continuous ground cover, exterior air sealing, perimeter insulation where appropriate, and a planned means of humidity control work together as an assembly (Building Science Corporation crawl-space guidance).
That work belongs below the subfloor, not in a coat of membrane above it. The correct approach depends on climate, flood-zone requirements, termite inspection rules and whether the crawl space is vented or conditioned. Use the vapor barrier placement guide before adding plastic, and review the conditioned crawl-space checks if enclosure is being considered.
For moisture through concrete, do not treat a wood-panel overlay as the cure. Test and address the slab first, then choose a concrete-to-floor assembly approved for the measured condition. The subfloor-over-concrete guide explains why vapor-control placement changes with the flooring system.
Installation checklist
Before covering the subfloor, verify all six points:
- The source is corrected. No active plumbing, exterior-water or condensation problem remains.
- The structure is sound. Panels and framing are firm, supported and correctly fastened.
- The assembly is dry enough. Moisture readings meet the finish-floor and membrane manufacturers’ limits rather than an arbitrary universal number.
- Every layer is compatible. The membrane is approved for the substrate, setting material, drain and finished flooring.
- Continuity is detailed. Seams, corners, walls, thresholds, drains and penetrations are treated as the selected system requires.
- The work is verified. Required cure periods, coverage checks and any specified flood test are complete before the membrane is concealed.
If one of these cannot be confirmed, pause the installation. Waterproofing is durable only when the water source, structural panel, membrane and finish floor are treated as one assembly.