
Choose the Right Filler for the Defect—and Avoid a Visible Patch
Match the formula to the defect, substrate and finish, then prepare, layer when permitted, dry fully, sand flush and test the color first.
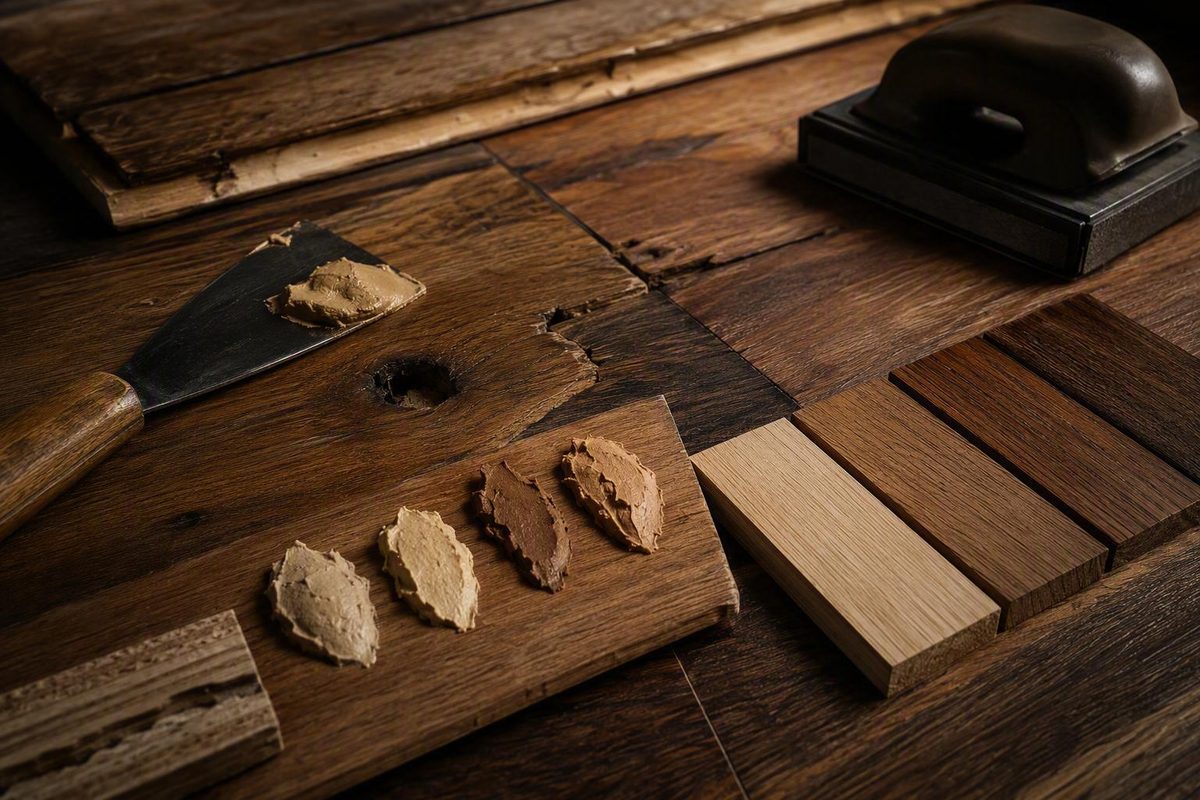
Water-based wood filler is best used for cosmetic repairs on compatible wood surfaces, not as a cure for every crack, gap, or floor problem. Choose it according to the defect’s width, depth, location, movement, and planned finish. Clean the area, test the complete finish system, build deeper repairs in layers when permitted, and let the entire fill dry before sanding. If the wood is rotten, loose, sagging, or structurally damaged, repair the underlying problem instead.
Quick decision table: which repairs fit water-based filler?
Start with the defect rather than the brand. A shallow nail hole in unfinished trim and a field of open joints in a hardwood floor require different products, even if both containers say “water-based.”
| Defect | Likely fit | What to check |
|---|---|---|
| Shallow nail holes | General-purpose paste filler | Substrate, color, and finish compatibility |
| Scratches or dents with missing material | Paste filler if there is a stable void to fill | Whether the damage affects the wood or only the finish |
| Small cracks and gouges | Paste or designated spot filler | Supported repair size and whether layered fills are permitted |
| Broken cosmetic edges | Product specifically approved for edge filling | Whether the edge carries hardware, load, or repeated impact |
| Open wood grain | Formula approved for grain filling | Required thinning method and planned finish |
| Narrow floor joints | Liquid sanding-dust filler | Bare-floor requirement and maximum joint width |
| Full-trowel floor filling | Designated hardwood-floor filler | Bare wood, sanding stage, tools, coverage, and drying conditions |
| Rot, loose boards, sagging, or structural damage | Not a filler repair | Condition of the wood and supporting floor system |
A finish-only scratch may need finish repair rather than filler. Likewise, a dent caused by compressed but intact fibers does not necessarily present a cavity that paste can fill. Filler is most appropriate when sound wood has a small, stable void or missing section.
For shallow cosmetic damage, a compatible general-purpose paste is usually the simplest format. Deeper cavities may dry slowly or shrink below the surface, so several thinner applications can be more reliable than one thick mass when the manufacturer permits layering.
Floor-joint fillers form a separate category. Product-specific width limits matter; a joint filler intended for narrow seams should not be treated as a general solution for larger or moving floor gaps.
Full-trowel filling is different again. It spreads a designated floor filler across bare hardwood before final sanding, addressing many small imperfections at once. Do not assume that a retail tub intended for isolated nail holes can be diluted and troweled across an entire floor.
Choose the formula by application and color strategy
Water-based fillers come in several practical formats:
- General-purpose paste filler: Applied with a putty knife to individual holes, scratches with missing material, cracks, gouges, or broken cosmetic edges.
- Liquid sanding-dust filler: Mixed with fine dust from the floor and worked into narrow joints in untreated wood.
- Spot floor filler: Formulated for isolated hardwood-floor defects under the conditions stated by its manufacturer.
- Full-trowel floor filler: Designed to cover a broad area of bare hardwood before the final sanding cut.
- Grain filler: Spread thinly over open-pore wood to create a smoother surface before finishing. Use only a formula specifically approved for that application.
Next, decide how the repair’s color will be managed.
A preset shade attempts to approximate the existing wood directly. A stainable filler is designed to receive compatible stain, although its response may differ from the surrounding wood. Color-changing products are also sold, but the category listing alone does not establish what the change signifies or whether it improves the final match. A dust-mixed filler uses fine sanding dust from the floor to bring the base color closer to the surrounding boards.
Retail assortments confirm that preset-color, stainable, color-changing, and multiple-size water-based fillers are available. Prices and availability vary by location and time, while ratings and bestseller labels do not establish adhesion, shrinkage resistance, or durability (Lowe’s water-based wood-filler assortment).
Do not treat “water-based” as a complete specification. Check whether the formula is approved for:
- The wood species or substrate
- Spot repair, joint filling, grain filling, or full-trowel application
- Bare, painted, stained, or previously sealed wood
- Interior or exterior exposure
- The defect’s width and depth
- The intended stain, sealer, paint, or topcoat
A stainable, tinted, preset-color, or dust-mixed filler can still remain visible.
Prepare the defect and run a test patch
Remove splinters, crumbling material, wax, grease, and other contamination without enlarging the defect unnecessarily. Vacuum holes and cracks so the filler contacts sound wood rather than loose dust. If the edges continue to crumble or feel soft, stop treating the area as a routine cosmetic repair.
Check the current product label and technical data sheet to determine whether bare wood is required. Bona Pacific Filler, for example, is specified for bare hardwood before the final sanding cut. That requirement belongs to the product’s application system and should not be generalized to every water-based filler.
Do not apply filler over paint, polyurethane, penetrating oil, wax, shellac, lacquer, or an unknown old coating unless the selected product’s documentation confirms that use. Likewise, do not strip or abrade the surrounding finish merely to create bare wood unless the repair system specifically calls for it and the visual consequences have been tested in an inconspicuous area.
Before working in a prominent location, prepare an offcut, sample board, or inconspicuous test area. Carry it through the complete planned sequence:
- Apply the filler at a representative thickness.
- Let the entire fill dry.
- Check whether it remains firmly bonded.
- Sand it with the intended abrasives.
- Apply the planned stain, sealer, or topcoat.
- Inspect the color and patch visibility in daylight and room lighting.
Read the current label, technical data sheet, and safety data sheet before application. Ventilation, personal protection, cleanup, disposal, allowable dilution, and finish timing are product-specific; they are not universal rules for all water-based fillers.
How to apply, dry, and sand the filler
For a shallow gouge in bare wood, use this basic sequence:
- Clean the cavity. Remove loose fibers and contamination, then vacuum thoroughly.
- Press in the filler. Use a putty knife or spatula to force the material against the bottom and edges rather than bridging the opening.
- Control the excess. Leave only enough above the surface for final leveling. A large mound adds unnecessary drying and sanding time.
- Wait for complete drying. Do not judge readiness from a dry-looking surface skin alone.
- Sand flush. Keep the sanding block or tool level so the repair is not dished below the surrounding surface.
- Remove all dust. Residue can affect stain appearance and topcoat adhesion.
- Apply the compatible finish. Follow the sequence established by the test patch.
For a deeper gouge, use several thinner fills if the product permits layered application. Let each layer dry before adding the next.
Use a putty knife or spatula for spot work. Use a floor trowel only when the designated floor-filler instructions call for full-trowel application; the tool, coverage rate, and sanding stage are parts of that specific system.
One supplier guide suggests starting at approximately 100–120 grit and following with 180–220 grit, but this is not a universal schedule (Bailey Flooring Supplies application guide). The product directions, wood species, surrounding finish, amount of excess filler, and next coating step should determine the actual progression.
Do not add water merely to make a paste spread farther. Some formulas allow measured thinning for grain filling or another specified application, while others are intended to be used as supplied. Bona Pacific’s documentation contains conflicting maximum dilution instructions, so the current container label or direct manufacturer clarification should control.
Drying time is a range, not a promise
Temperature, relative humidity, fill thickness, coverage rate, and cavity size all influence that process. A shallow nail hole in warm, dry conditions is not comparable to a deep gouge or a floor-wide trowel application.
Bona Pacific lists a conditional drying range of 30 minutes to two hours, depending on environmental conditions, coverage rate, and the size of the cracks or holes (Bona Pacific Filler technical data sheet).
For its sanding-dust floor-joint filler, Bona says suitable small fills can usually be sanded after about 30 minutes. The same manufacturer page limits the product to joints up to 2 mm and warns that larger gaps take longer and may need multiple applications (Bona Home Wood Floor Filler specifications).
Treat these figures as product-specific starting points, not category-wide promises.
Judge readiness according to the current instructions and the condition of the entire fill.
Those steps may have separate timing requirements from both the filler and finish manufacturer.
Match the color before committing to the repair
Color options vary by formula. Depending on the product, the manufacturer may permit:
- Blending two factory filler shades
- Adding a compatible universal tint
- Mixing in fine sanding dust
- Adding an approved stain or pigment while the filler is wet
- Applying stain after the filler has dried and been sanded
- Selecting a preset shade intended to approximate a wood species
These methods are not interchangeable. Bona Pacific permits blending its filler colors, using compatible universal tint, or adding fine wood dust. Bona Home is designed to be mixed with sanding dust from the floor.
DAP says its Premium Wood Filler accepts stains, tints, pigments, and topcoats while wet and may be thinned with water for grain filling (DAP Premium Wood Filler details). The cited summary does not provide a measured thinning ratio, so it does not support improvising one.
Permission to accept color does not guarantee an exact match. Natural wood varies with species, grain direction, density, age, sun exposure, previous coatings, and undertone.
Evaluate the repair after the filler has dried because wet color may not represent the finished appearance. Use the test patch to compare the bare, sanded filler and the same filler under the exact stain and topcoat planned for the project. If the patch stands out, revise the color method before filling the visible area.
Mixing the kit with sanding dust from the wood floor means the filler has the same colour as the floor itself Bona Home Wood Floor Filler.
Troubleshooting shrinkage, slow drying, and visible patches
| Symptom | Likely contributing factor | Bounded corrective action |
|---|---|---|
| Fill sinks below the surface | Deep application or drying shrinkage | Let it dry, then add another thin layer if permitted |
| Filler stays soft | Cool conditions, high humidity, excessive thickness, or a large cavity | Allow more time and verify the product’s conditions and repair limits |
| Patch is too light or dark | Wrong preset shade, judgment based on wet color, or incompatible tint ratio | Stop broad application and revise the test sample |
| Patch stains unevenly | Filler and wood absorb stain differently | Test another compatible color method or finish schedule |
| Topcoat appears cloudy, weak, or uneven | Dust, incomplete drying, or incompatibility | Stop and consult the filler and finish instructions |
| Crack or floor gap returns | Seasonal or active wood movement | Investigate the movement rather than repeatedly filling the opening |
| Repair breaks from an edge | Unsound wood, impact, movement, or unsuitable filler | Remove the failed material and reassess the repair method |
| Wood is soft, rotten, loose, or sagging | A problem beyond the cosmetic surface | Set the filler aside and assess the underlying material or floor system |
A sunken repair does not automatically mean the filler is defective. Deep applications make moisture escape more slowly, and some fillers may shrink as they dry. Once the first fill has dried, another thin application can bring it flush if the product permits recoating or layering.
For a color mismatch, do not keep filling in the hope that stain will conceal it. Change the preset shade, compatible tint, filler blend, or dust mixture on the sample first. If the stain or topcoat behaves poorly, pause the project and compare the current instructions for both products before proceeding.
Recurring cracks and floor gaps require particular caution. The appropriate repair depends on the cause, so repeatedly packing the opening with filler is not a diagnosis or a reliable permanent solution.
Read product specifications without turning them into universal rules
These examples show why the exact product format matters. They are not a performance ranking.
| Product | Intended use | Selected manufacturer specifications |
|---|---|---|
| Bona Pacific Filler | Spot or full-trowel filling on bare hardwood before final sanding | 30 minutes to two hours drying; 600–800 sq. ft. per gallon coverage; 100 g/L US regulatory VOC value; water cleanup |
| Bona Home Wood Floor Filler | Mixed with sanding dust for joints in untreated parquet and plank floors; not recommended for cork or end-grain parquet | Joints up to 2 mm; about 30 minutes before sanding suitable small fills; manufacturer-reported EC1 Plus certification |
| DAP Premium Wood Filler | General wood repair, edge and crack filling, and optional grain filling | Water cleanup; accepts compatible colorants while wet; may be thinned for grain filling; can be sanded, planed, cut, drilled, sawed, screwed, or routed after drying |
The figures and permissions in the table apply only to the named formulas under their stated conditions. The supplied DAP product summary, for example, does not provide a measured thinning ratio or drying time. Likewise, Bona Home’s sanding-dust method and joint-width limit do not apply to an unrelated paste filler, and its EC1 Plus statement does not establish the emissions profile of water-based fillers generally.
When comparing products, prioritize the current container label, technical data sheet, and safety data sheet. Formulas and directions can change, while a retailer’s category, price, stock status, rating, or review count cannot substitute for application limits.
The practical selection rule is straightforward: use a filler approved for the specific defect, substrate, location, and finish. Prepare and test before committing, build deeper fills gradually when permitted, and let actual conditions—not the shortest stated time—determine when to sand or finish. If the wood is rotten, loose, moving, or structurally damaged, set the filler aside and repair the cause.