
How to Tell Whether Your Plywood Base Is Ready for Hardwood
Assess structural adequacy, surface readiness and moisture readiness instead of relying on nominal plywood thickness alone.
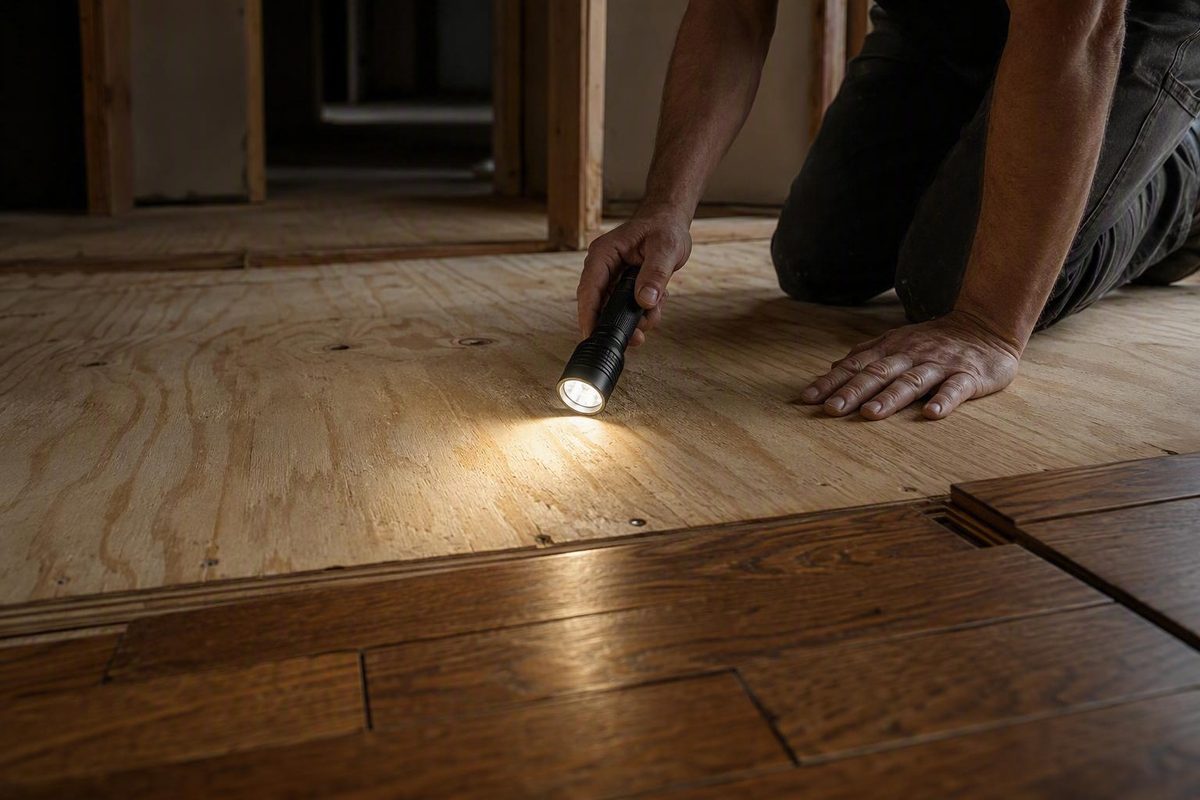
Yes—properly rated and adequately supported plywood can serve as a base for hardwood flooring. Nominal thickness alone, however, does not establish suitability. The complete floor must pass three separate checks: structural adequacy, surface readiness, and moisture readiness.
Joist spacing, panel span rating, edge support, fastening, panel condition, flooring direction, and installation method all affect the decision. Before installing anything, verify the current requirements for the exact flooring, plywood panel, fasteners, adhesive, underlayment, and moisture-control system, along with applicable building codes.
The short answer: plywood works when the whole floor assembly works
Treat a plywood subfloor as part of a floor system, not as an isolated sheet. The assembly includes the framing, connectors, panels, and any specified subfloor adhesive. Moisture exposure, uneven framing, panel ridging, and fastening can affect the finished surface.
Evaluate the floor in three stages:
- Structural adequacy: Is the plywood rated for the measured joist spacing? Are panel edges supported as required? Are the framing and panels sound, stiff, and securely connected?
- Surface readiness: Is the surface sufficiently flat, clean, stable, and free of damage, ridges, protruding fasteners, and incompatible residue?
- Moisture readiness: Have both the plywood and hardwood been measured, and are the results acceptable for the selected flooring and expected indoor conditions?
These are independent checks. A stiff floor can still have ridges that interfere with a glue-down installation.
General guidance can screen an assembly, but it cannot prove code compliance or approve a particular hardwood product. Project-specific instructions and approved assembly details control.
Choose plywood by assembly type, joist spacing, and panel rating
Begin by establishing the plywood’s function:
- Structural subfloor: The plywood spans joists and transfers floor loads to the framing. Panel rating, thickness, orientation, fastening, and edge support are structural concerns.
- Underlayment or smoothing layer: The plywood rests on an existing continuous plank or panel subfloor. It may improve the installation surface without acting as the primary joist-spanning layer.
Do not apply thickness advice for one role to the other.
The following figures are historical screening benchmarks published in 2007. They are not universal current minimums and cannot replace the panel rating, applicable code, or product instructions (Wood Floor Business’s dated subfloor guide).
| Actual joist spacing | Historical plywood benchmark | Rating and edge-support check | Final verification |
|---|---|---|---|
| Up to 16 in. on center | 5/8 in. | Span rating must permit the spacing; verify required long-edge support | Current code and panel, flooring, and fastener instructions |
| More than 16 through 19.2 in. on center | 3/4 in. | Confirm span rating and tongue-and-groove, blocking, or other approved support | Same project-specific requirements |
| More than 19.2 in. on center | 7/8 in. | Verify rating, bearing, joints, and all required edge support | Same checks; seek structural review if capacity is uncertain |
Thickness is only one part of that screen. APA panel selection is tied to both the span rating and the spacing of supporting joists. On APA Rated Sheathing with a two-number rating, the second number indicates the maximum support spacing for subfloor use. Tongue-and-groove panels can eliminate separate blocking along long edges in the APA system described, but square-edge panels may need blocking or another approved form of support.
Assembly type also explains why isolated thickness recommendations can mislead. In one forum discussion, a contributor suggested 1/2- to 3/4-inch plywood over an existing 1.5-inch tongue-and-groove cedar floor. That was assembly-specific advice about a supported smoothing layer, not a specification for plywood spanning open joists (the original forum discussion).
Decide whether a second plywood layer or underlayment is necessary
Hardwood does not automatically require another plywood layer. The answer depends on the existing assembly and the requirements of the finish-floor system.
The relevant terms describe different functions:
- Structural subflooring spans framing and transfers loads to it.
- Combination subfloor-underlayment panels, such as APA Rated Sturd-I-Floor, perform combined roles in suitable assemblies.
- Separate plywood underlayment is installed over the structural floor to create or improve the finish-floor surface.
- Acoustic or resilient underlayment is a product-specific layer used where required for sound control, cushioning, or a floating-floor system; it is not necessarily plywood.
APA says Rated Sheathing and Sturd-I-Floor may be used beneath hardwood and describes separate underlayment as optional for hardwood over those suitable panels (APA’s underlayment and subfloor guidance).
“Optional” does not mean unnecessary in every project. Another layer or a different underlayment may still be required because of:
- the hardwood manufacturer’s substrate instructions;
- the installation method;
- an adhesive manufacturer’s approved-substrate requirements;
- a product-specific acoustic specification;
- the condition of the existing installation surface; or
- the proposed board direction relative to the joists.
Added plywood can provide a more suitable installation surface or form part of an approved response when hardwood will run parallel to the joists. Those problems must be corrected at their source.
Tongue-and-groove plywood may be important when panels span framing. Follow an assembly-specific specification for panel grade, thickness, joints, gaps, adhesive, and fasteners rather than borrowing a universal second-layer detail.
Run a structural and surface-readiness inspection
Inspect in an order that prevents surface work from concealing a structural problem:
- Identify the assembly. Locate the joists, measure their spacing, determine their direction, and establish whether the visible plywood spans them or covers another subfloor.
- Confirm ratings and support. Read accessible panel stamps and inspect bearing, end joints, long edges, blocking, and tongue-and-groove engagement.
- Check movement. Walk the floor and investigate bounce, squeaks, moving seams, loose panels, and fastener movement.
- Measure flatness. Place a long straightedge in several directions, including across panel joints.
- Remove contamination. Prepare the surface for the selected fastened, glued, or floating system.
- Test moisture. Test only after known leaks or persistent damp conditions have been corrected.
Repair loose panels, protruding fasteners, delaminated or otherwise damaged areas, panel ridging, and other irregularities before covering the floor. A squeak or moving seam is a symptom to investigate, not something the hardwood should be expected to hide.
For glue-down flooring, remove paint, oil, wax, sealer, old adhesive, drywall compound, dust, and other bond-inhibiting residue. Confirm that any primer, filler, patch, or leveling product is compatible with both plywood and the selected adhesive.
Historical guidance provides different flatness benchmarks according to installation method and fastener length:
- With fasteners at least 1 1/2 inches long: within 1/4 inch over 10 feet or 3/16 inch over 6 feet.
- For glue-down flooring or fasteners shorter than 1 1/2 inches: within 3/16 inch over 10 feet or 1/8 inch over 6 feet.
These are dated general benchmarks from the 2007 trade guide cited earlier, not universal tolerances. A retailer preparation guide uses 3/16 inch over 10 feet as a general benchmark but likewise directs installers to follow the flooring manufacturer’s requirements (Lowe’s plywood-subfloor preparation guide).
Sand high areas only where doing so will not damage or compromise the panel. Correct low areas only with products approved for plywood and the intended installation method.
Flatness and stiffness are different.
Measure moisture instead of relying on appearance or a fixed wait
Use an appropriate moisture meter to measure both the plywood and the hardwood. Record multiple readings across the room, including known or suspected moisture-risk areas. Do not rely on one convenient measurement or assume that a dry-looking surface is ready.
A compact moisture log can include every necessary field without becoming difficult to use:
| Location | Subfloor and flooring readings | Difference | Date and observed risk |
|---|---|---|---|
| Exterior-wall area | Subfloor: ___ / Flooring: ___ | ___ | ___ / Exterior exposure |
| Room center | Subfloor: ___ / Flooring: ___ | ___ | ___ / Baseline |
| Near plumbing | Subfloor: ___ / Flooring: ___ | ___ | ___ / Plumbing risk |
The 2007 guidance recommends at least 20 subfloor readings per 1,000 square feet. It also gives maximum flooring-to-subfloor differences of four percentage points for solid strip flooring and two percentage points for solid plank flooring wider than 3 inches (the dated moisture benchmarks).
Use those values only as historical screening figures. Species, board width, engineered construction, climate, meter settings, adhesive, and manufacturer instructions may produce different requirements.
A fixed acclimation period, including a commonly quoted 72 hours, does not prove readiness. Moisture readings, stable site conditions, indoor temperature and humidity, and the flooring’s packaging and installation instructions provide the better basis for a decision.
Do not use the terms underlayment, vapor retarder, vapor barrier, and adhesive moisture-control system interchangeably. Historical wood-floor guidance warns that materials with a perm rating of 0.7 or less, including polyfilm, can trap moisture in a wood subfloor; do not place a very low-permeance sheet over plywood unless the complete assembly is specifically designed and approved for it by the relevant product manufacturers (Wood Floor Business, 2007).
Match the preparation to flooring direction and installation method
The installation method determines which plywood characteristics require the closest attention.
| Installation method | Primary plywood checks | Preparation and final confirmation |
|---|---|---|
| Nail-down or staple-down | Structural support, stiffness, secure panels, suitable fastener-holding substrate | Correct movement and damage; verify fasteners, panel requirements, and product-specific flatness |
| Glue-down | Sound, dry, stable, bondable surface | Remove contamination; use compatible patches and primers; confirm adhesive approval for the substrate |
| Floating engineered | Stable, flat, clean base | Use only specified underlayment and moisture-control products; follow product-specific joint instructions |
For mechanically fastened hardwood, the plywood must support the floor assembly and hold the specified fasteners.
For glue-down flooring, contamination and incompatible repair materials can interfere with the bond. Confirm that the exact hardwood product and adhesive are approved for installation over plywood. A general statement that hardwood can be glued does not establish compatibility for every solid or engineered product.
For floating engineered flooring, underlayment and moisture-control requirements are product-specific. Some floors use locking joints, so do not assume that adhesive must be applied between every floating plank.
Board direction matters as well. The cited historical guidance favors installing hardwood perpendicular to the joists. If the boards will run parallel, possible responses include an approved plywood layer oriented across or diagonally to the joists or supplemental bracing. Either approach requires confirmation for the actual framing, subfloor, and hardwood system.
Avoid transferring fastener spacing, perimeter gaps, adhesive coverage, or acclimation periods from one product to another. Use the instructions for the exact flooring model and installation method.
Final go/no-go checklist
Proceed only when every applicable item receives a yes:
- [ ] The assembly type is known: structural plywood over joists or underlayment over a continuous subfloor.
- [ ] Joist spacing and direction have been measured.
- [ ] The panel grade, thickness, and span rating are verified for the support spacing.
- [ ] Panel edges are tongue-and-groove, blocked, or otherwise supported as required.
- [ ] Panels are secure, and squeaks or movement have been investigated and corrected.
- [ ] The floor has acceptable stiffness without unexplained bounce or deflection.
- [ ] Delamination, deterioration, ridging, protruding fasteners, and damaged areas are corrected.
- [ ] Flatness meets the selected flooring and adhesive requirements.
- [ ] The surface is clean and compatible with the intended installation method.
- [ ] Moisture readings for both plywood and flooring are documented and acceptable.
- [ ] Underlayment and moisture-control materials are compatible with the complete assembly.
- [ ] Flooring direction has been considered.
- [ ] Current product instructions, approved assembly details, and applicable code requirements have been confirmed.
The project is no-go if the plywood is delaminated, persistently wet, visibly deteriorated, sagging, or moving. Another finish layer will not correct the underlying cause. Obtain a qualified assessment when there is excessive bounce, sagging, widespread deterioration, damaged framing, unsupported edges, or uncertainty about structural capacity.
Do not sand, grind, scrape, or otherwise disturb suspect old resilient flooring or adhesive. Have it evaluated under applicable local requirements by a qualified asbestos professional before disturbance; older flooring materials may contain asbestos and may require professional removal (Lowe’s preparation warning).
Apply requirements in this order: current product instructions and approved assembly details, applicable code, current panel guidance, and current industry standards. Dated general guidance can help screen the floor, but it cannot make the final installation decision.