
How to Decide What Your Damaged Floor Actually Needs
Check moisture, panel and framing condition to choose the least extensive durable repair, then verify seam support, dryness, flatness and finish compatibility.
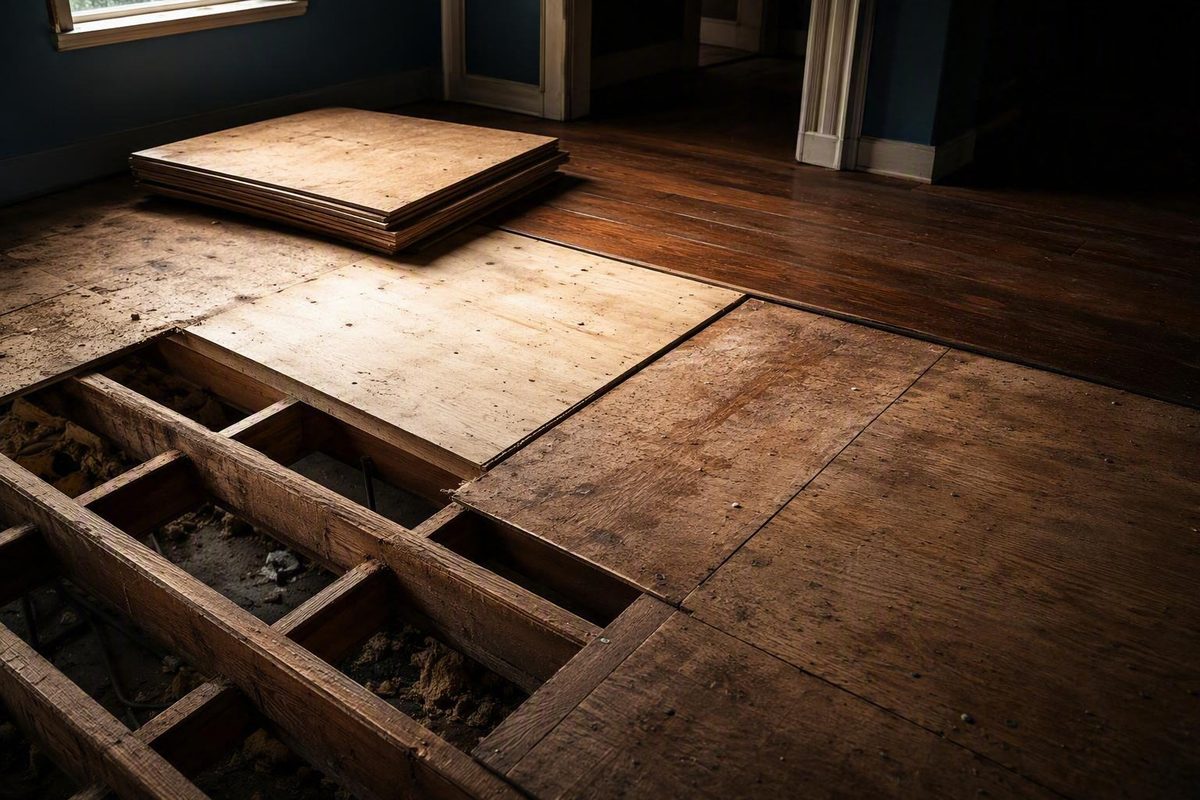
Subfloor replacement should begin with diagnosis, not demolition. A soft spot beside a toilet may need a supported patch. A squeak may require only refastening. A wet but firm panel may be dryable. A sag crossing several joists may originate in the framing rather than the subfloor.
The right sequence is to stop the moisture, expose enough of the floor assembly to identify the affected layers, inspect the framing, and choose the narrowest durable response. Panel dimensions, gaps, orientation, adhesive, fasteners, and surface tolerances must then come from the selected products, finished-floor requirements, applicable code, and conditions in the house—not from a generic tutorial.
Cost planning follows the same diagnosis-first approach. Rather than relying on a national average, build the budget around access, demolition, drying, framing, fixtures, utilities, permits, and finish-floor restoration.
What the subfloor does—and what replacement actually means
The subfloor is the structural layer beneath the visible flooring. In a conventionally framed wood floor, it sits above and is attached to the floor joists.
It is distinct from the neighboring layers:
- Finished flooring is the visible, walkable surface.
- Underlayment or a preparation layer is a separate material that may sit between the subfloor and finish. Depending on the system, it may smooth the surface, isolate movement, support waterproofing, or satisfy another installation requirement.
- Subfloor is the structural deck itself.
Plywood and oriented strand board, or OSB, are common residential panel subfloors. Older houses may have straight or diagonal plank subfloors. Concrete commonly serves as the subfloor in slab-foundation buildings and some below-grade spaces, although repairing concrete is different from replacing wood panels over joists. A flooring contractor’s overview similarly distinguishes the visible floor from the structural layer and identifies plywood, OSB, and concrete as common subfloor materials.
“Subfloor replacement” does not necessarily mean removing every panel in a room. It may describe:
- Cutting out and replacing one damaged section
- Replacing several panels around a bathroom or appliance
- Selectively repairing boards in an older plank floor
- Replacing most or all of a room’s deck
- Completing a larger replacement after widespread wetting or decay
Scope depends on where the damage ends, whether the remaining material is sound, and whether the new seams can be fully supported. A neat stain does not establish the repair boundary.
Do not blame the subfloor merely because a symptom appears at floor level. A squeak may come from movement around a fastener. A hump may originate at a joist or beam. Cracked tile may reflect movement or an unsuitable tile assembly. A sloping room may involve framing or foundation movement.
Before estimating replacement, determine which layer is failing: the finish flooring, underlayment, subfloor, fasteners, joists, beams, foundation, or some combination of them.
Warning signs and a diagnosis-first inspection checklist
The following conditions justify investigation:
- A soft or spongy area
- Visible or measurable sagging
- Unusual bounce or movement
- Persistent squeaking concentrated in one location
- A musty odor
- Cracked, loose, or repeatedly failing tile
- Cupped, buckled, lifted, or distorted flooring
- Bubbling or separating resilient flooring
- A rocking toilet
- Staining on the floor or ceiling below
- Movement around panel or plank seams
None proves by itself that replacement is required. Loose fasteners, gaps, seasonal wood movement, moisture, and installation defects can all produce squeaks. Unevenness may originate in joists, beams, or the foundation, while distorted finish flooring may have its own installation or moisture problem. Contractor guidance on floor noise likewise identifies several possible causes of squeaking rather than one definitive diagnosis.
Use the symptom to decide where to inspect, not what to replace.
Trace the likely source by location
In bathrooms, begin with the toilet, tub, shower, sink, supply connections, drains, waterproofing transitions, and penetrations. In kitchens, inspect the sink cabinet, dishwasher, refrigerator or ice-maker supply, and nearby exterior doors. In laundry rooms, consider supply hoses, drains, standpipes, utility sinks, and appliance movement.
Elsewhere, investigate flooding, wind-driven rain, poorly sealed doors, roof or wall leaks, condensation, and damp crawl spaces. Pests, damaged framing, or an old installation defect may also weaken a floor without an obvious current leak.
Inspect in a controlled sequence
- Document the symptom. Mark the soft, noisy, distorted, or low area. Note whether it changes with weather, plumbing use, or appliance operation.
- Look for active water. Check fixtures, supply lines, drains, appliance connections, exterior openings, and accessible spaces below.
- Inspect from underneath when possible. A basement or crawl-space view may reveal staining, swollen edges, unsupported joints, damaged framing, plumbing leaks, or pest activity.
- Expose only what is initially necessary. A register, trim piece, fixture opening, or limited section of finish flooring may reveal the assembly without committing to full-room demolition.
- Check firmness. Probe suspect wood carefully and compare it with known sound material nearby. Look for fibers that crumble, compress, flake, or separate.
- Map the damage. Work outward in several directions and mark the transition to consistently firm, intact material.
- Inspect adjacent framing. Examine accessible joists, rim framing, blocking, bearing areas, and panel support for softness, splitting, deformation, excessive alteration, or movement.
- Reassess the scope. Decide whether the problem is limited to the finish, attachment, one subfloor area, or a broader moisture or structural condition.
Look for staining, swelling, delamination, crumbling fibers, rot, mold-like growth, pest channels, loose fasteners, unsupported seams, and movement between the subfloor and joists. Water-damage guidance from a structural-panel manufacturer similarly recommends stopping the water and exposing the floor before deciding what must be removed; it also warns that framing damage may need evaluation before new subflooring is installed (water-damaged subfloor assessment sequence).
Do not assume that the edge of a stain is the edge of deterioration. The repair boundary must reach demonstrably firm, usable material and allow a practical, fully supported patch layout.
Stop opening or cutting the floor when you encounter an uncontrolled leak, widespread rot, substantial sagging, questionable joists, unidentified utilities, or suspected involvement of a beam, foundation, bearing wall, engineered joist, or floor truss. Sewage, uncertain contamination, or extensive mold-like growth also falls outside a generic repair procedure. Contractor guidance treats soft, sagging, moisture-affected, or structurally moving floors as conditions requiring inspection of both the flooring and framing, not automatic panel replacement (assessment considerations for soft and sagging floors).
These discoveries can turn a panel repair into structural, plumbing, electrical, or remediation work. Do not conceal them behind a new patch.
Fix the moisture source before deciding what wood to remove
Correcting the moisture source is the first repair step. It is not something to postpone until after new panels are installed.
Depending on the cause, this may mean repairing a supply or drain leak, correcting an appliance connection, addressing a defective fixture installation, stopping rain entry, improving exterior drainage, reducing crawl-space moisture, or controlling indoor humidity. The remedy must address the source rather than merely dry the visible surface.
A wet subfloor does not automatically require replacement. If the exposure was limited and the panel remains firm, intact, and structurally usable, it may sometimes be dried after the water source has been stopped. Material that is rotten, spongy, crumbling, badly swollen, delaminated, mold-affected, or structurally weakened generally requires removal. Commercial home-improvement guidance makes the same distinction between wet material that may remain salvageable and material weakened by prolonged moisture exposure.
Drying is not determined by color, odor, or touch alone. A panel may appear dry on top while moisture remains elsewhere in the assembly. Staining may also remain after otherwise sound material has dried.
Use a moisture-assessment method suitable for the particular material and covering system. Follow the relevant instructions for the panel, adhesive, underlayment, waterproofing system, and finished flooring. If exposure was prolonged, concealed, or of uncertain origin, obtain qualified assessment rather than attempting to classify the material from one reading.
The purpose of testing is to confirm compliance with the requirements of the materials that will enclose the floor—not to apply one generic threshold to every assembly.
A patch may look successful at first and fail later if the underlying moisture remains.
The source and history of the water also matter. Do not use a generic DIY cleaning method for uncertain contamination, sewage, or extensive microbial growth; treat those as professional-assessment boundaries.
Decision tree: dry, refasten, patch, overlay, replace, or escalate
Once the source and extent of the problem are understood, choose among six basic outcomes.
1. Dry structurally sound material
Consider drying when the subfloor remains firm, retains structural integrity, has not significantly swollen or delaminated, and can be exposed to effective drying. Continue monitoring instead of reinstalling the finish as soon as the visible surface appears dry.
Drying does not reverse decay. If the material has lost strength or can no longer provide the required fastening capacity, replacement is the more durable response.
2. Refasten a sound but loose assembly
If the subfloor is dry and sound but moves against the framing, refastening may correct localized noise or movement. First confirm that the sound comes from the subfloor-to-framing connection and that the planned fastener will not encounter plumbing, wiring, ducts, or radiant components.
Refastening cannot restore rotten wood, support a hanging seam, or correct moving framing. It should not be attempted through an unidentified finished floor using a blind, one-pattern-fits-all method.
3. Replace isolated damaged material
A localized patch may be appropriate when:
- The remaining subfloor is sound
- Nearby framing is sound
- The moisture source has been corrected
- Every required patch edge can terminate on framing or properly installed support
- The replacement can be made flush and structurally compatible
- The repaired surface can meet the finished floor’s requirements
The patch must extend beyond weak material, but there is no universal number of inches to remove beyond a stain. Probe, inspect, and lay out the opening so it reaches sound material and supportable boundaries.
4. Retain and selectively repair a sound plank subfloor
An old straight or diagonal plank subfloor does not require demolition merely because of age. If the boards are dry and sound, possible responses include refastening loose boards, replacing damaged sections, and supporting loose or hanging ends.
The deck still needs evaluation for movement, gaps, board direction, surface variation, and compatibility with the proposed floor covering. Informal old-house discussions often favor preserving sound planks, but their overlay thicknesses and attachment methods are opinions about a particular house, not general specifications. One forum discussion illustrates both the desire to retain an old plank deck and the height, stair, support, and structural complications that make overlay advice project-specific.
5. Consider a compatible overlay
An overlay can provide a more continuous surface over a sound existing deck when the assembly and intended finish permit it. It may be useful over some plank floors or where the retained surface needs further preparation.
An overlay is not a substitute for removing rot or repairing damaged framing. It may hide movement without correcting it.
Added thickness can affect:
- Stair-riser consistency
- Door clearance
- Thresholds and transitions
- Toilet-flange relationships
- Appliance clearances
- Cabinets and countertops
- Adjoining floor heights
- Baseboards, trim, and exterior doors
Choose an overlay only after checking these consequences and the requirements of the new floor covering. Do not adopt an overlay thickness, adhesive practice, or fastening pattern simply because it worked in an online example.
6. Replace broadly or escalate
Broader replacement becomes reasonable when weakness, rot, swelling, or delamination is widespread; damage appears in dispersed areas; repeated wetting has affected much of the deck; or numerous small patches would leave an unreliable assembly.
There is no universal percentage of a room that triggers full replacement. Scope depends on retained strength, continuity, framing condition, access, seam support, moisture history, and the intended finish-floor system. One squeak or stain is not enough.
Escalate before prescribing a framing repair when movement may involve joists, beams, foundations, bearing walls, or several parts of the building. Do not assume a joist should be shaved, jacked, sistered, or replaced without understanding its loads, supports, damage, utilities, and connections.
A floor may be flat but sloped, or nominally level but wavy. The selected flooring system’s flatness requirement governs installation readiness; a noticeable slope, hump, or active movement may require a separate structural diagnosis.
Plan the replacement panel and patch layout before cutting
Before buying panels or making cuts, prepare a project worksheet. Record:
- Existing subfloor material
- Actual panel or plank thickness
- Visible grade or span-rating marks
- Tongue-and-groove or square-edge profile
- Joist type, direction, and spacing
- Rim framing and existing blocking
- Unsupported seams or board ends
- Finished-floor type and installation method
- Underlayment, membrane, or waterproofing requirements
- Doorways and adjoining-floor transitions
- Stairs and riser relationships
- Toilet, tub, shower, cabinet, and appliance locations
- Plumbing and electrical penetrations
- Access from below
- Suspected damage boundary
- Questions for the local permit or inspection authority
Plywood and OSB are both common options, but the material name is not a complete specification. Selection also depends on panel grade, actual thickness, span rating, edge profile, framing spacing, edge support, exposure conditions, applicable code, and the intended floor covering.
Measure the existing material instead of relying only on its nominal label. The replacement must create a structurally compatible, flush surface. Products with similar nominal descriptions may not precisely match an older panel, plank deck, previous repair, or accumulated finish buildup.
Plan the cutout on paper and on the floor. Every replacement edge requiring support must land on a joist, rim member, or properly installed blocking. Never leave a patch seam hanging between framing members. An unsupported or damaged existing edge may require a larger opening or additional framing support.
Damage near a wall, tub, shower, stair, cabinet, or fixed appliance requires extra planning. The subfloor may continue beneath the obstruction, which may conceal plumbing, waterproofing, framing connections, or bearing conditions. Decide how the area can be exposed and supported before cutting away the accessible section.
Locate joists from above and below when possible. Investigate possible plumbing, wiring, ducts, data lines, and radiant systems, then control cutting depth to limit exposure to concealed components. A documented bathroom repair demonstrates why identifying subfloor thickness and limiting saw depth matter when water or electrical lines may be beneath the panel.
Separate universal principles from project specifications.
Universal principles
- Remove structurally compromised material.
- Reach sound boundaries.
- Support required seams.
- Avoid damaging framing and concealed services.
- Produce a dry, stiff, flush repair.
- Meet the finished floor’s preparation requirements.
Project-specific specifications
- Panel material, grade, thickness, and span rating
- Panel orientation
- Required gaps
- Adhesive selection and placement
- Fastener type and corrosion resistance
- Fastener length and spacing
- Edge treatment
- Underlayment or membrane
- Surface-flatness tolerance
Obtain those details from the selected panel manufacturer, finished-floor manufacturer, applicable code or approved project documents, and the existing assembly. Dimensions from a branded product article or single bathroom demonstration are not universal instructions.
The general subfloor replacement sequence
The following sequence describes a planned localized replacement. It does not replace product instructions, code requirements, trade qualifications, or structural design.
1. Prepare the work area
Isolate the work area and plan for dust and debris. Use eye and hand protection appropriate to the tools and materials involved. Confirm that the moisture source has been controlled, then identify framing and possible utilities before using a saw, drill, nailer, or screw gun. General replacement guidance likewise includes safety goggles and gloves among the preparation items for panel removal (general replacement preparation).
Do not begin demolition with an uncontrolled leak or an unidentified energized service in the work area. If plumbing or electrical systems must be disconnected or altered, check the local authority’s permit, inspection, and qualification requirements before work begins.
2. Expose the full suspect area
Remove the finished flooring, underlayment, trim, fixture, or appliance necessary to inspect and complete the repair. Preserve reusable materials where practical, but do not let that goal force the patch to stop short of damage.
Label trim and reusable components. Photograph fixture and transition details before disassembly. If waterproofing is disturbed, identify the applicable system requirements before rebuilding the assembly.
3. Mark a regular, supportable cutout
Probe outward until the retained material is consistently sound. Mark a square or rectangular opening when practical, adjusting it so the replacement edges can be supported.
A tidy shape makes fabrication easier, but sound material and structural support matter more than geometric convenience. Do not leave a crescent of weak panel simply to keep the opening small.
4. Cut and remove the damaged section
Set the cutting tool to a controlled depth suited to the material being removed. Complete accessible cuts without entering joists or known services. Use an appropriate tool near corners and walls where a circular saw cannot safely complete the cut.
Remove the damaged material carefully. Existing panels may be glued or tightly fastened, and aggressive prying can damage framing or the edge that must remain.
5. Clean and inspect the opening
Remove debris, deteriorated fibers, and failed fasteners so the opening can be inspected clearly. Examine:
- Joist tops and accessible sides
- Rim or edge framing
- Remaining panel edges
- Plumbing penetrations
- Hidden dampness
- Pest damage
- Mold-like growth
- Previous holes, notches, or repairs
Stop and revise the plan if framing is soft, split, deformed, heavily altered, or otherwise questionable. A new panel should not conceal unresolved framing damage. Manufacturer guidance on water-damaged floors likewise states that damaged joists may require evaluation or repair before new subflooring is installed.
Its components and permitted alterations depend on its design and manufacturer documentation.
6. Install the required edge support
Where a seam does not land on suitable existing framing, provide properly planned blocking or another approved support. Its top must align with the surrounding framing so the replacement does not rock, dip, or sit proud.
Support must be securely connected and suitable for the assembly. A loose block wedged beneath a seam is not equivalent to installed framing. Fixture and service openings may also affect how the surrounding panel edges need to be supported.
7. Cut and dry-fit the replacement
Transfer the opening dimensions to compatible replacement material. Account for the required orientation, edge profile, and manufacturer-specified gap. Lay out penetrations from the actual pipes, registers, or fixtures rather than copying dimensions from another project.
Dry-fit the piece before applying any assembly-approved adhesive. Confirm that it can be inserted without damaging its edges, bears where intended, and aligns with the surrounding floor. Use a straightedge to identify a proud or low patch.
8. Install according to the applicable assembly requirements
If the selected assembly calls for adhesive, use a compatible product in the specified location and manner. If it does not, do not add adhesive solely from habit. Follow the applicable requirements for orientation, gaps, fastener type, fastener length, edge distance, and fastening schedule.
Tutorials disagree about screws versus nails, fastening intervals, and whether adhesive should always be used. That disagreement is a reason to follow one coherent panel and flooring system rather than blending details from unrelated examples.
Seat fasteners as required by the assembly. Do not use fastening force to compensate for poor support or a badly fitted patch.
9. Test the repair
Confirm that:
- Every required seam is supported
- The patch is firm under load
- The panel does not rock
- Fasteners are properly seated
- Edges are flush
- No new movement or squeak is apparent
- Fixture openings are correctly located
- The surrounding subfloor remains sound
Investigate unexpected movement instead of burying it beneath another layer.
10. Verify readiness for the finish floor
Before installing underlayment, waterproofing, tile components, resilient flooring, or wood flooring, verify that the assembly satisfies the selected system’s dryness and flatness requirements. Check transitions, final floor height, door clearance, and fixture relationships.
A structurally sound patch may still be unsuitable for the chosen flooring if it remains damp, uneven, contaminated, flexible, or incompatible with the required preparation layers. Finish-floor readiness is the final acceptance stage, not an assumption.
Bathrooms, toilets, and other high-risk repair locations
A toilet-area repair illustrates why subfloor replacement can cross several trades.
Stop using the fixture if leakage is suspected and correct the source. Remove the toilet as appropriate, expose the flange and nearby floor, and inspect both the plumbing and framing before defining the patch.
Once the area is exposed, check around the flange opening, supply connection, drain, nearby seams, and joists. Water may extend beyond the visible discoloration. Plan the replacement so its required edges and the fixture area have suitable support for the selected assembly.
Coordinate the flange with the final floor assembly, not merely the bare replacement panel. Underlayment, backer, membranes, tile, resilient flooring, and other components can change the finished relationship. A toilet-repair tutorial can illustrate locating framing, adding support, fitting a patch, and preparing an opening, but its dimensions apply only to that demonstrated project (toilet-area subfloor repair example).
Damage extending under a tub, shower, cabinet, wall plate, stair, or fixed appliance creates an access and planning problem. Ask:
- Can the damaged area be reached without removing the obstruction?
- Does the subfloor continue beneath a wall or bearing component?
- Is plumbing attached to or passing through the affected framing?
- Will removal disturb waterproofing?
- Can all new seams be supported?
- Will partial removal leave deterioration concealed?
- Who will safely disconnect and reinstall the fixture or appliance?
Do not assume that accessible rotten material can simply be cut flush with a tub or wall and covered. If damage continues beneath the obstruction, the project may require plumbing, carpentry, waterproofing, appliance, cabinet, or structural input.
Bathrooms combine structural support, plumbing, fixture stability, waterproofing, penetrations, and finished height. Replacing only the visible damaged panel may leave the original leak, loose flange, failed waterproofing, or unsupported opening unresolved.
Kitchens and laundry rooms present similar scope risks. Dishwashers, refrigerators, washing machines, sinks, and cabinets can conceal slow leaks. Supply and drain lines may restrict demolition, while appliance or cabinet handling adds work beyond the panel repair. Establish responsibility for disconnection, moving, storage, and reinstallation before demolition.
Budget, DIY limits, contractor scope, and final acceptance checks
Online subfloor-replacement prices should not be treated as dependable quotes. Published estimates may conflict, mix material-only and installed costs, omit methodology, or apply to a different year and market. One commercial pricing guide, for example, presents inconsistent totals while still illustrating how demolition, disposal, permits, mold treatment, framing repairs, and room conditions can affect the budget (example of reported cost variables and estimate limitations).
Build the budget by scope:
- Initial investigation
- Leak detection and moisture-source correction
- Moisture assessment and drying
- Finish-floor and underlayment removal
- Trim removal and replacement
- Toilet, appliance, cabinet, or fixture handling
- Demolition and disposal
- Contamination or mold assessment
- Remediation when required
- Joist, blocking, rim, beam, or other framing work
- Replacement panels and installation materials
- Plumbing or electrical work
- Waterproofing restoration
- Permits and inspections
- New underlayment or preparation layers
- Finish-floor repair or replacement
- Threshold, door, and transition work
- Cleaning and temporary protection
Include a contingency for hidden conditions. A small visible stain may expose broader panel damage, and framing cannot always be fully evaluated until the floor is open. The contingency should reflect that uncertainty rather than assuming the first cutout will be the final scope.
Obtain multiple current local quotes based on the same written description. Ask each bidder to identify:
- Included demolition area
- Finish-floor removal and restoration
- Fixture and appliance handling
- Moisture-source work
- Drying or remediation
- Framing allowances
- Panel specification
- Blocking and seam support
- Plumbing and electrical responsibility
- Disposal
- Permits and inspections
- Exclusions
- Hidden-damage pricing or change-order procedures
- Transition and finished-height work
- Cleanup and protection
A reasonable experienced-DIY candidate is a localized, accessible area where the moisture source is known and corrected, contamination is not in question, framing is sound, utilities are identified, and a clear supported patch layout can be created. The worker must also be able to control cutting depth and restore the relevant finish-floor or waterproofing assembly.
Professional assessment is appropriate for an active leak, sewage or uncertain contamination, extensive mold-like growth, widespread damage, questionable engineered framing, major sagging, uncertain load paths, work beneath bearing components, or complicated plumbing and electrical conflicts. Contractor guidance similarly treats persistent softness, sagging, separating seams, and concentrated squeaking as reasons to inspect the floor and framing before selecting a repair (soft and squeaky floor assessment).
Before accepting the completed repair, verify:
- The moisture source has been corrected.
- Exposed framing is sound or has been properly addressed.
- Every required patch seam is supported.
- The replacement panel is compatible with the assembly.
- The patch is flush with the surrounding subfloor.
- Fastening is complete and follows the applicable instructions.
- The surface is dry, stiff, clean, and sufficiently flat.
- Fixture and service penetrations have been addressed.
- Applicable waterproofing requirements have been confirmed.
- Transitions and final floor height have been planned.
- Door, stair, cabinet, appliance, and toilet relationships work.
- The finish-floor manufacturer’s requirements have been confirmed.
- Responsibilities for restoration and cleanup are clear.
HFI Flooring is an informational publication covering hardwood repair, subfloor fixes, and material choices. It says its articles draw on hands-on remodeling experience and that manufacturers do not pay for placement (HFI Flooring’s editorial scope and sponsorship statement). Its published terms describe the articles as informational rather than a guarantee of fitness for a particular project (HFI Flooring’s terms of use). HFI Flooring does not present itself here as a contractor, inspector, engineer, plumber, or remediation provider.
Can you replace only one section of a subfloor?
Yes. Localized replacement is often possible when the remaining deck and framing are sound, the source of damage has been corrected, and every required edge of the replacement can be supported.
The repair should extend to firm material rather than stopping at the visible edge of a stain. Its seams should terminate on suitable joists, rim framing, or properly installed blocking. If that cannot be achieved without enlarging the opening, the patch must become larger.
Localized replacement is not appropriate when damage is widespread, moisture remains unresolved, framing is compromised, or multiple small patches would leave an unreliable floor.
Does wet subfloor always need to be replaced?
No. Wet but firm and structurally intact material may sometimes be dried after the water source has been stopped. Removal is generally appropriate when the panel is rotten, spongy, crumbling, delaminated, badly swollen, contaminated, or structurally weakened.
Do not rely on surface appearance alone. Use an assessment method suitable for the material and confirm the requirements of the adhesive, underlayment, waterproofing, and finish-floor systems before closing the assembly. Remember that a moisture reading does not establish structural strength by itself.
Do squeaks or a bouncy floor mean the subfloor is rotten?
Not necessarily. Squeaks may result from loose fasteners, gaps, seasonal movement, or rubbing between the subfloor and framing. Bounce can originate in a weakened panel, insufficient support, joist behavior, a beam, or another part of the structure.
Persistent localized noise or movement is a reason to inspect. Softness, sagging, moisture evidence, and damaged framing make the condition more concerning, but no single symptom proves that replacement is required.
Should replacement subfloor be plywood or OSB?
Either may be appropriate. The material name alone does not determine suitability. Panel grade, actual thickness, span rating, edge profile, framing spacing, support conditions, moisture exposure, applicable code, and the intended finished floor all matter.
Choose a product that is structurally compatible with the existing assembly and creates a flush transition. Then follow that panel manufacturer’s installation instructions and the requirements of the finished-floor system.
Is subfloor replacement a suitable DIY project?
A localized patch may be a reasonable experienced-DIY project when the moisture source is corrected, damage is accessible and clearly bounded, framing is sound, utilities are known, and every seam can be properly supported. The worker must also be able to control cutting depth, handle affected fixtures safely, and restore the finish-floor assembly correctly.
It is not a suitable trial project when the floor involves sewage, uncertain contamination, extensive mold-like growth, active leakage, damaged engineered framing, major sagging, bearing components, unknown utilities, or complex plumbing and electrical work.
The final decision sequence is simple: stop the moisture, expose and inspect the assembly, determine whether the panel and framing remain sound, and select the least extensive durable repair. Support every required seam, then verify dryness, stiffness, flatness, finished height, and floor-covering compatibility before closing the floor. A successful subfloor replacement is defined less by how much material was removed than by whether the cause, framing condition, product requirements, and hidden scope were properly addressed.