
From Soft Spot to Sound Floor: A Diagnosis-First Repair Guide
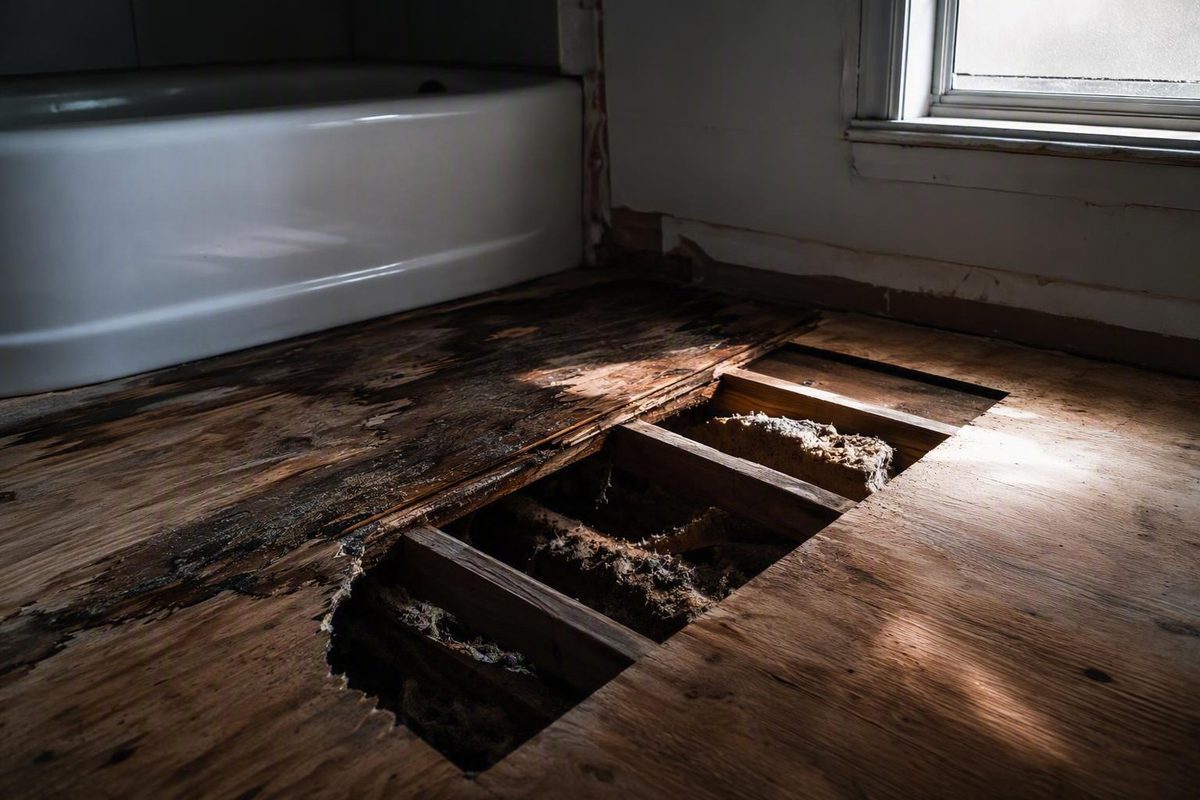
Repairing subfloor damage is not primarily a cutting-and-patching job. It is a diagnosis job first. A soft spot beside a tub may be deteriorated underlayment, a loose but otherwise sound structural panel, localized rot, or damage extending into the floor framing. Each condition calls for a different response.
The general sequence is simple:
- Identify the affected floor layer.
- Correct the moisture, pest, fastening, or support problem.
- Expose enough of the assembly to understand the damage.
- Decide whether to dry, refasten, patch, replace, or seek structural help.
- Verify that the repaired assembly is dry, rigid, supported, and ready for the intended finish floor.
A localized plywood or OSB patch can be a reasonable DIY project when the surrounding panel and conventional framing are sound, concealed hazards have been identified, and the patch can be installed according to the applicable panel and flooring instructions. Widespread movement, damaged framing, contamination, engineered joists, suspected asbestos, or decay beneath fixed features changes the scope considerably.
Start by identifying the damaged layer
A floor is an assembly, not a single sheet. From top to bottom, a typical wood-framed floor may include:
- Finished flooring: Tile, hardwood, resilient flooring, laminate, carpet, or another walking surface.
- Underlayment: An optional layer used for smoothing, uncoupling, sound control, cushioning, or compatibility with the finish.
- Structural subfloor: Panels or boards that span between supports and transfer loads to the framing.
- Supporting structure: Joists, beams, blocking, posts, or another framing system.
Plywood and oriented strand board, or OSB, are common wood structural panels. Older homes may have plank subfloors. In a different assembly, a concrete slab can serve as the permanent subfloor. Underlayment and subfloor are therefore not interchangeable: underlayment sits above the structural base and cannot substitute for it.
That distinction matters when a visible wooden layer has crumbled. A thin underlayment panel may have been installed over a sound structural subfloor. Replacing that upper layer is different from repairing the panel that spans the joists. Conversely, what looks like an extra layer may be the only structural wood beneath the finish.
Before deciding what to remove, inspect the floor stack where its edges are already visible:
- Lift a threshold or transition strip.
- Remove a floor register.
- Look through an existing plumbing penetration.
- Inspect from an unfinished basement or crawl space where access is safe.
- Examine an edge exposed during finish-floor removal.
- Compare layers at a doorway, cabinet cutout, or other opening.
Do not assume that the first wood layer you see is the structural subfloor. Trace the layers far enough to determine which one spans the joists, which stops at walls or cabinets, and which merely lies over another panel.
Also determine whether the apparent defect belongs to the subfloor at all. Loose tile, damaged grout, a separated resilient-floor seam, or a warped hardwood board may be limited to the finish. On the other hand, a surface defect can be the first visible sign of movement or moisture below.
The repair target is not simply “new wood.” It is a substrate that is:
- Structurally sound
- Adequately dry
- Properly supported
- Securely fastened
- Free of active deterioration
- Flat enough for the selected finish-floor system
The finish-floor manufacturer’s instructions should control applicable moisture limits, flatness tolerances, underlayment requirements, and approved preparation products. A repaired panel can feel solid underfoot yet remain unsuitable for tile, hardwood, laminate, or resilient flooring if the complete assembly does not meet those requirements.
Diagnose the symptom—and the cause behind it
Symptoms narrow the possibilities, but they rarely prove one diagnosis. A squeak can come from panel movement, a finish-floor fastener, a joist connection, or another rubbing surface. A stain may mark an old spill or an active concealed leak. A soft area may be degraded underlayment, damaged subfloor, inadequate edge support, or compromised framing.
Use the following table as an investigation guide rather than a diagnosis by appearance.
| Symptom | Possible causes | What to check next |
|---|---|---|
| Soft or spongy area | Wet or deteriorated wood, delamination, flaky OSB, damaged underlayment, unsupported edge | Expose the affected layer, inspect its physical condition, look from below where possible, and determine how far the weakness extends |
| Broad bounce | Loose panels, inadequate support, long framing span, damaged joists, unsuitable assembly | Determine whether movement is limited to one panel or extends across several framing bays |
| Sagging or dipping | Framing deflection, failed support, joist damage, rot, settlement, localized panel failure | Check whether the depression crosses joists or is confined between supports |
| Persistent squeak | Panel moving against a joist or fastener, loose finish flooring, gaps, poor fastening | Locate the sound and identify which components move relative to one another |
| Swollen seams | Moisture absorption, prolonged wetting, panel-spacing problem | Compare adjacent seams and inspect the panel for continuing swelling or loss of cohesion |
| Stains | Current or historical leak, condensation, flooding, pet contamination | Trace possible plumbing, appliance, exterior, or crawl-space moisture sources |
| Musty odor | Retained moisture, microbial growth, wet insulation, contaminated material | Inspect beyond the visible mark and avoid closing the assembly until the source is understood |
| Cracked grout or tile | Substrate movement, inadequate stiffness, installation problem, impact | Check seams, panel movement, framing behavior, and tile-system compatibility |
| Cupped, buckled, or warped flooring | Moisture imbalance, trapped water, finish-floor installation problem, movement below | Lift enough finish material to inspect the underlying layers and the moisture pattern |
Squeaks often occur when a loose subfloor moves against a joist or fastener, but noise alone does not prove decay. Broad sagging or movement is more concerning because it may involve joists, beams, posts, bearings, or other supports rather than one loose panel.
Common underlying causes include:
- Leaking toilets, tubs, showers, sinks, supply lines, or drains
- Dishwasher, refrigerator, washing-machine, or water-heater leaks
- Flooding or contaminated water
- Crawl-space or basement dampness
- High indoor humidity or condensation
- Poor ventilation
- Exterior drainage or water-entry problems
- Loose, missed, or deteriorated fasteners
- Unsupported panel edges
- Inadequate framing or an unsuitable panel span
- Wood decay
- Termite or other pest activity
Water can pass through flooring seams and spread beneath finish material that still appears intact. Consequently, the visible stain should not be treated as the automatic demolition boundary, especially around walls, tubs, cabinets, toilets, and appliances (SERVPRO’s commercial water-damage overview).
Inspect beyond the obvious mark. Damage may continue beneath a wall plate, tub apron, shower base, vanity, cabinet, toilet, or appliance.
For water-related damage, an informal moisture map can help organize observations:
- Mark visibly affected and apparently unaffected areas.
- Take readings according to the meter manufacturer’s instructions.
- Record the material, location, date, and reading.
- Repeat readings as drying progresses.
- Compare the readings with physical inspection and the requirements of the material that will cover the repair.
This is trend tracking, not a universal pass-or-fail test. Do not declare the floor ready merely because one reading is lower than before or the exposed face feels dry. Use the applicable meter and flooring instructions, and obtain qualified moisture assessment when the results are uncertain.
Choose the right repair: dry, refasten, patch, or replace
Once you know which layer is affected and what caused the problem, sort the condition into one of five practical categories.
1. Loose but structurally sound
Consider refastening when the panel is dry, firm, appropriate for the assembly, supported by sound framing, and moving at its connection to the joists.
First confirm that the movement actually occurs at that connection. Then follow the panel, framing, fastener, and finish-floor requirements that apply to the assembly. Adhesive may be used in some accessible connections, but it cannot repair decay, replace missing support, or restore a damaged joist.
Refastening may reduce a squeak; it cannot guarantee silence. If the noise remains, investigate finish-floor movement, gaps, ducts, bridging, joist connections, or other contact points rather than adding fasteners indiscriminately.
2. Briefly wetted but still sound
Drying may be reasonable when all of the following are true:
- The water source has been stopped.
- The exposure did not involve sewage or other contaminated water.
- The material remains firm and intact.
- Plywood veneers have not separated.
- OSB is not flaky, badly swollen, or losing cohesion.
- The panel has not sagged or become unstable.
- The assembly can be opened sufficiently for drying and inspection.
- Moisture conditions can be assessed under the applicable product requirements.
A panel manufacturer’s repair overview similarly distinguishes wet material that remains strong and solid from rotten or spongy material that requires removal (LP Building Solutions’ water-damaged subfloor guidance).
Do not judge drying by the surface alone. Panel edges, the underside, insulation, wall plates, joist pockets, and cavities beneath fixtures may retain moisture after the exposed face feels dry.
3. Localized panel failure
A patch may be appropriate when the failed material can be removed back to sound wood and the remaining panel and framing can accept a replacement installed under the applicable requirements.
Typical candidates include:
- A deteriorated area around an old toilet leak
- A damaged section beside a tub
- A small appliance-leak area
- A panel edge that has lost integrity
- An opening left after plumbing changes
The repair may grow as demolition exposes concealed deterioration. “Localized” describes the final verified scope, not the size of the original stain.
4. Widespread panel deterioration
Broader replacement is more appropriate when panels are extensively soft, crumbling, delaminated, flaky, persistently swollen, or unstable.
Cosmetic covering is not a structural repair. Floor patch, filler, overlay panels, or self-leveling products cannot restore rotten wood, reconnect delaminated veneers, support an edge hanging between joists, or correct framing-related sagging.
Community advice about filler over partially damaged wood is inconsistent. Even the more permissive approach depends on the remaining base being solid; thin or flexible veneers may not provide a reliable substrate. Treat such advice as an illustration of the issue, not as a substitute for the patch-product and flooring-manufacturer instructions (Home Improvement Stack Exchange discussion).
5. Framing or support failure
Stop treating the job as a simple panel patch when you find:
- Soft, split, cracked, heavily notched, or otherwise damaged joists
- Movement across several framing bays
- A failed beam, post, bearing point, or footing
- Engineered I-joists or floor trusses that may require repair or modification
- Damage extending into wall supports
- An uncertain load path
- Continuing movement after the panel is exposed
This general panel-repair guide does not provide a structural repair design for them. Obtain a repair detail from the engineered-member manufacturer or an assessment from a qualified contractor, design professional, or structural engineer.
If the symptoms involve a wider structural sag rather than localized panel deterioration, begin with guidance on diagnosing a sagging floor over a crawl space rather than assuming that a plywood patch will solve it.
Make the area safe before cutting
Correct the cause before installing new material. Repair the leak or appliance, address drainage or condensation, restore necessary ventilation, control crawl-space moisture, or obtain pest treatment as appropriate. A replacement panel installed over an unresolved problem can deteriorate like the original.
Use this scope-and-safety checklist before demolition:
- [ ] Stop and verify correction of the moisture, drainage, ventilation, or pest source.
- [ ] Keep people off soft or unstable areas.
- [ ] Remove enough finish flooring and underlayment to assess the assembly.
- [ ] Determine which visible layer is structural.
- [ ] Identify the approximate joist direction and locations.
- [ ] Inspect from below where access is safe.
- [ ] Determine whether plumbing, wiring, ducts, drains, gas piping, or other services may be present.
- [ ] Measure the existing structural-panel thickness.
- [ ] Plan the patch around sound material and available support.
- [ ] Establish stable footing and a controlled debris-removal route.
- [ ] Use protective equipment appropriate to the tools and identified materials.
- [ ] Stop if the material, utilities, contamination, or structure falls outside your competence.
Verify the layout from below, through an existing opening, or by another appropriate method before cutting. A documented DIY repair example likewise emphasizes locating the joists and measuring panel thickness before setting the saw (At Charlotte’s House subfloor-patching account).
Determine the actual thickness of the layer being removed. A circular saw used for this work is commonly set only slightly deeper than that layer to reduce—but not eliminate—the chance of cutting below it. This does not make an unknown cutting path safe. If concealed services cannot be located with reasonable confidence, stop and obtain qualified help.
A circular saw can make straight, accessible cuts. An oscillating tool may help finish corners or work near an obstruction after the main cuts, as demonstrated in a sponsored toilet-area repair tutorial (Home Repair Tutor’s subfloor repair example). Tool choice does not override the need to understand what lies beneath the cut.
Do not sand, grind, or aggressively disturb older sheet flooring, black adhesive, or unknown patching material until it has been identified. Some legacy materials may contain asbestos. A commercial flooring guide advises treating black adhesive as potentially asbestos-containing until it is tested and avoiding sanding or grinding it; suspected material should remain undisturbed pending appropriate testing and handling (America’s Floor Source guidance).
Stop before or during demolition if you encounter:
- A floor that cannot provide stable working access
- Visible mold or a persistent mold-like odor
- Sewage or other contaminated water
- Live termites or extensive pest damage
- Decay that cannot be accessed safely
- Damaged framing or movement across several bays
- Engineered joists or floor trusses that may require alteration
- Suspected asbestos-containing material
- Uncertainty about plumbing, electrical wiring, gas piping, or ducts
These conditions call for appropriate trade work, hazardous-material assessment, restoration services, pest treatment, or structural guidance rather than continued ordinary patching.
Remove damaged material and define a sound opening
The final opening is governed by two considerations: sound retained material and a support plan that complies with the applicable assembly requirements. Do not measure an arbitrary distance beyond a stain and assume that the cut is adequate.
A practical sequence is:
- Expose the area. Remove enough finish flooring and underlayment to see the suspected damage and nearby seams.
- Map framing and obstructions. Mark confirmed supports, fixtures, penetrations, and known services.
- Inspect the material. Look for softness, crumbling, veneer separation, flaking, swelling, and movement.
- Plan the replacement. Determine how the new panel will be supported and fastened before enlarging the opening.
- Mark manageable cut lines. A straight-sided opening is usually easier to fit than an irregular one, provided it removes all failed material.
- Control the cut. Use the measured layer thickness and stop short of uncertain areas or obstructions.
- Finish restricted areas cautiously. Use an appropriate tool only after considering what is beneath it.
- Lift the damaged section. Expect existing fasteners or adhesive to resist removal.
- Reassess the exposed assembly. Expand the investigation if deterioration continues.
Continue assessing the floor as it opens. The original soft spot may represent only the center of a wider moisture pattern. Pay particular attention to panel edges, plumbing penetrations, toilet flanges, wall plates, joist surfaces, insulation, and cavities where moisture could remain trapped.
Remove rotten, crumbling, delaminated, or structurally unreliable material within the intended repair. Do not retain a narrow strip of weak panel merely because removing it would enlarge the opening. Such a strip may provide a poor fastening base and allow movement to return.
After removal, inspect:
- Exposed joist tops and sides
- Existing blocking or other supports
- Remaining panel edges
- Fastener condition
- Plumbing and drain penetrations
- Adjacent underlayment and finish flooring
- Insulation and cavities below
- Wall plates and nearby fixed features
- The dryness and rigidity of material that will remain
Do not keep cutting beneath it without understanding the assembly.
Joist damage or an uncertain load path is not an invitation to invent a sistering or blocking detail. Framing repairs depend on member type, span, bearing, connections, damage location, and loads. Escalate that portion of the work to someone qualified to assess and specify it.
Build a fully supported replacement patch
A durable patch must be integrated into the floor assembly, not placed over the opening like a loose lid. The following principles are general; the panel manufacturer, framing system, finish-floor instructions, and applicable local requirements must supply the project-specific detail.
Match the structural panel
Measure the removed structural panel and select replacement material of matching thickness so the patch does not create an abrupt height change.
Thickness alone is not enough. Confirm the appropriate:
- Panel type and grade
- Span suitability
- Face orientation
- Edge profile
- Exposure classification
- Compatibility with the existing assembly
- Compatibility with the intended finish floor
If the existing floor uses planks or an unusual multilayer arrangement, determine whether you are replacing the structural layer, an underlayment layer, or both.
Support the patch under the applicable detail
Localized repair guidance consistently treats support beneath patch edges as fundamental to limiting flex. Where an opening does not terminate over existing framing, an approved support detail may require blocking or another framing component beneath the seam. The exact member, connection, bearing, and fastening arrangement must suit the actual framing rather than being copied from a tutorial.
SUPPORTED SEAM CONCEPT

 Existing panel       New patch        Existing panel
───────────────┬──────────────────┬────────────────
               │                  │
         framing/support     framing/support
               ▲                  ▲
        seams bear on the specified support


UNSUPPORTED EDGE

 Existing panel       New patch
───────────────┬──────────────────
               │
               └── edge hangs between supports
Pause and obtain the manufacturer’s repair or connection requirements.
Dry-fit before fastening
Before applying adhesive or installing final fasteners, place the patch in the opening and confirm:
- The planned support is present where required.
- The patch fits without being forced.
- Plumbing and drain openings align.
- The face is flush with adjacent panels.
- No obstruction prevents full seating.
- The intended face and orientation are correct.
- Required panel spacing is present.
- The fastening paths avoid known services.
Some panel instructions and repair examples specify an edge gap of approximately 1/8 inch, but that is not a universal rule. Follow the instructions for the actual panel and assembly; product-specific spacing can differ (LP Building Solutions’ panel-repair example).
Adhesive and fasteners
Construction adhesive is commonly used with mechanical fasteners in some wood-panel assemblies to reduce movement at supported connections.
Adhesive does not:
- Restore rotten wood
- Replace required support
- Repair damaged framing by itself
- Make an unsupported seam acceptable
- Guarantee a squeak-free floor
Do not copy one project’s schedule. The same caution applies to blocking dimensions, adhesive beads, and support connections.
Before covering the repair, verify:
- The patch is flush with adjacent structural material.
- The seams follow the specified support detail.
- The edges remain rigid under ordinary inspection pressure.
- Fasteners are properly seated without damaging the panel face.
- The patch does not rock or visibly move.
- The original cause has been corrected.
- The assembly is adequately dry under the applicable requirements.
Adapt the repair around toilets, tubs, and other fixed features
Bathroom repairs combine structural work with plumbing clearances, fixture supports, and wet-area risks. Before laying out a patch, identify:
- Hot and cold supply lines
- Drain and vent locations
- Toilet rough-in position
- Closet-flange location and required elevation
- Tub or shower supports
- Cabinet and vanity footprints
- Wall locations
- Nearby joists and other supports
- Electrical cables serving receptacles, lighting, or heated-floor systems
For a toilet-area patch, lay out the opening from the actual framing and plumbing dimensions. Do not copy a flange-hole diameter, joist spacing, screw length, or blocking arrangement from a tutorial. Those details may not match your flange, drain, panel, finish-floor thickness, or framing system.
One toilet-area repair tutorial recommends placing the closet flange on top of the completed bathroom finish floor. Treat that as a project example, not a universal plumbing rule: verify the required flange position against the actual flange design, flooring assembly, and applicable plumbing requirements before finalizing the patch.
Dry-fit the panel around plumbing before adhesive or final fastening. Confirm that the panel can be placed without forcing the drain sideways and that fastening locations will remain clear of pipes and other services.
Tubs and showers require particular caution. A damaged panel disappearing beneath a fixture does not establish that it is safe to cut farther. Determine how the fixture is supported and whether qualified removal or temporary support is required.
The same principle applies to walls and cabinets. Rot continuing beneath these features is a pause-and-assess condition.
Do not close a bathroom floor merely because the leak has stopped. Confirm that retained panels, framing, and accessible cavities are adequately dry and that no active deterioration remains.
Verify the repair before reinstalling the finish floor
Panel installation is not the final acceptance test. Before reinstalling tile, hardwood, luxury vinyl tile, laminate, carpet, or another finish, work through this checklist:
- [ ] The leak, drainage, humidity, ventilation, or pest source has been corrected.
- [ ] Retained material and framing are adequately dry.
- [ ] No panel is soft, flaky, crumbling, delaminated, or actively swelling.
- [ ] Exposed framing and supports are sound.
- [ ] Patch seams comply with the applicable support detail.
- [ ] The patch is rigid and does not rock or visibly flex.
- [ ] Fasteners are secure and properly seated.
- [ ] The patch is flush with adjacent structural panels.
- [ ] The surface is sufficiently flat for the selected finish.
- [ ] Plumbing openings and fixture elevations are correct.
- [ ] Required underlayment and moisture-control components have been identified.
- [ ] The complete assembly meets the finish-floor manufacturer’s instructions.
Different flooring products impose different requirements. Use the selected manufacturer’s instructions for:
- Moisture test methods and acceptance limits
- Flatness tolerances
- Approved patching or leveling products
- Required underlayment
- Moisture barriers or vapor-control layers
- Structural-panel and substrate requirements
- Fastener or adhesive compatibility
- Installation over plywood, OSB, planks, or concrete
Tile deserves extra scrutiny. Replacing a damaged panel does not, by itself, prove that the floor is suitable for tile. Framing behavior, panel layers, fastening, span, and compatible tile underlayment all matter. Cracked grout or tile may indicate movement, so replacing only the visibly damaged wood can leave the original stiffness problem unresolved.
Minor high or low areas may be corrected only after the substrate is shown to be sound and stable. Use a preparation method approved for both the substrate and finish flooring. Sanding, overlays, patching compounds, and self-leveling materials must not be used to conceal active sagging, flexible seams, rot, or framing movement.
For a water-loss project, retain practical records:
- Photographs before, during, and after removal
- The identified water source and its repair
- A sketch of the affected area
- Dated moisture readings with material and location
- Drying records
- Notes about removed layers
- Photographs of exposed framing and supports
- Product labels and installation instructions
- Final checks before the repair is covered
These records can document what was found and how the work proceeded. They do not guarantee acceptance or coverage by an insurer, buyer, inspector, or flooring manufacturer.
Frequently asked questions
Can a wet subfloor be dried instead of replaced?
Sometimes. Drying may be appropriate after brief exposure to uncontaminated water when the source has been corrected, the assembly can be opened for effective drying, and the panel remains firm, bonded, stable, and free of significant swelling or sagging.
Replacement is generally more appropriate when plywood is delaminated, OSB is flaky or persistently swollen, the panel is soft or crumbling, sagging remains, contamination is present, or acceptable moisture conditions cannot be verified. The decision should consider physical condition, exposure, contamination, and measurements—not merely whether the exposed surface feels dry (BioSweep’s commercial drying-versus-replacement overview).
Can I use floor patch or self-leveler over a small damaged area?
Only after confirming that the underlying material is sound, dry, rigid, supported, and compatible with the preparation product.
An approved patching or leveling product may correct a minor surface depression or transition. It cannot restore rotten wood, rebond delaminated veneers, stabilize flaky OSB, support a hanging seam, or correct framing-related sagging.
If only an underlayment layer is damaged and the structural subfloor remains sound, replace or prepare that upper layer according to the finish-floor system. Check both the preparation-product and flooring-manufacturer instructions before application.
Does every edge of a subfloor patch need support?
A patch must follow a support detail that prevents its seams and edges from moving independently under load. In typical localized wood-panel repairs, that means terminating seams over existing framing or installing approved support beneath edges that would otherwise hang between joists.
Do not assume that fastening the patch only to the adjacent sheet supplies an equivalent structural connection. Select the support and fastening method from the applicable panel and framing instructions, especially when the floor uses engineered members.
What thickness of plywood or OSB should I use for a subfloor patch?
Generally, match the measured thickness of the existing structural panel so the repaired area remains flush. Do not assume a nominal thickness based on another house or tutorial.
Then verify that the replacement panel’s type, grade, span suitability, orientation, and edge configuration are appropriate for the actual joist spacing, existing assembly, planned finish flooring, and local requirements. No single plywood or OSB thickness is correct for every repair.
When should I stop DIY subfloor repair and call a professional?
Stop when the work extends beyond a localized conventional wood-panel repair or introduces hazards you cannot reliably assess or control. Important triggers include:
- Damaged, soft, split, or significantly altered joists
- Engineered I-joists or floor trusses requiring repair or modification
- Widespread sagging or movement across several framing bays
- Failed beams, posts, bearings, or foundations
- Rot extending under walls, tubs, showers, or cabinets
- An uncertain load path
- Mold or persistent mold-like odors
- Sewage or other contaminated-water exposure
- Live termites or extensive pest damage
- Suspected asbestos-containing flooring or adhesive
- Unknown plumbing, electrical, gas, or duct locations
- A floor too unstable to provide safe working access
- Persistent movement after the damaged panel is exposed
Depending on the condition, appropriate help may include a plumber, electrician, pest professional, hazardous-material specialist, restoration contractor, experienced remodeling contractor, structural engineer, or engineered-framing manufacturer.
Follow the diagnosis-first sequence
For a localized wood-panel repair, use a diagnosis-first framework: identify the affected layer, correct the underlying cause, expose and assess the full area, remove failed material back to sound wood, provide the support required by the assembly, install a compatible matching-thickness panel, and verify dryness, rigidity, flatness, and finish-floor readiness.
A localized patch can be a manageable DIY repair when conventional framing is sound, the work area is stable, hazards are controlled, and the applicable product instructions can be followed. Structural movement, contamination, engineered framing, suspected asbestos, unknown utilities, or deterioration beneath inaccessible features calls for qualified help rather than a larger improvised patch.